Homemade Moulding Tips
- Tutorial Type Techniques
Hi everyone!
Ioday I want to share with you the technique I use to prepare my molds. The article is a few years old, but even now my technique hasn’t changed much. What i’m telling you here is nothing revolutionary. I started my first experiments reading from the Hirst Arts tutorials page, as many others did, and i just made my own experience.
About the silicon:
I use several silicons produced in Italy. Due to the weight i cannot afford to order foreign products, but they should be as good as ours. I mostly used GLS50 from Prochima and BL30 and AL30 from Anichità Belsito. While the first one has an amazing level of detail (all the matt surfaces will remain so, and any texture will be transposed) the other is much cheaper, and faster to vulcanize (3-5 hours versus a day). I usually like to keep a low “shore” value, which indicates the sturdiness and the rigidity of the cured rubber. Soft silicons tend to better keep details, and with the appropriate care tend to have less bubbles. On the other side, they tend to be worn of sooner, which is not advisable if you are selling several casts of your pieces. Personally I rarely sell my resin, and i much prefer details over durability.
Anyways, working with silicon is annoying, the liquid is dense and sticky, and if you touch it you have to spend some time cleaning. And it happens every time. The good thing (expecially for GLS50 and any other slow vulcanizing silicon) is that it is a real fluid: you can pour it, and it will infiltrate everywhere until all the spots will be covered. So the main deal is to mix it properly.
Materials:
Every material is acceptable for a mold master. I read several people discouraging the use of “weak” materials for masters, but I never had issues with them. As for the details, especially if you use the “slow” silicon rubbers, every kind of material will work properly. All the rough or porous surfaces will be filled with silicon, and when removing the master everything will be transposed.
Well, maybe some problems can arise: all the fragile materials will most likely break when detached from the silicon rubber. But don’t worry: the first cast you’ll make will be your new master. It happened to me several times: I had to make a new master, after a long use of the previous one, and I simply used a first cast for it. Of course, the more you will wait before selecting one cast as the new master, more defect you will find on the new mold!
Shapes:
Not all the masters are easy to mold nor cast. Some geometries can be challenging, both for undercuts or narrow holes.
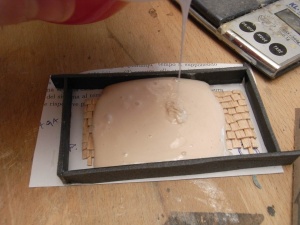
Undercuts can be a problem while pouring the silicon due to the formation of bubbles. A good solution shaking the mold box and moving the rubber with a stick to pull any bubble out. As for the casting, depending on your casting facilities undercuts can be a pain or not. Assuming that you don’t have any fancy tool, the best solution is to poke, once poured the liquid resin, pressing the rubber to squeeze out the air, and scraping all the surface to detach all the air bubbles that were anchored on it.
Narrow holes in the master result in thin and long protrusion in the rubber. The first issue is actually removing them from the master without breaking them. An uncontrolled tear is always a bad thing, but in most of the cases the final cast doesn’t need to have such deep holes, so the typical solution is to cut the silicon with a scissor rather than tearing it apart when pulling out. In some cases, however, the hole is needed in the final piece as well: if this is the case, it’s advisable to have a conic hole, so that geometrically the silicon won’t have impediments to the removal.
Preparing the mold:
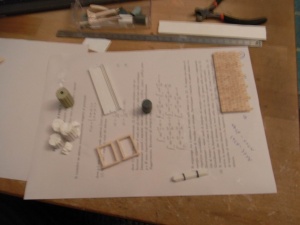
First of all, you need the masters. Here I took some columns, a roof piece, a barrel, some metal rods, and two window frames.
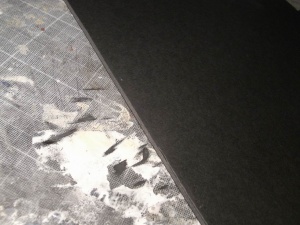
For the mold box where to pour the silicon I used some foamcore. It is quite an interesting and expensive material, and maybe it is a waste using it for that purpose. But i have it, and i like to work with PVA glue, so I prefer to use it rather than cardboard or other bendy materials.
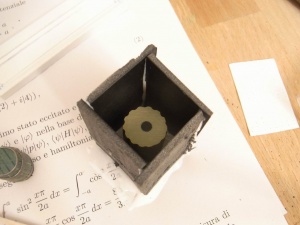
Here am preparing the structure for a column. I generally use this helix pattern for the box, it is quick to assemble and allows last-minute size changes in the volume.
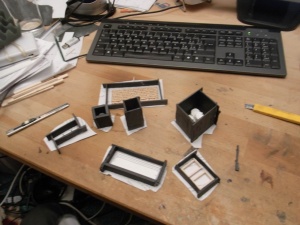
And that’s a group view. Same pattern for all the boxes.
Now: pouring the silicon! It is approx 150 g of GLS50 (it costs around 45 euros per Kg), with a 5% of T30 catalist, as per instructions. The mixture must be stirred for some time until the two media form a smooth blob. It is vital that all the areas are mixed evenly, to prevent an area without catalyst. It happens, and it means an additional 1-2 weeks for the curing. It sucks.
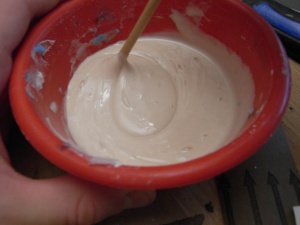
Once mixed, I just have to pour it. It is quite heavy, but it will fit in every crevice and hole!
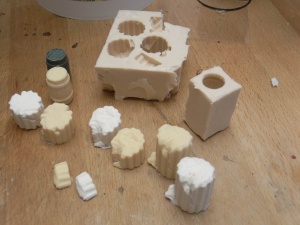
Here is a final Shot: After waiting 24 hours for the complete vulcanization (On the lid they say 18 hours, but it usually remains quite brittle until a day has passed) the pieces are finally ready! Then I cast some plaster and resin pieces… near each one you can see the copy.
Conclusions:
Using molds totally changed my – modelling – life. The time you invest sculpting one piece can be quadruplicated, since once completed it will be reproduced with a minimum effort. On the other hand, I’ve been captured by the temptation, and now I just sculpt for the sculpting’s sake. Whenever I sculpt something new I immediately mold it, although i usually don’t need it for any current project.
The perspective when you are capable of using molds will change A LOT. And the quality of the outcome as well.
Cheers,
The Lazy One
