Experiments on Poured Plaster
- Tutorial Type Techniques
Hi everyone!
After the successful tutorial about bunkers and poured plaster, my scientific spirit moved me to do some more thorough experiments. In fact, the most annoying effect was the premature drying of the plaster. That caused some reduction in the volume, therefore a deformation. Clearly, the wood was draining the water, absorbing it from the plaster, but I wanted to understand how relevant the effect was, and how I could prevent it.
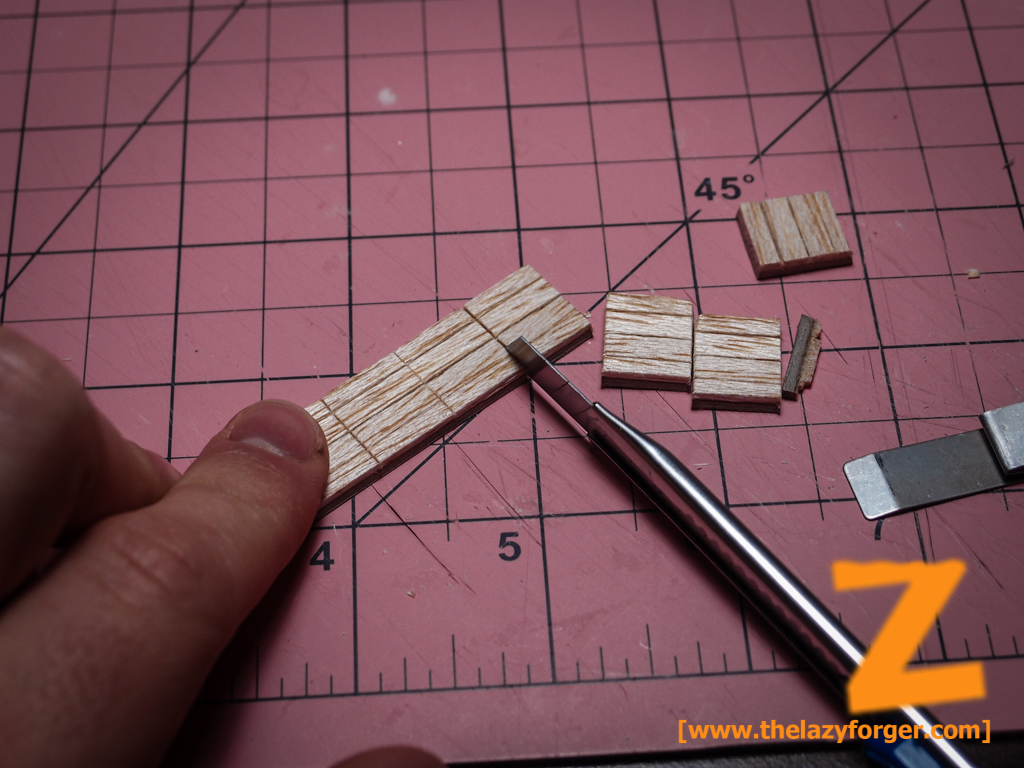
I cut three identical boxes in balsa wood and cardboard, inscribing some lines to see the effects on the cast.
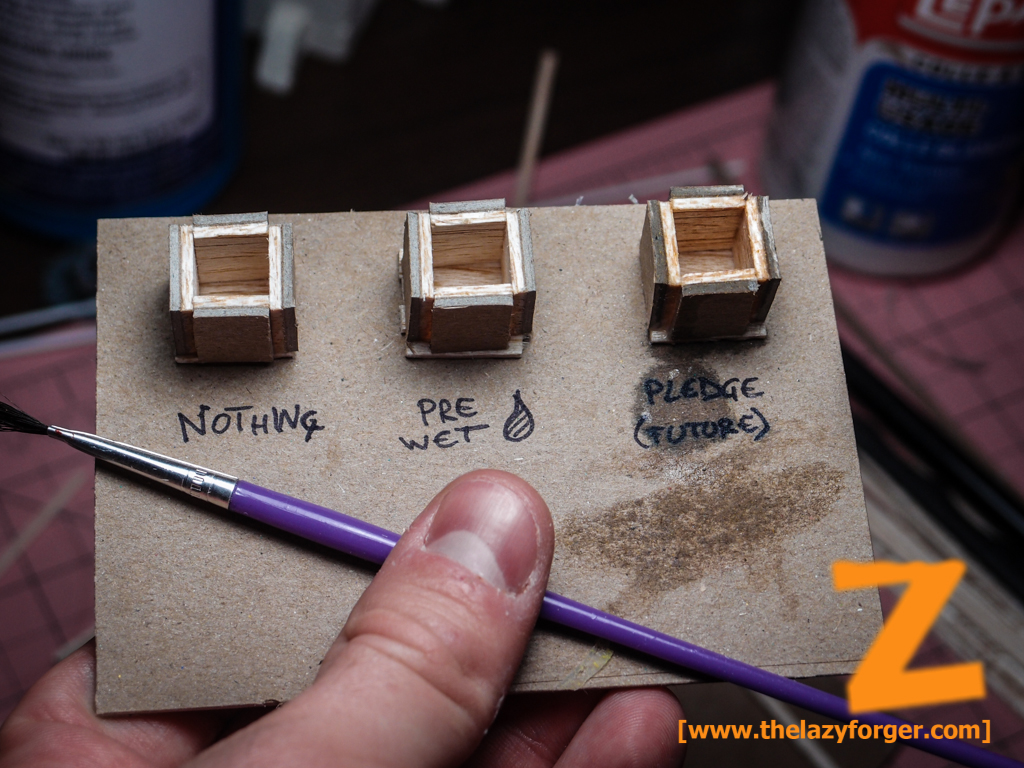
I assembled the three boxes, then i coated one with Future (or Pledge), a floor polish widely used in the modelling. Another one was soaked in water, while the last one was left dry.
Using the same plaster (an average quality one) with a slightly abundant water ratio (which is good for masters, and not for gaming pieces) i poured the right quantity in the three boxes, removing promptly the excess, in order to see the final hollowness.
even after a few seconds it was possible to see the first deformation.

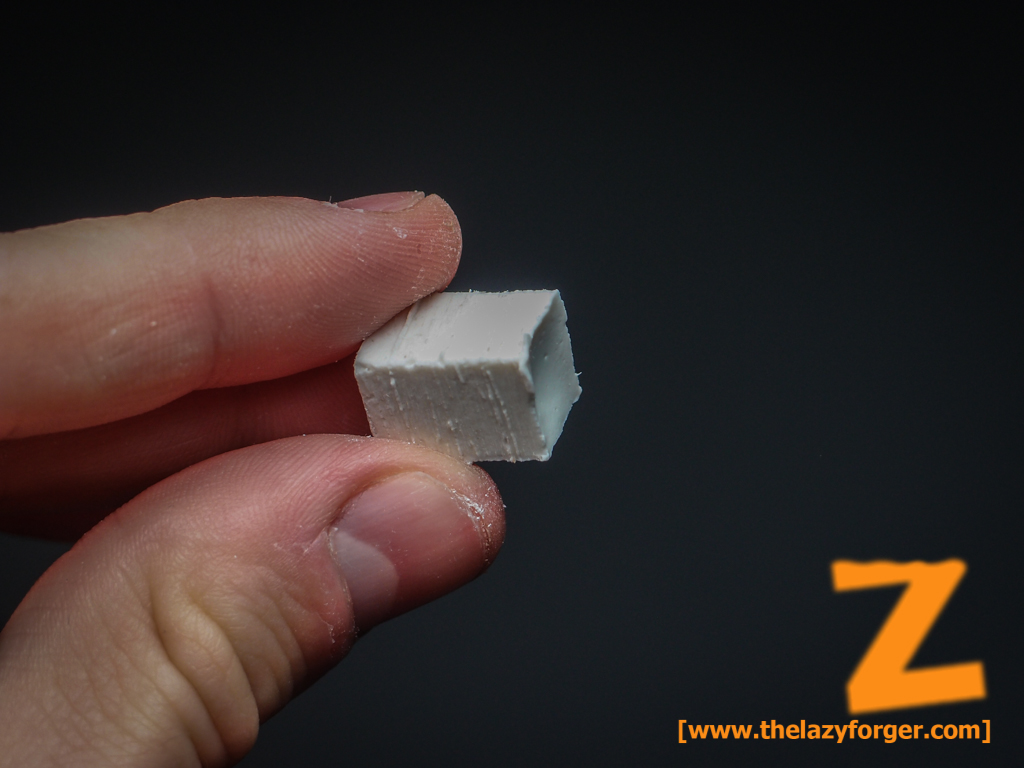
Once dry, the hole was quite visible.

Removing the boxes (and destroying them, as in the previous case) the details were finally exposed, but let’s take a closer look.
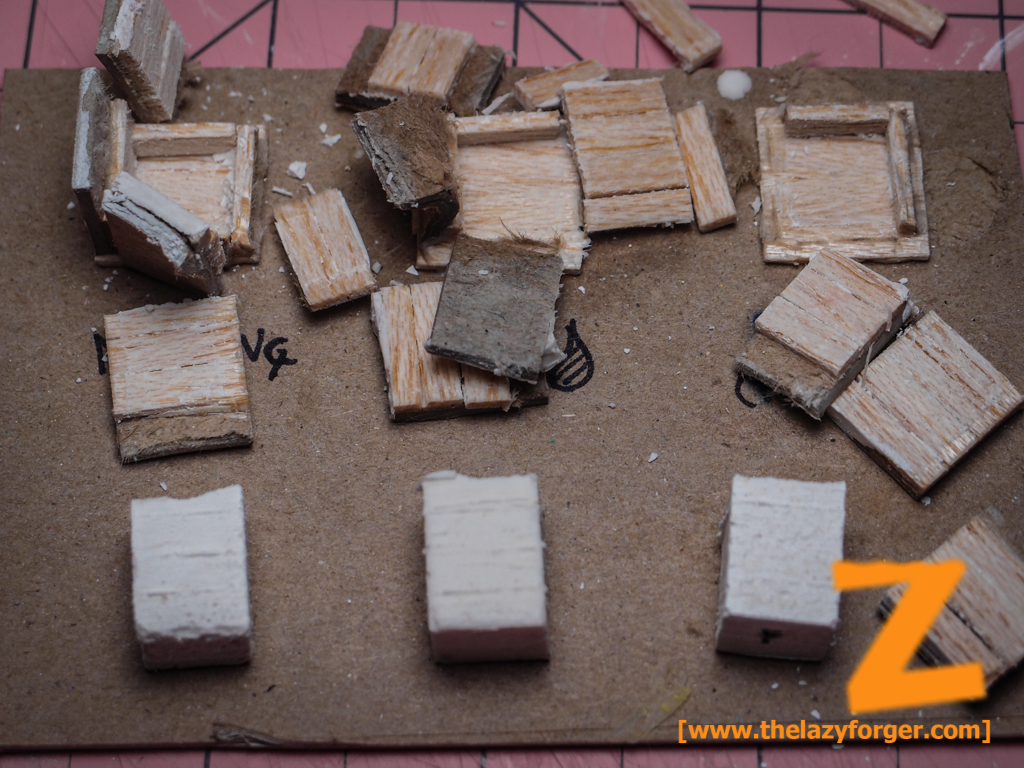
First of all, the dry box. The details on the surface are quite ok, with a few minor bubbles. However, the hollow deformation is enormous. If you really need to use a dry mold, consider to add constantly plaster to fill the holes.

Then, the wet mould. The deformation is less evident, and the details are extremely well preserved. That works pretty well, i’d say.
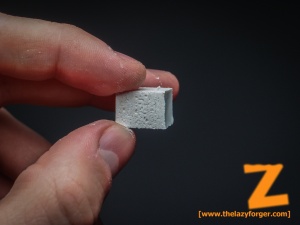
And now, the Future/Pledge coated mold. That had to remain dry, and the mold was the less damaged of the three. The deformation is minimal, but the bubbles on the surface are large and clearly visible. That might be a good thing, if your are looking for that effect. Otherwise, that’s a problem that doesn’t have a simple solution.
Conclusions:
The various approaches have either good and bad aspects. The dry mold, however, is clearly less proficient rather than the Future/Pledge or the soaked mold solutions. Both of them are better for specific usages, and all depends on the final look you want to achieve.
Cheers
The Lazy One