Painting the Paved Road
- Tutorial Type Gaming Scenery, Techniques
Hi everyone!

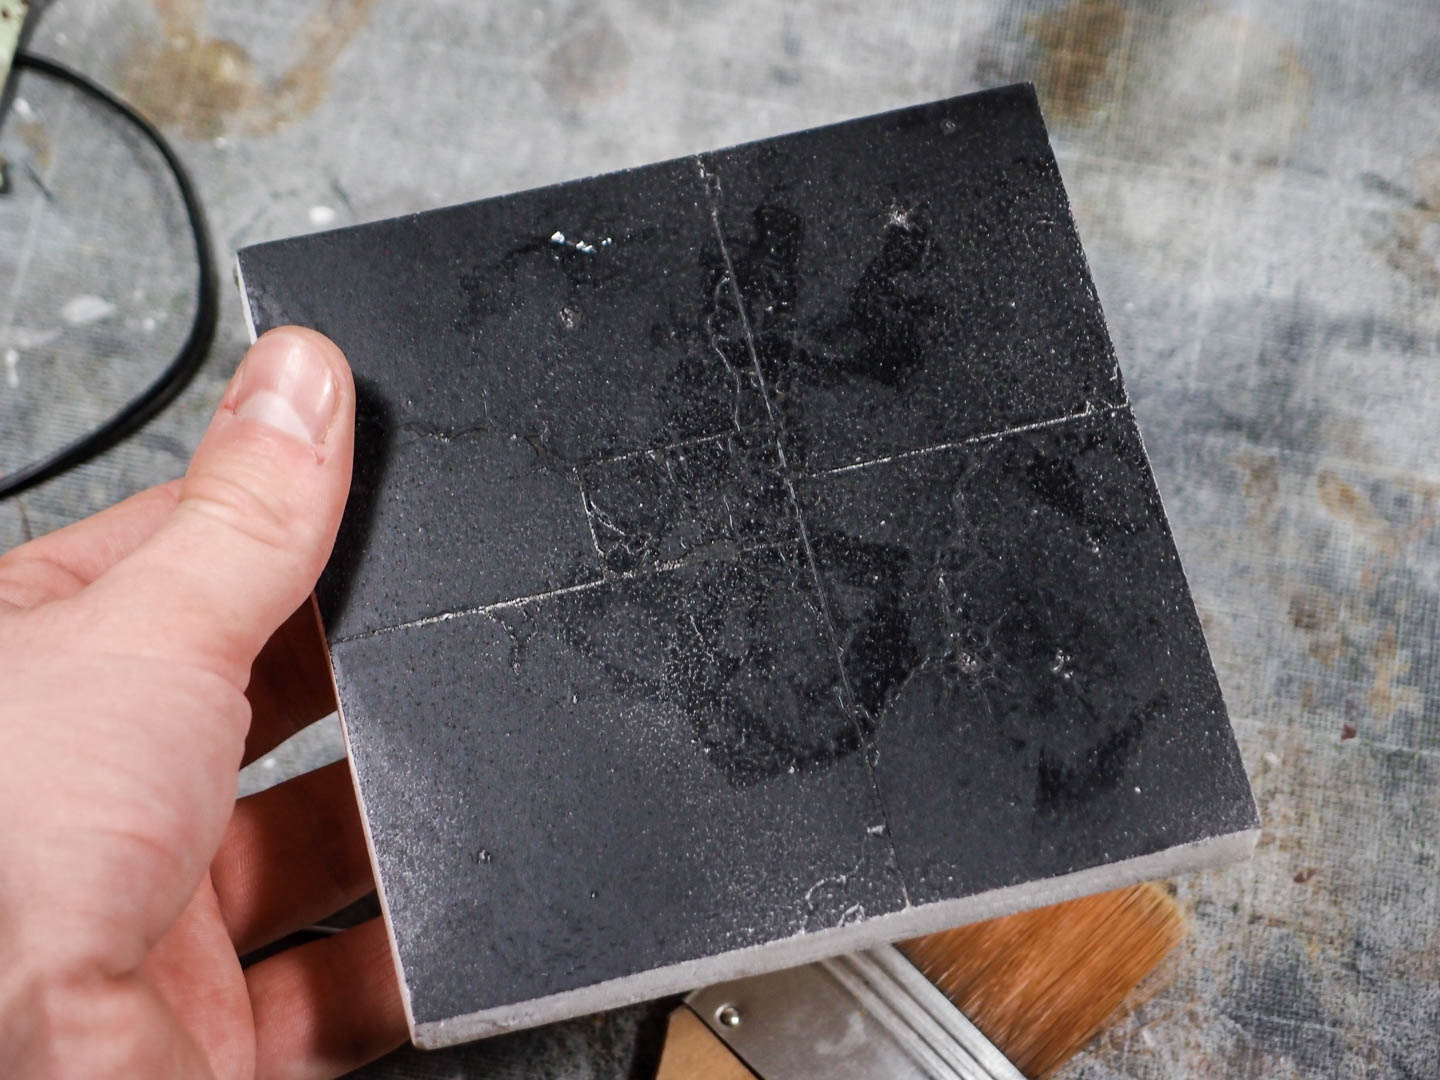
We closed last tutorial (https://thelazyforger.com/tutorials/lightweight-paved-road) with a 12 centimeter square slab of concrete, texturized and left to dry. As in the previous passes, drying is a critical aspect when working with stucco (or wall-filler call it however you like). Considering the chalky material will end up between a styrene sheet and several layers of paint, it’s a now-or-never kind of thing: all the residual water will remain trapped in the material, making it brittle and probably ruining your day at the first convention.
After a proper drying step, it is vital to seal all the powder on the surface with a spray primer. Let me stress that: do NOT use a brush in this step, the fine dust will fill all the details and you’ll end up with a smooth and dull surface.
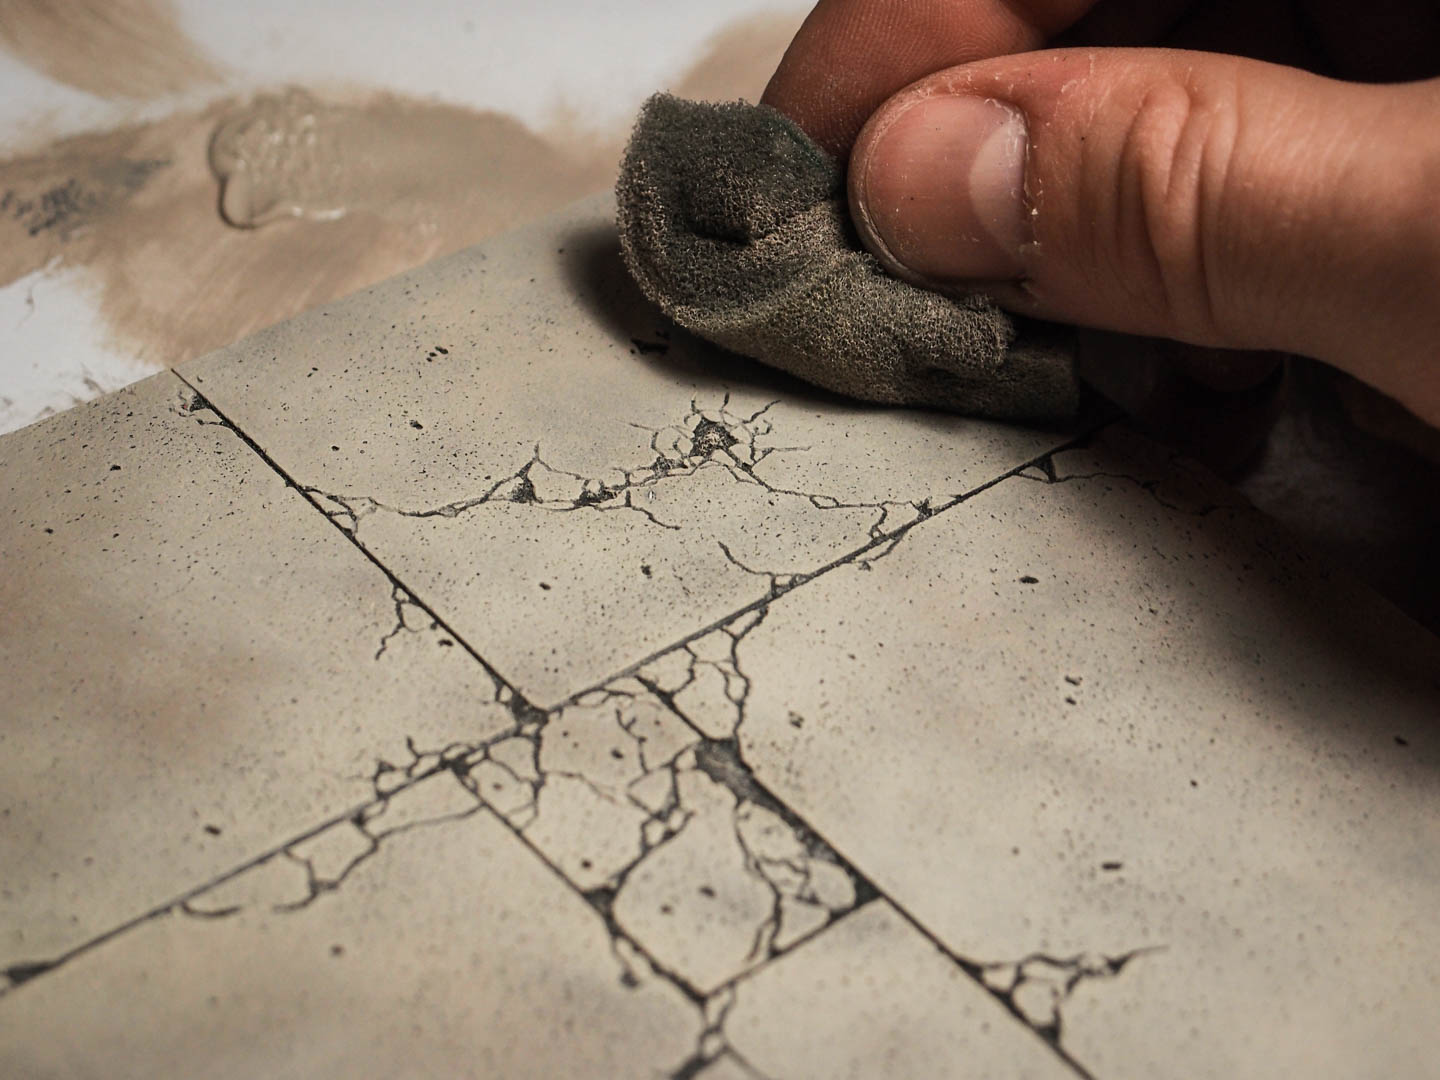
After letting it dry completely (I’m becoming tedious, but you know I’m right) start the painting. There is no particular indication for that, but I personally like to work with sponges (foam rubber will do the trick) and add layers of kaki and grey until i get a tone that seems believable.
It’s not the fastest of methods, but it will enhance any crack and dent and will end up with an airbrushy feel too.
For more info about this technique, take a look at this older tutorial.
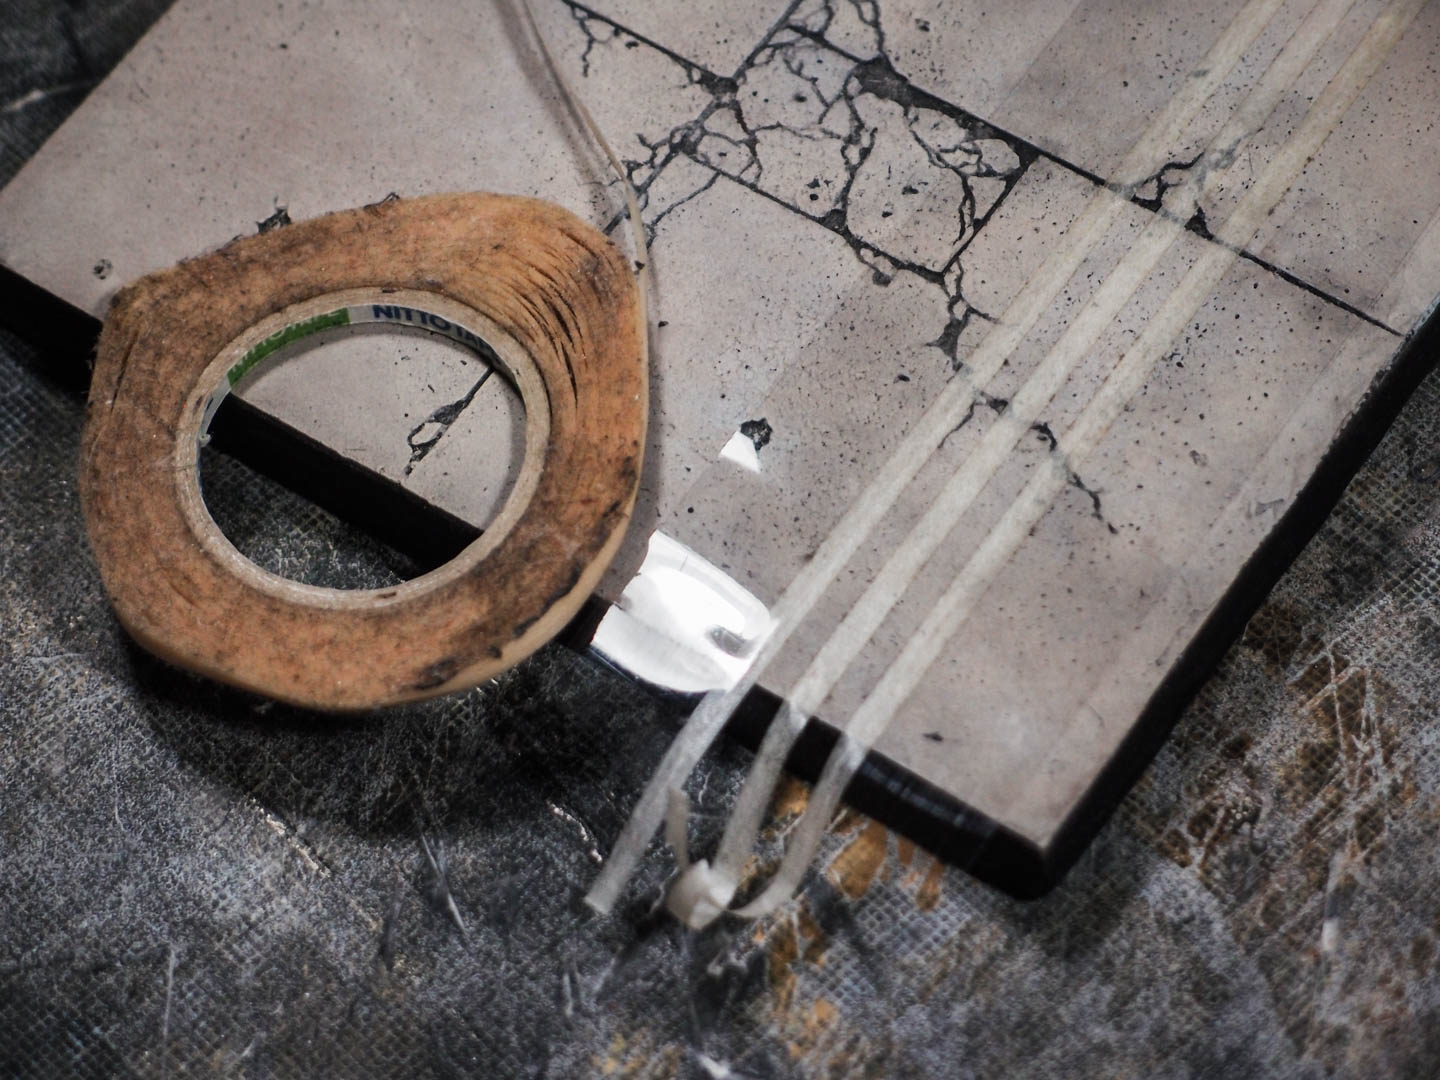
Once you have put the base colours in place (with a touch of drybrush on top, if you like) seal it all with a protective spray. Then I applied a few subtle washes to add more colors to it, but it’s really not mandatory.
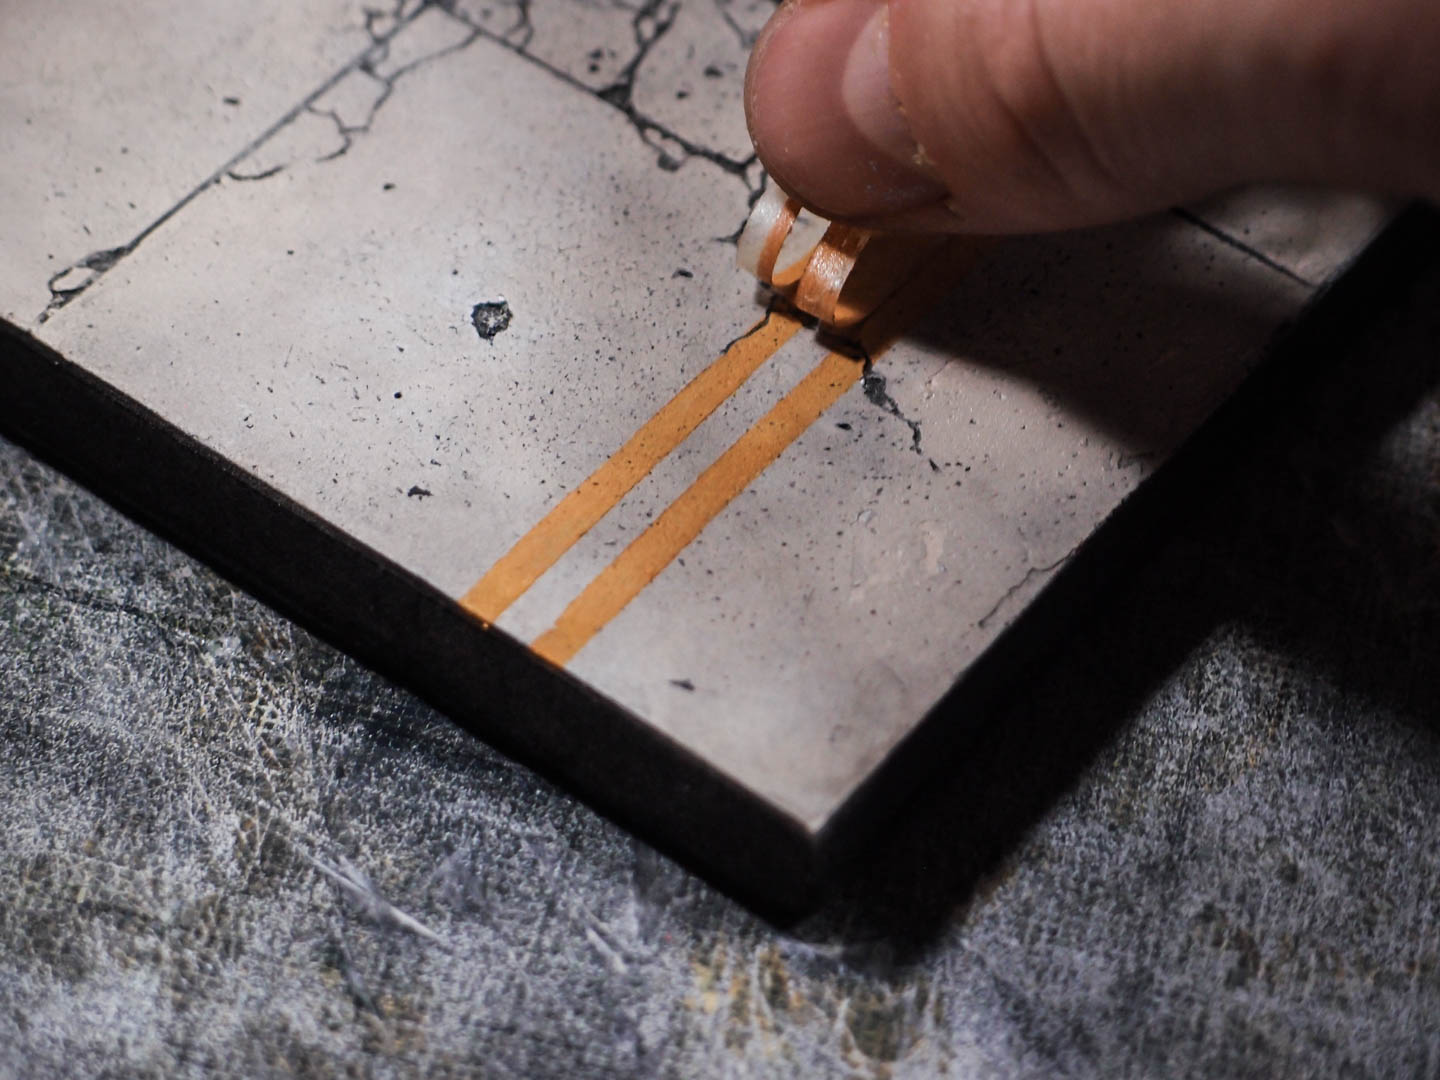
Be sure to add the protective layer before this step though: details such as road lines are very effective in this kind of works, but the stencil tape would tear off the plaster if it’s not protected properly.
Since I really didn’t want to take out the airbrush I did this step with a rubber sponge as well. Building up layers is very quick with this method, you just keep adding lighter colours to the mix and push it around. The result is something less flat than a single pass of paint.
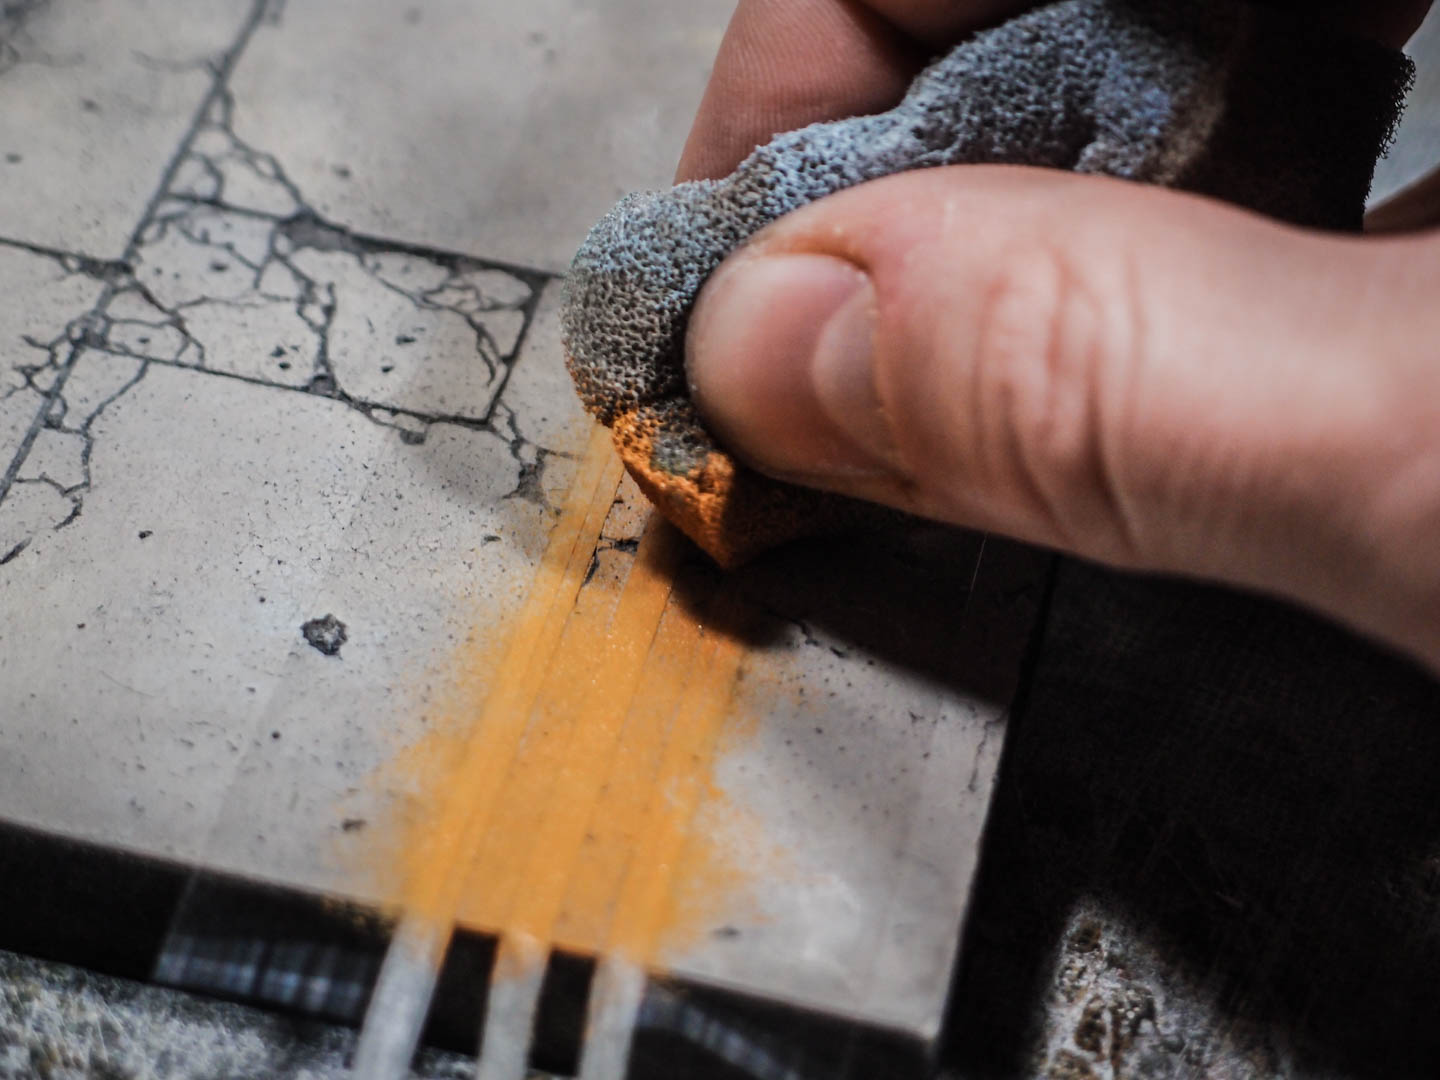
…Peeling it off.
And that’s the piece after the painting. To finish it, it only need a bit of vegetation.
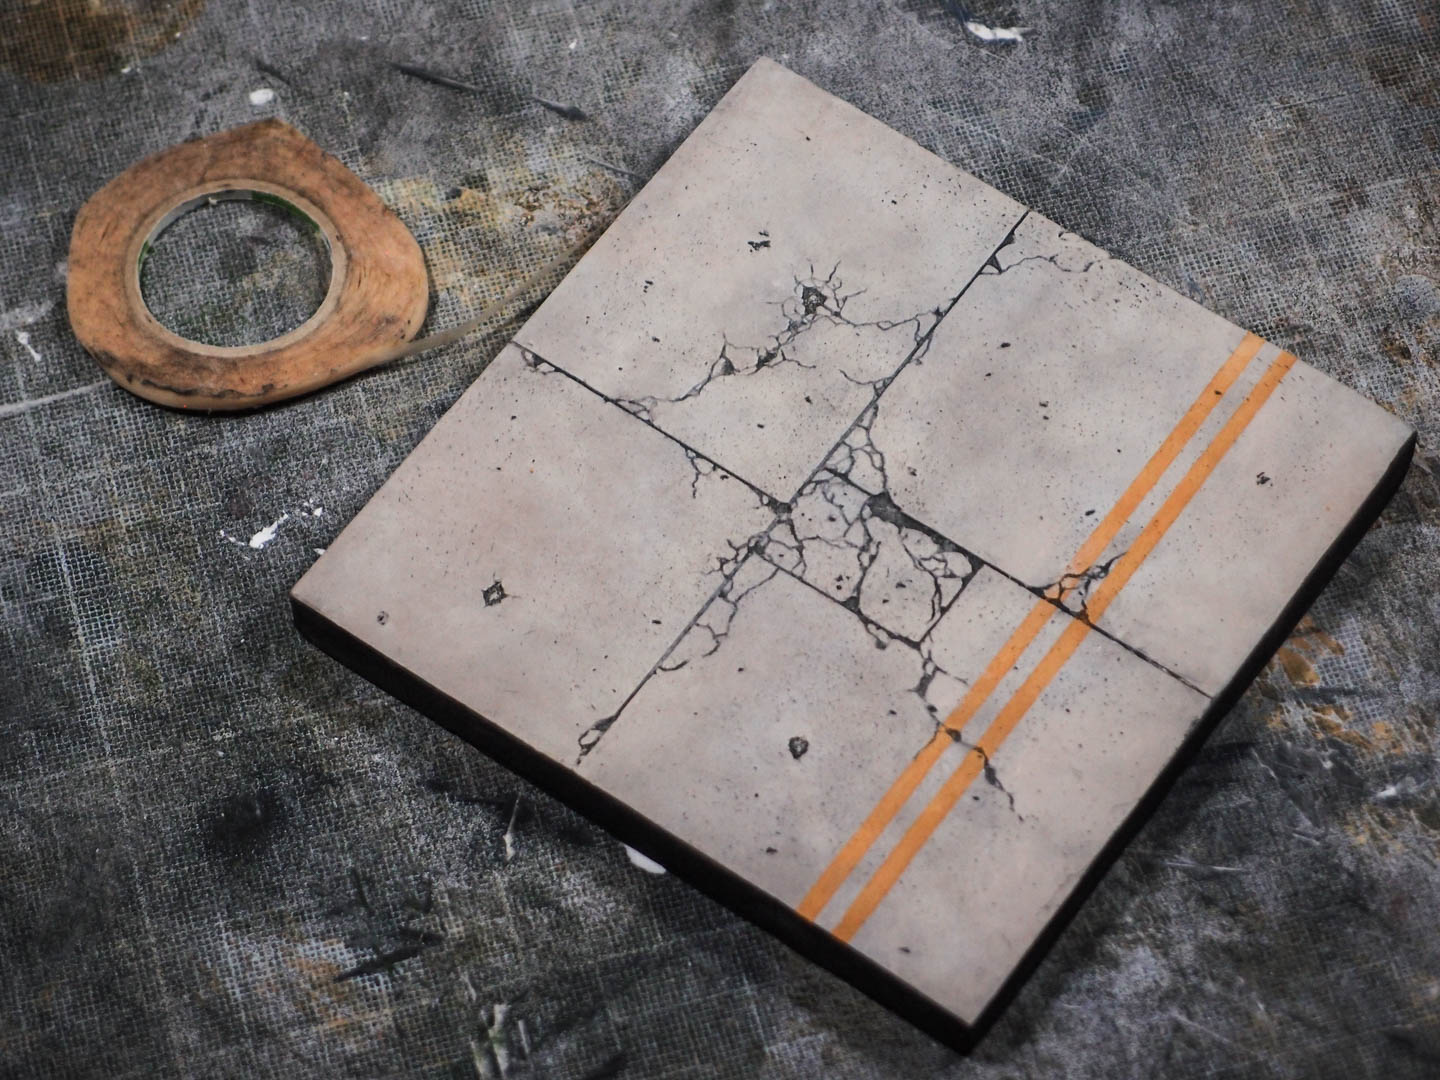
For that purpose, the cracks (especially the wide ones left by chips of plaster falling off when scribing) are excellent spots to add tufts. A bit of green every now and then balance the colors in the surface and make it slightly more believable
As a finishing touch, a few birch leaves scattered around, just to show off a bit. This last step is probably unnecessary, but since this is a test piece for larger projects, I thought I had to test. And it’s certainly looking good!

And that’s the complete piece!
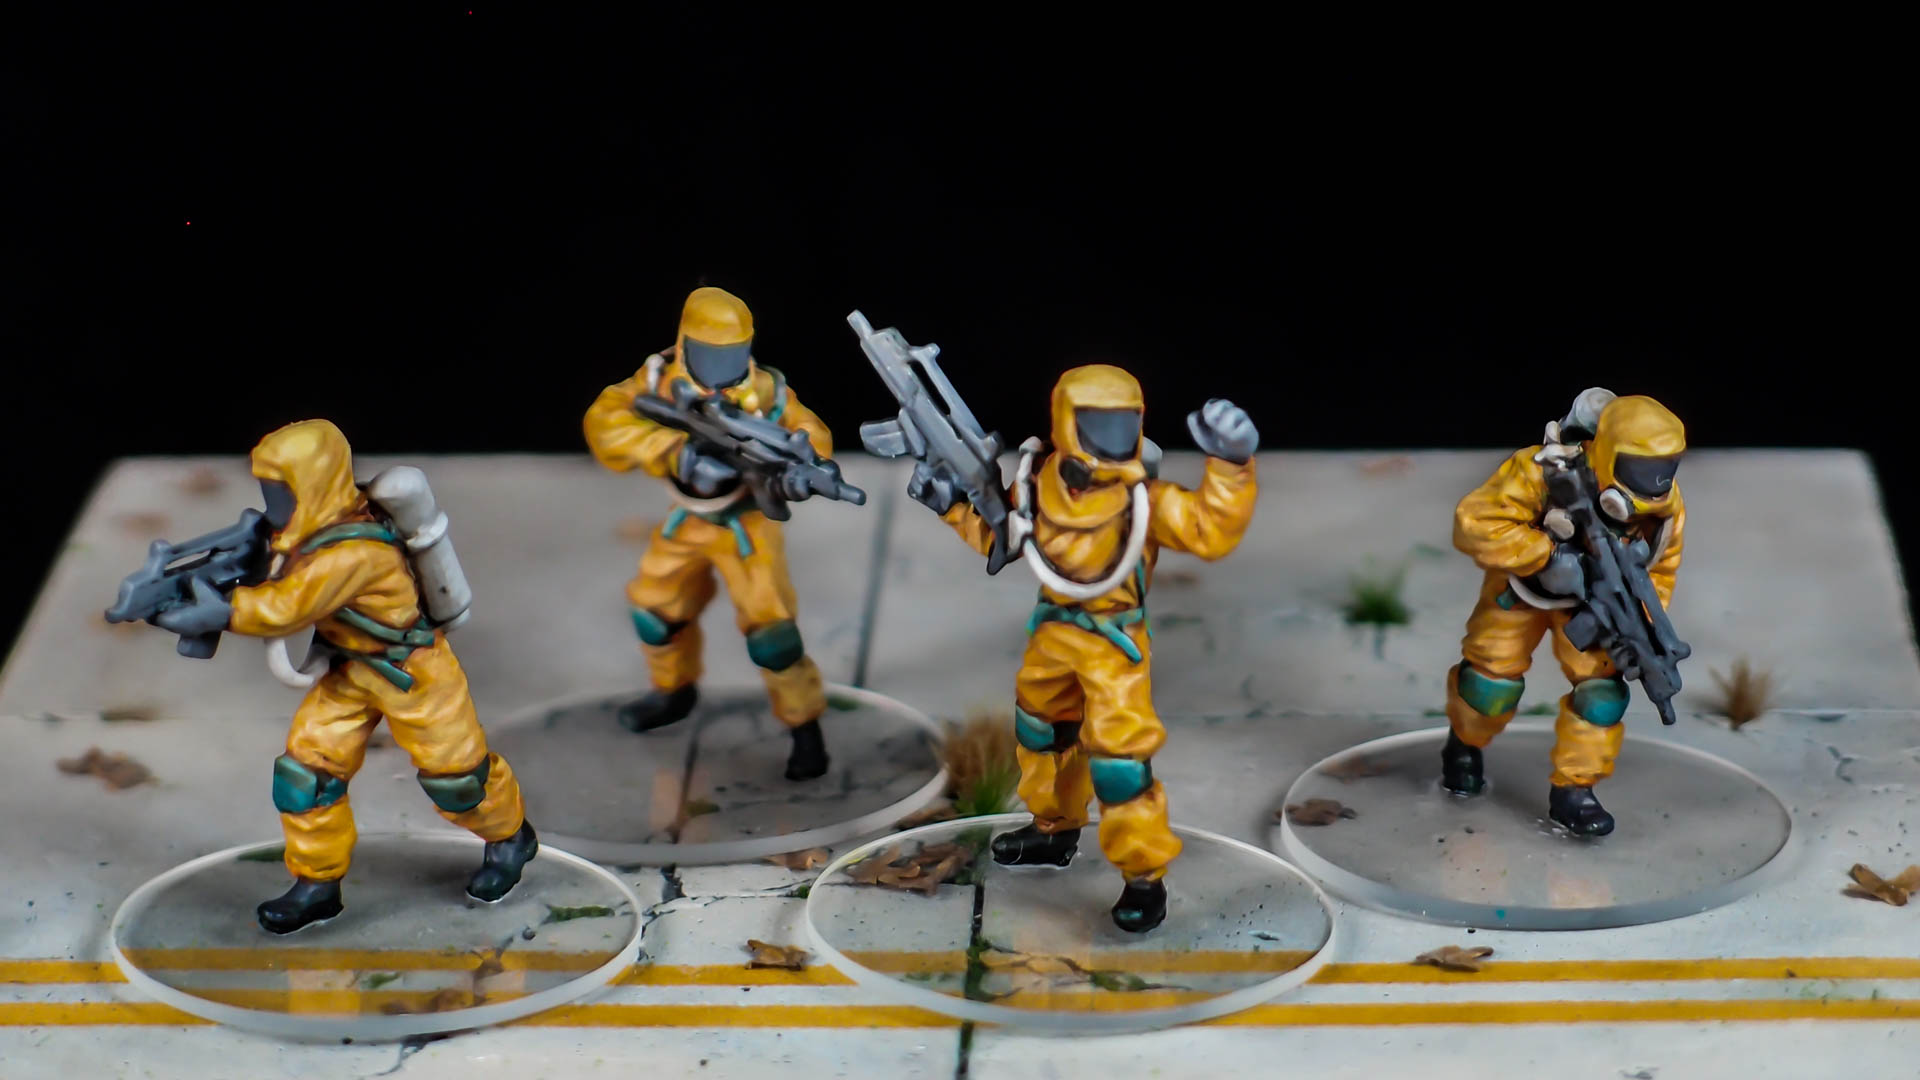
A couple of shots with figures on it as well. It’s working great as a photo backdrop too!

Cheers,
The Lazy One