Rocky walls
- Tutorial Type Dioramas, Gaming Scenery, Techniques
In this brief tutorial I’ll expand the basic ideas used for the Jungle Islands into a more versatile and practical solution for cliffs, hills and any sort of terrain that requires detailed rocky stuctures.
The final goal is to have a quick and cheap panel of texturized rock in plaster to be then broken into parts to be used as detailing elements or joined together once again into large rocky walls.
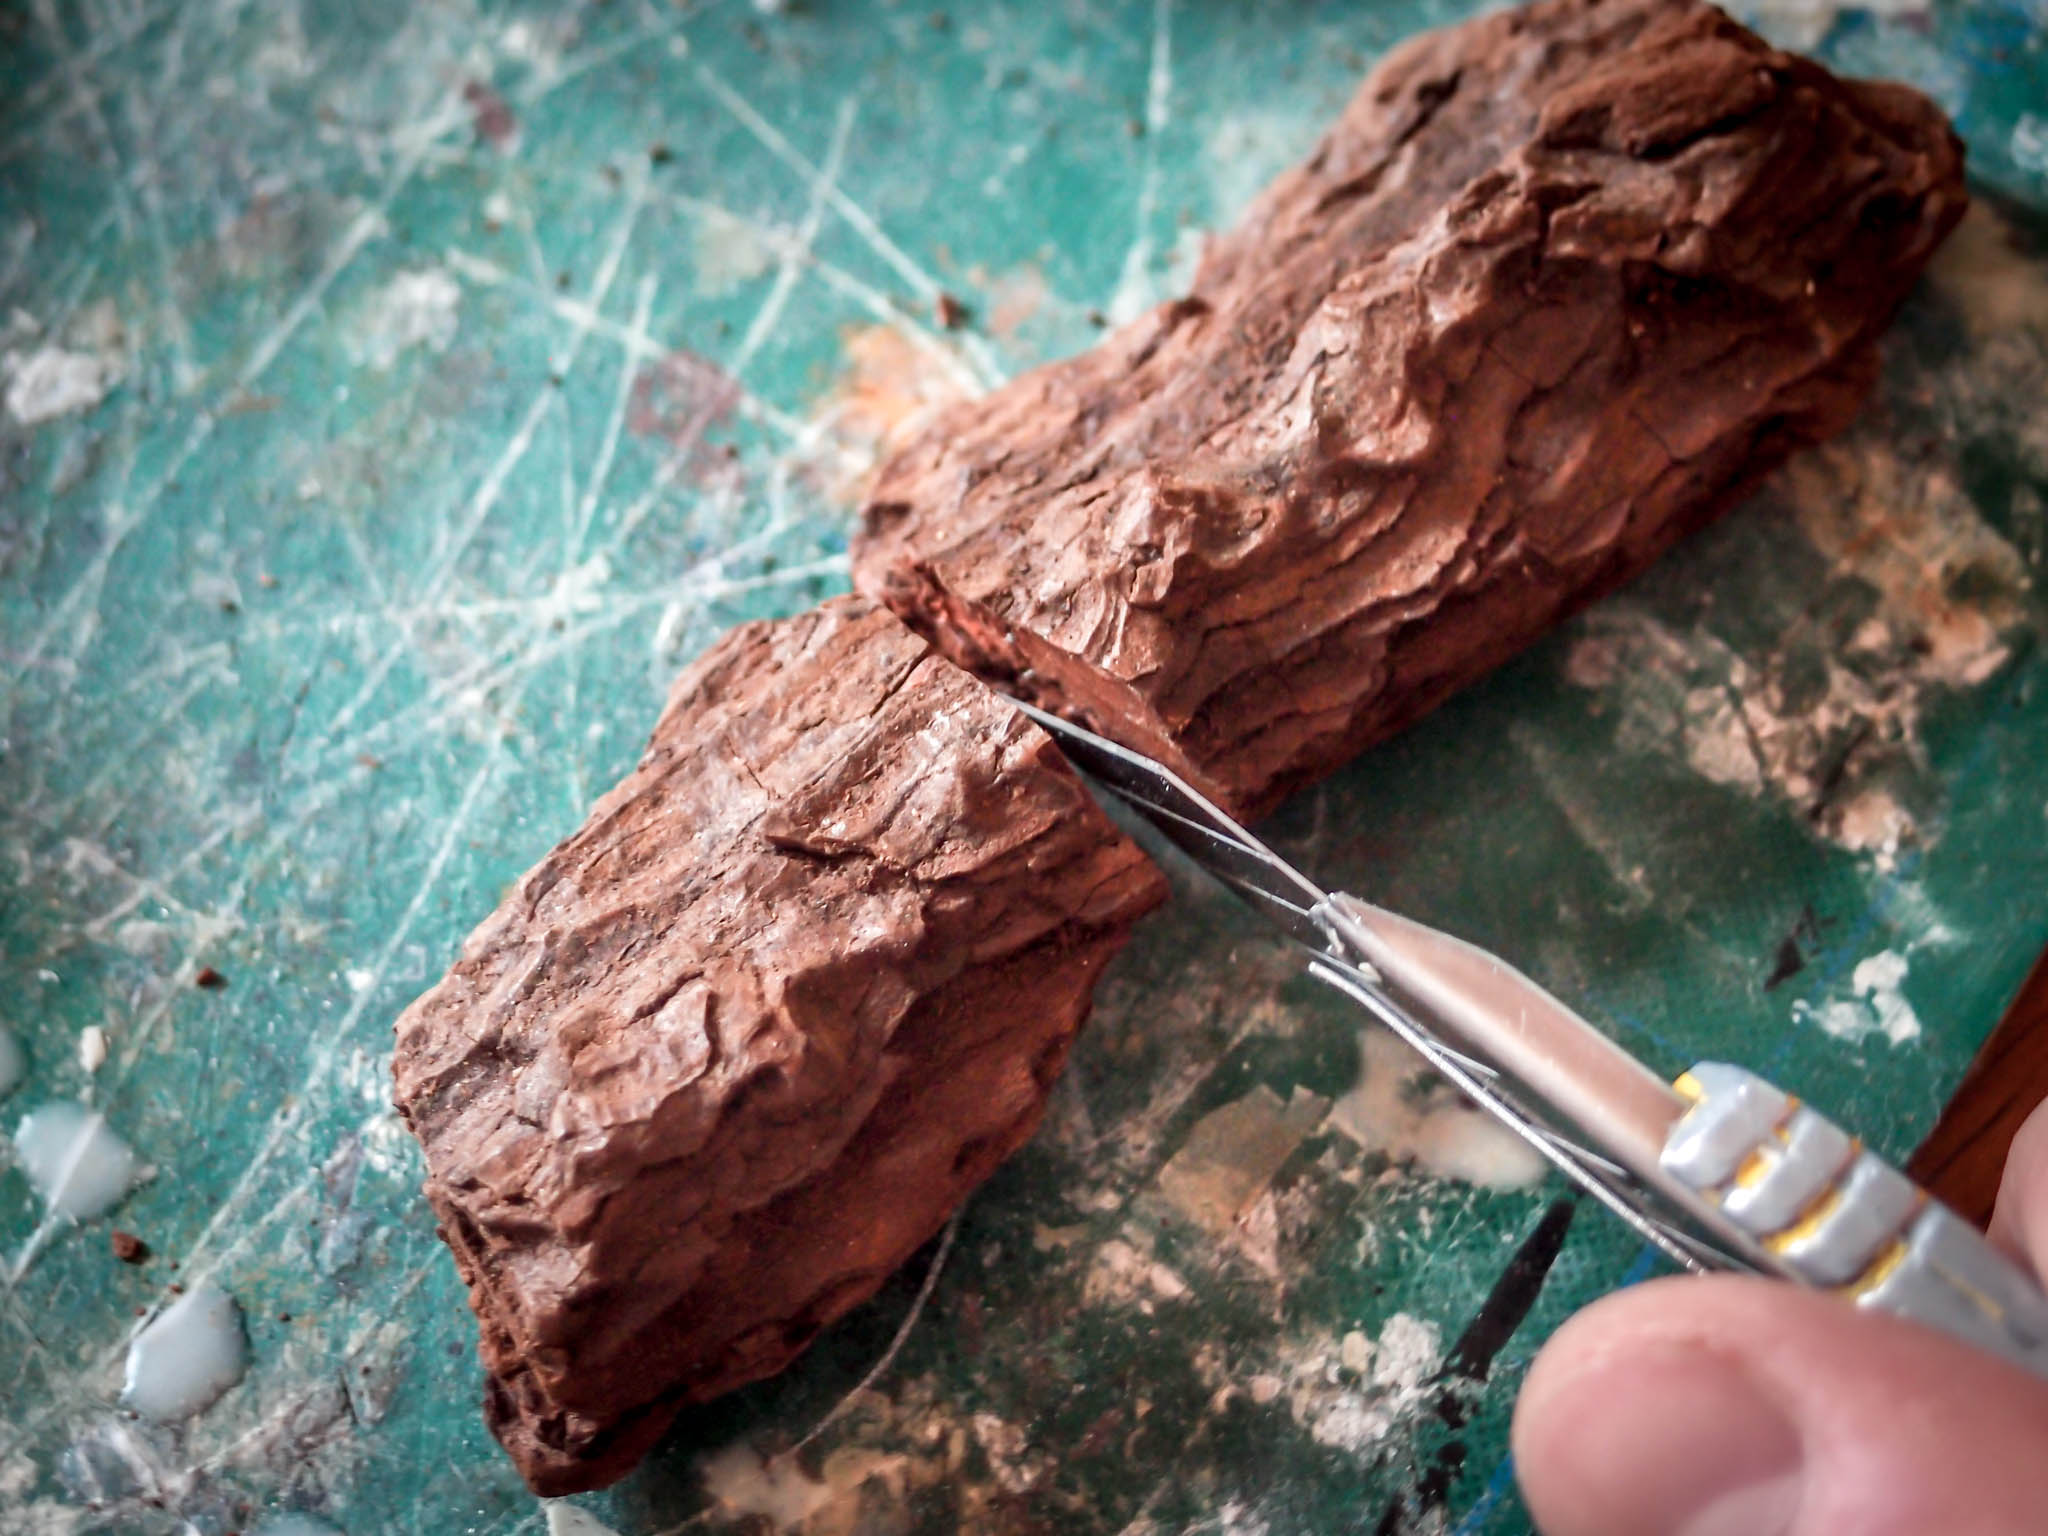
While I really like the effect of bark for rocks, the bark pieces usually tend to be roundish, not suited for large flat faces. Besides, they are also hard to find in many areas of the planet, especially in cities.
So, here comes the solution.
I recently purchased a Kg of clay at the local art store. It comes very cheap, and as long as it’s kept in a ziplock bag it won’t dry out.
I flattened it into a 3 cm thick slab with the help of a spatula. The surface didn’t have to be particularly flat, just enough to have a coherent face.
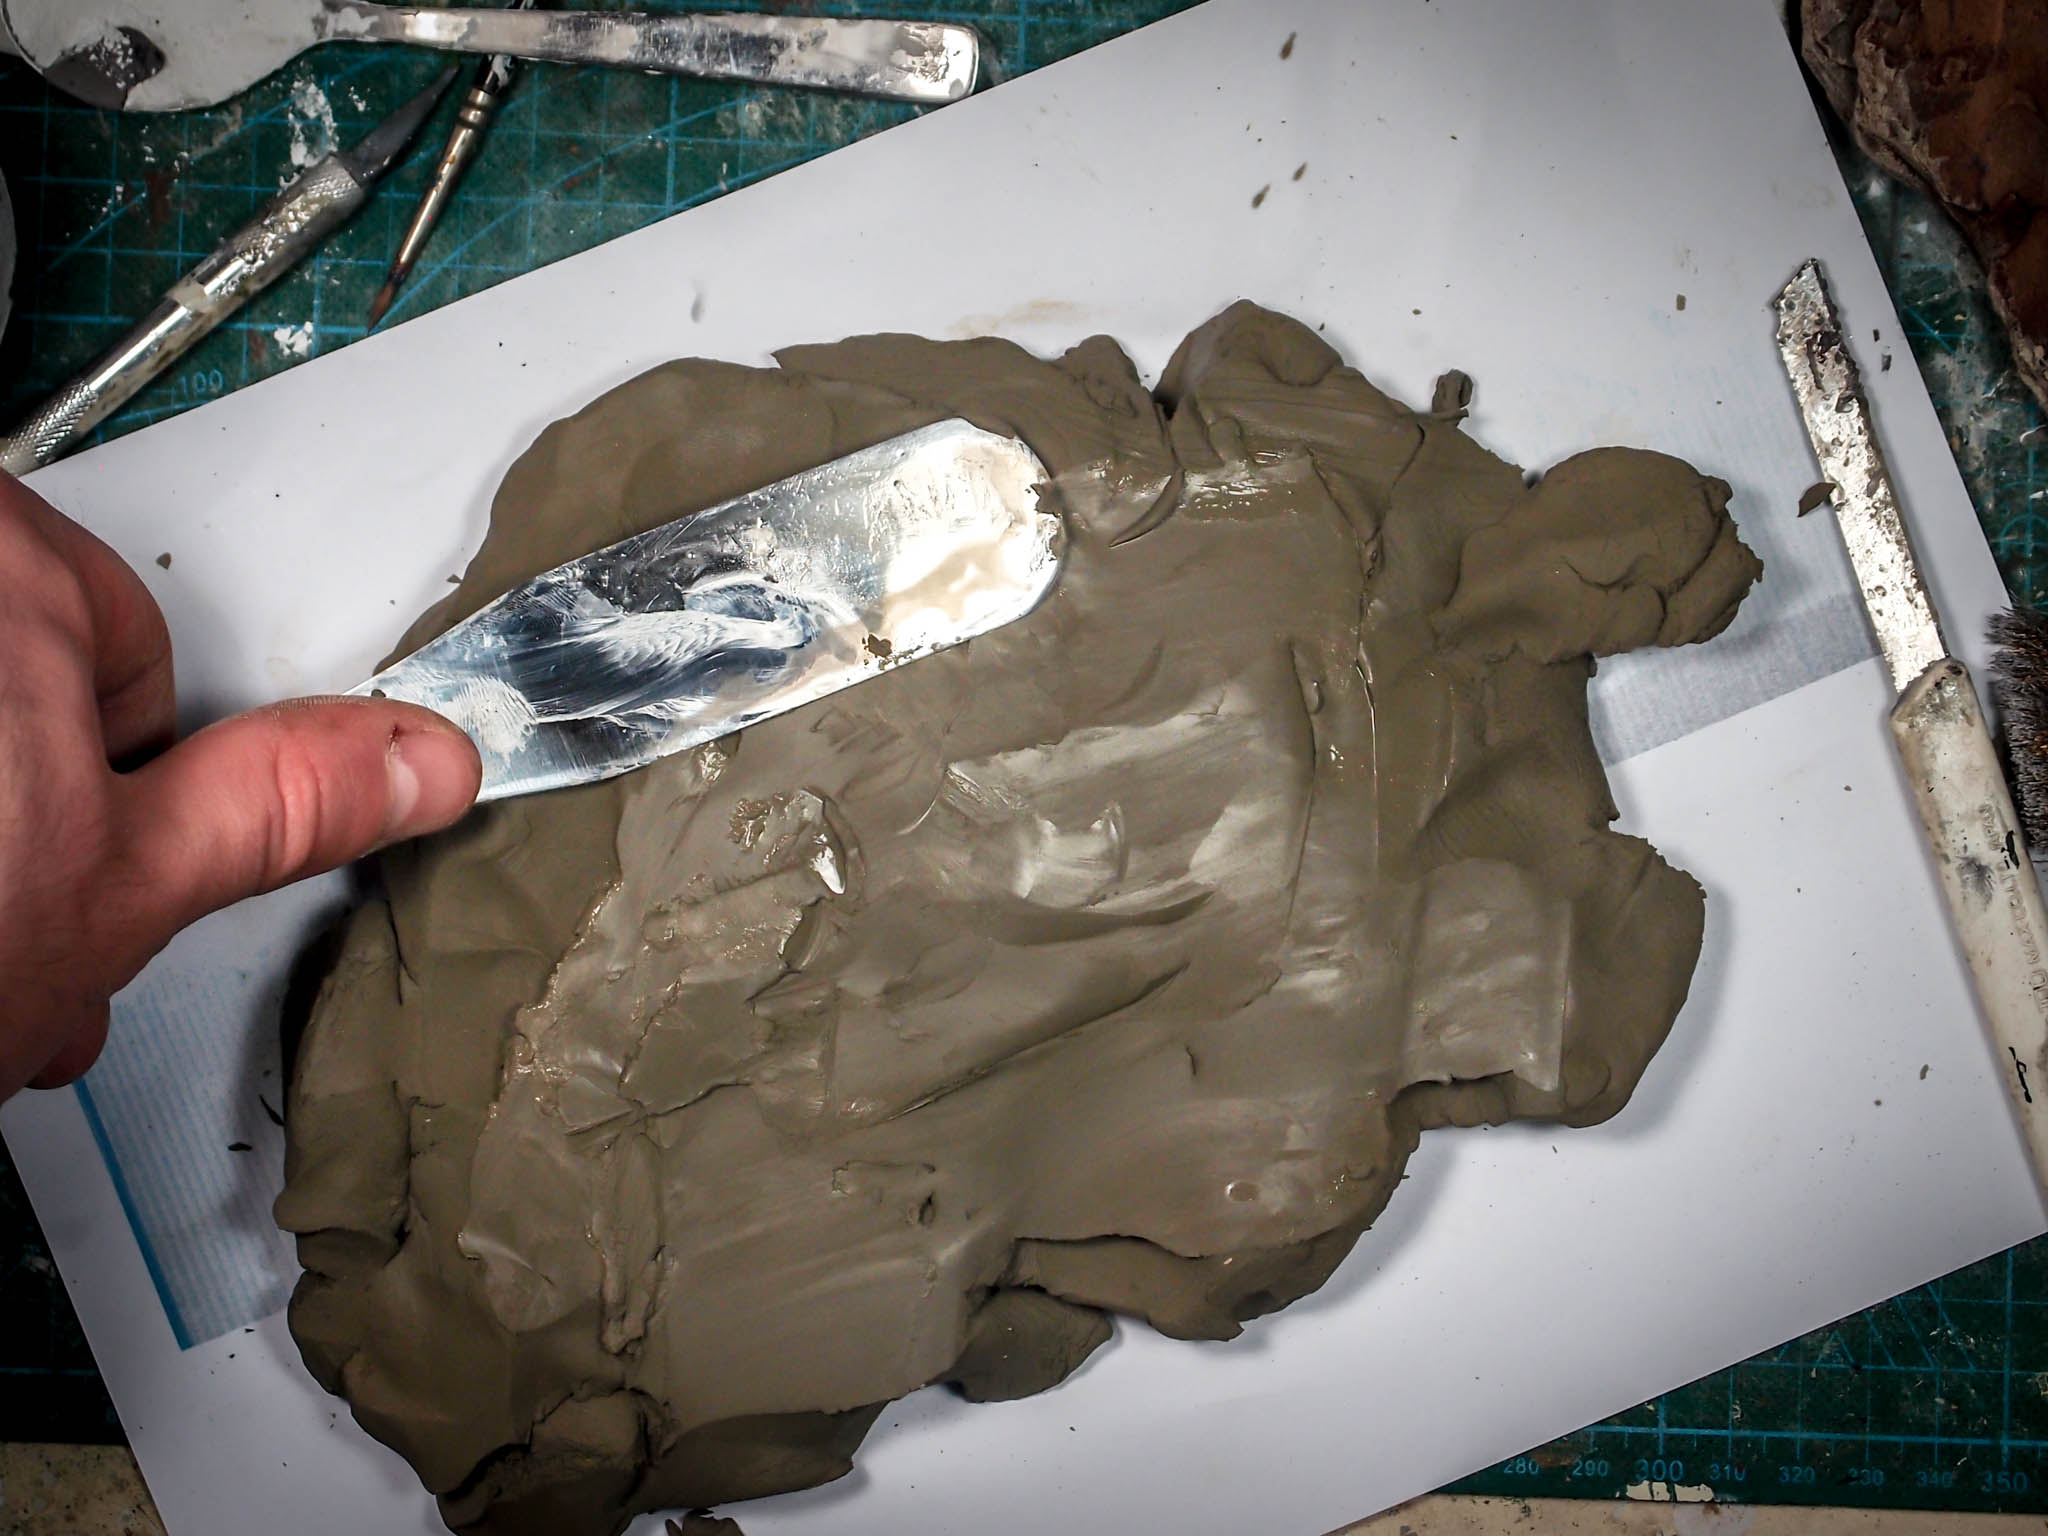
Using some of the relatively precious bark pieces I have, I pushed them into the clay, leaving an impression each time.

Of course, the more you push them around, the more clay will flow into the recesses that were formed previously. All in all, the surface had to be texturized a couple of times until the shapes seemed convincing enough. Using all the areas of the bark pieces provided extra variety in the patterns, always keeping in mind that the orientation of the veins should probably be kept constant.

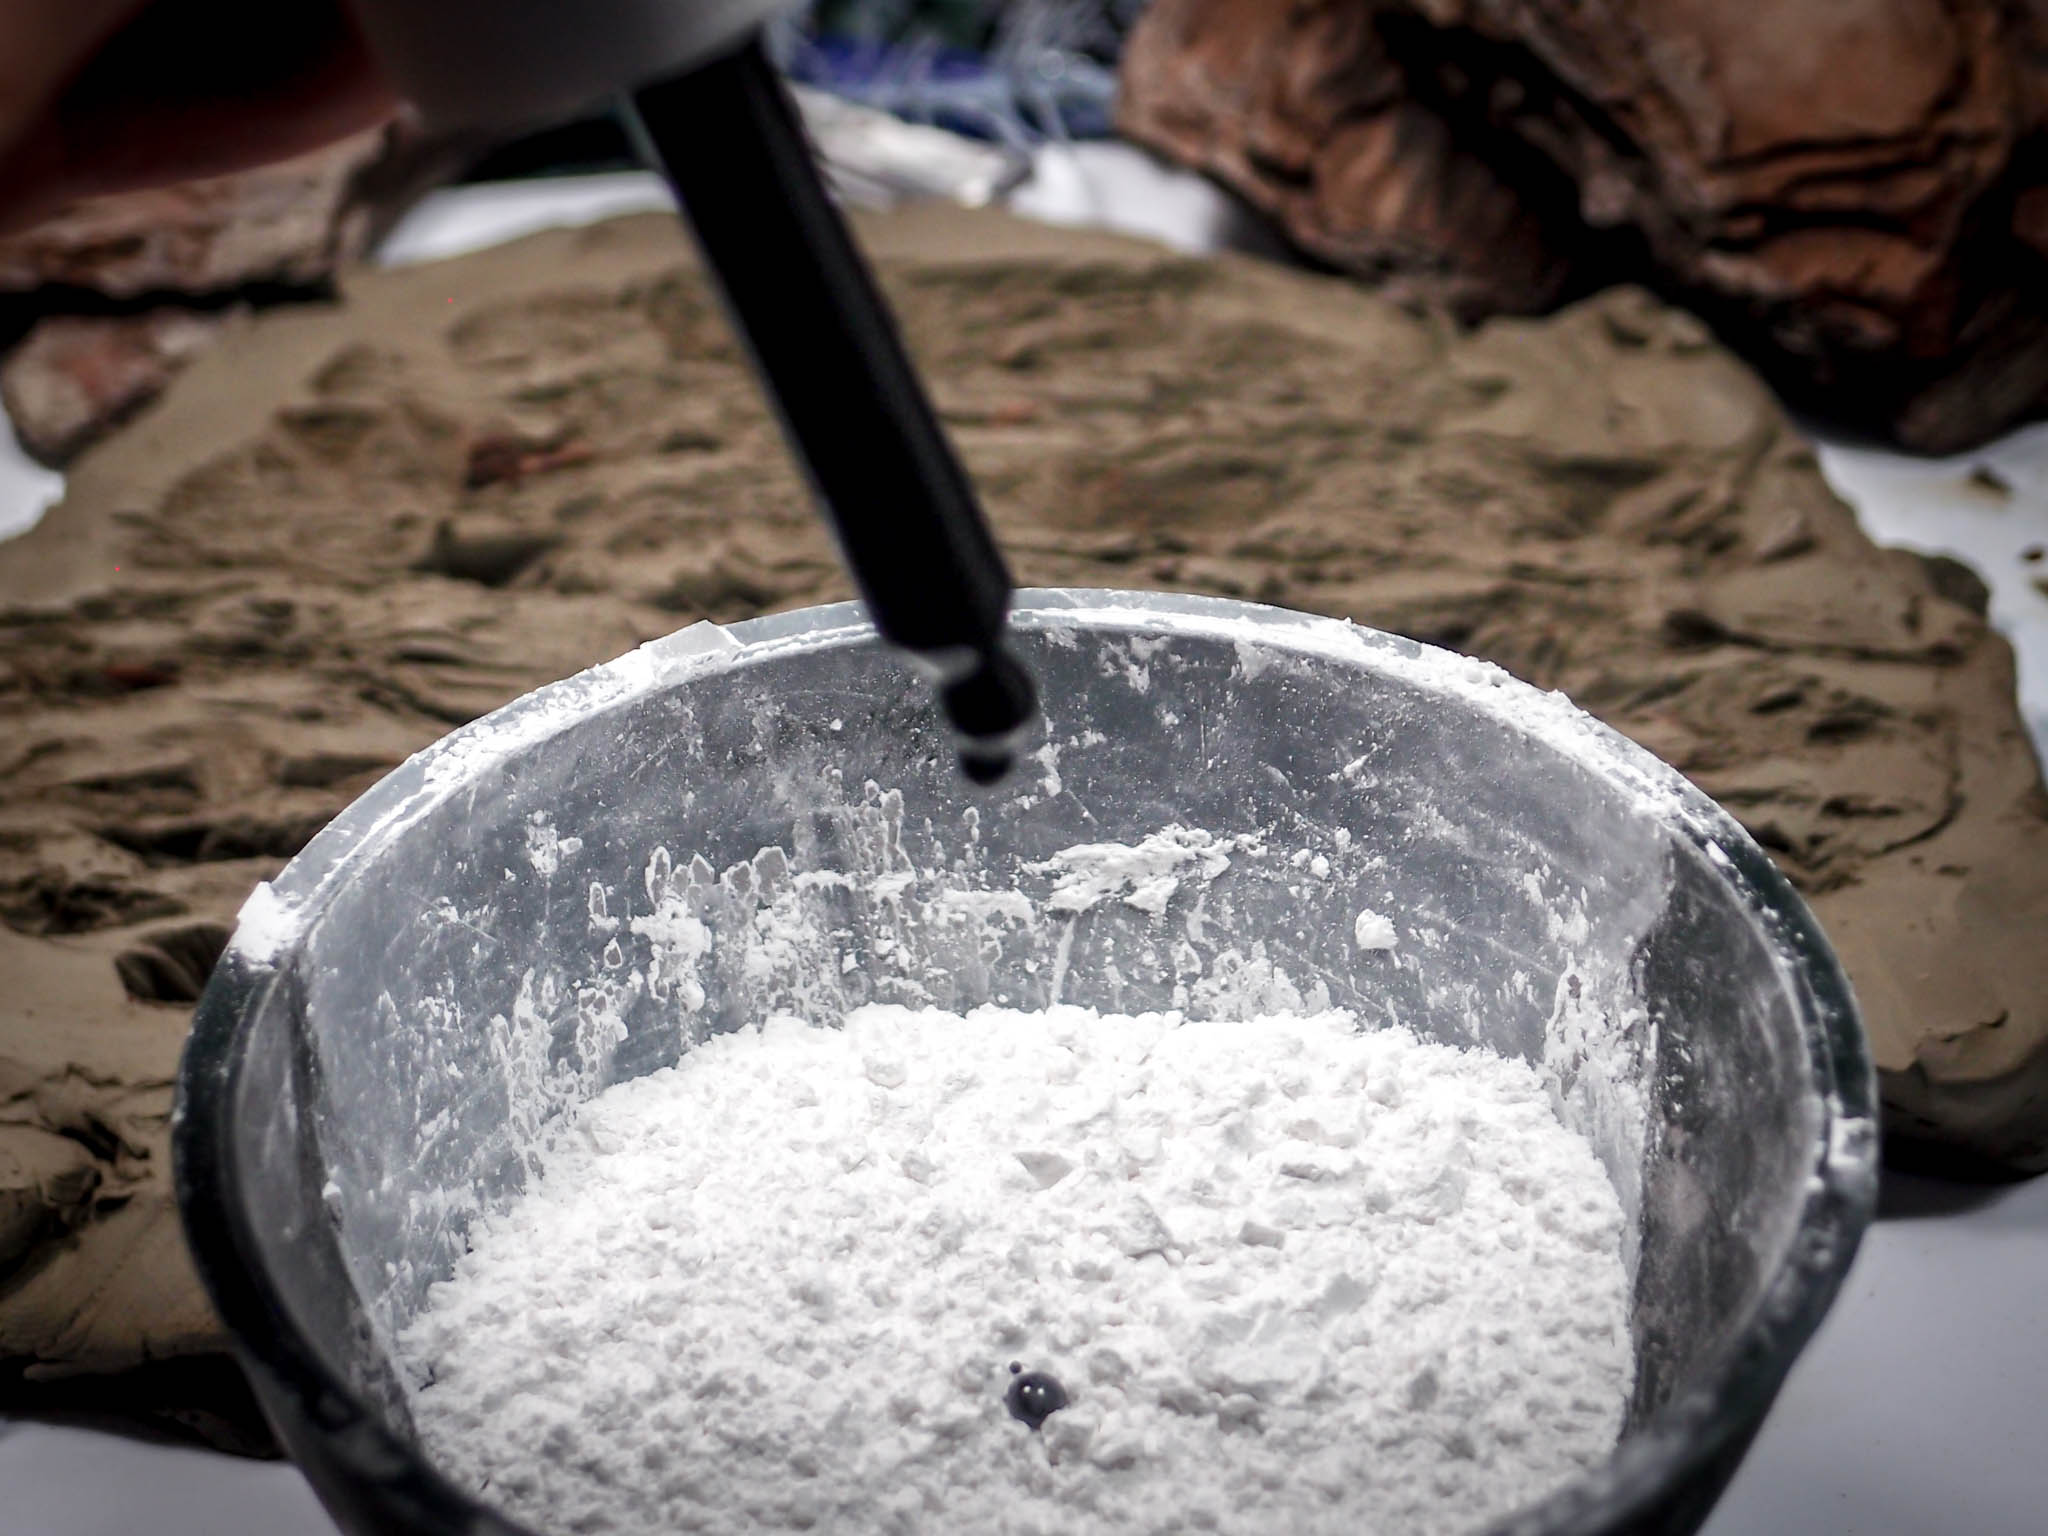
Once the surface was textured, I prepared some plaster. I’m using high-grade ceramic plaster (which doesn’t chip on the final piece, definitely worth the extra price), and for these rocks I added some drops of black ink.
Since the clay is wet, the pouring of plaster is particularly easy. just a few gentle taps once the liquid is poured and the few bubbles surface rapidly.
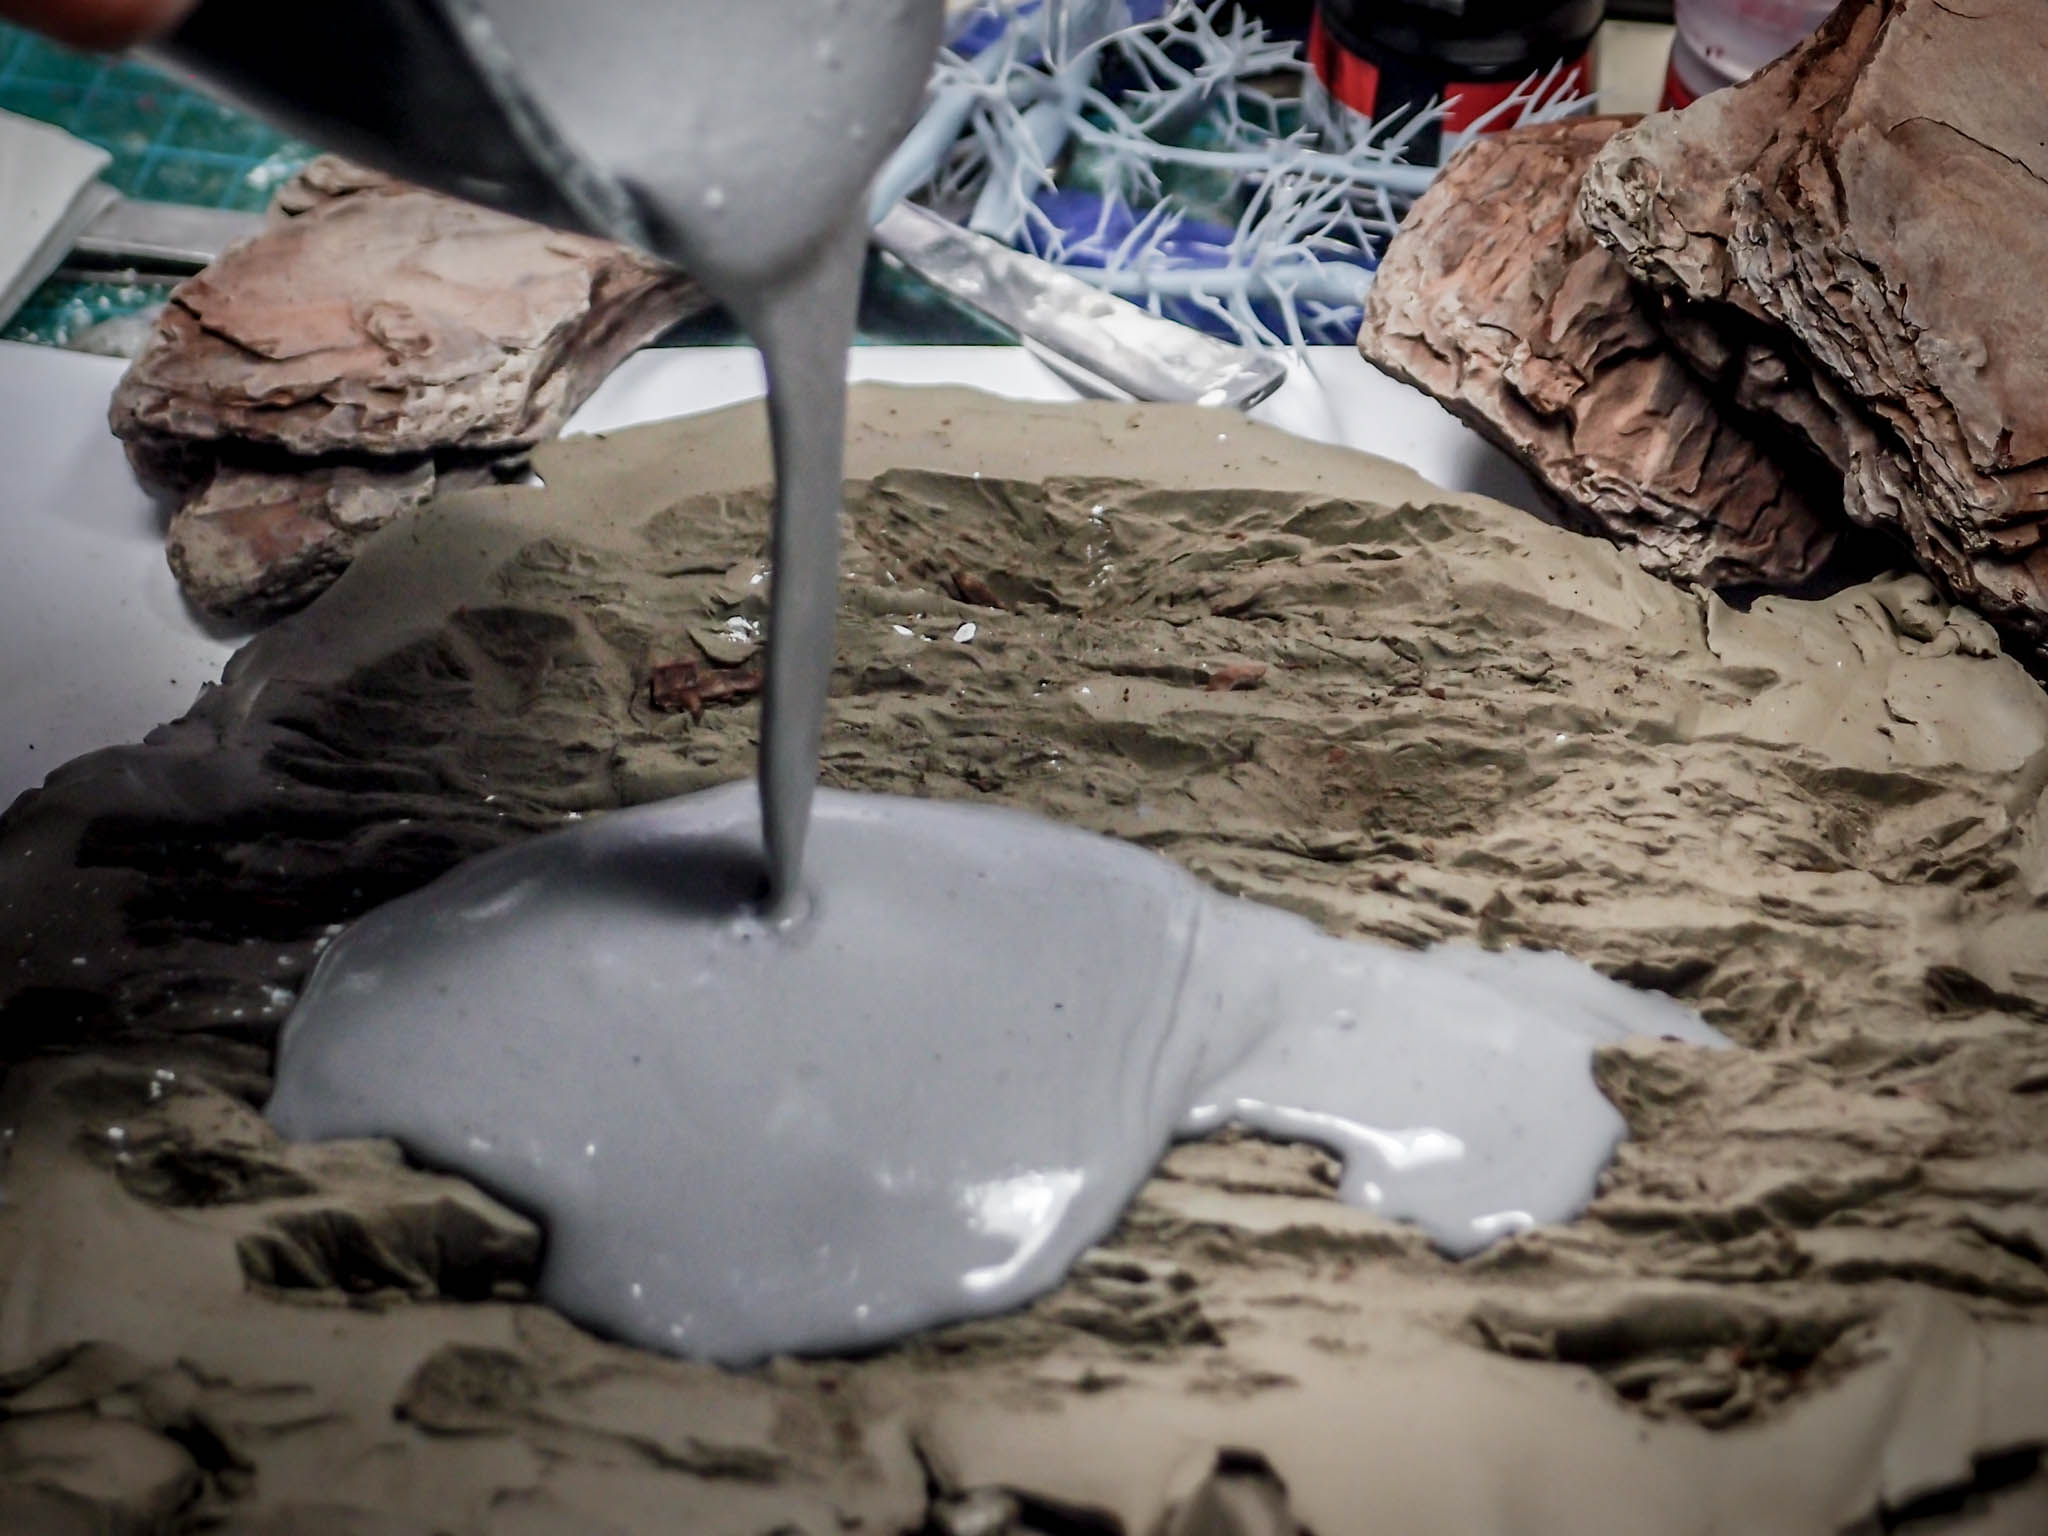
Leaving it to dry, then removing the clay gently, I got a whole detailed surface, full of interesting shapes protruding out.

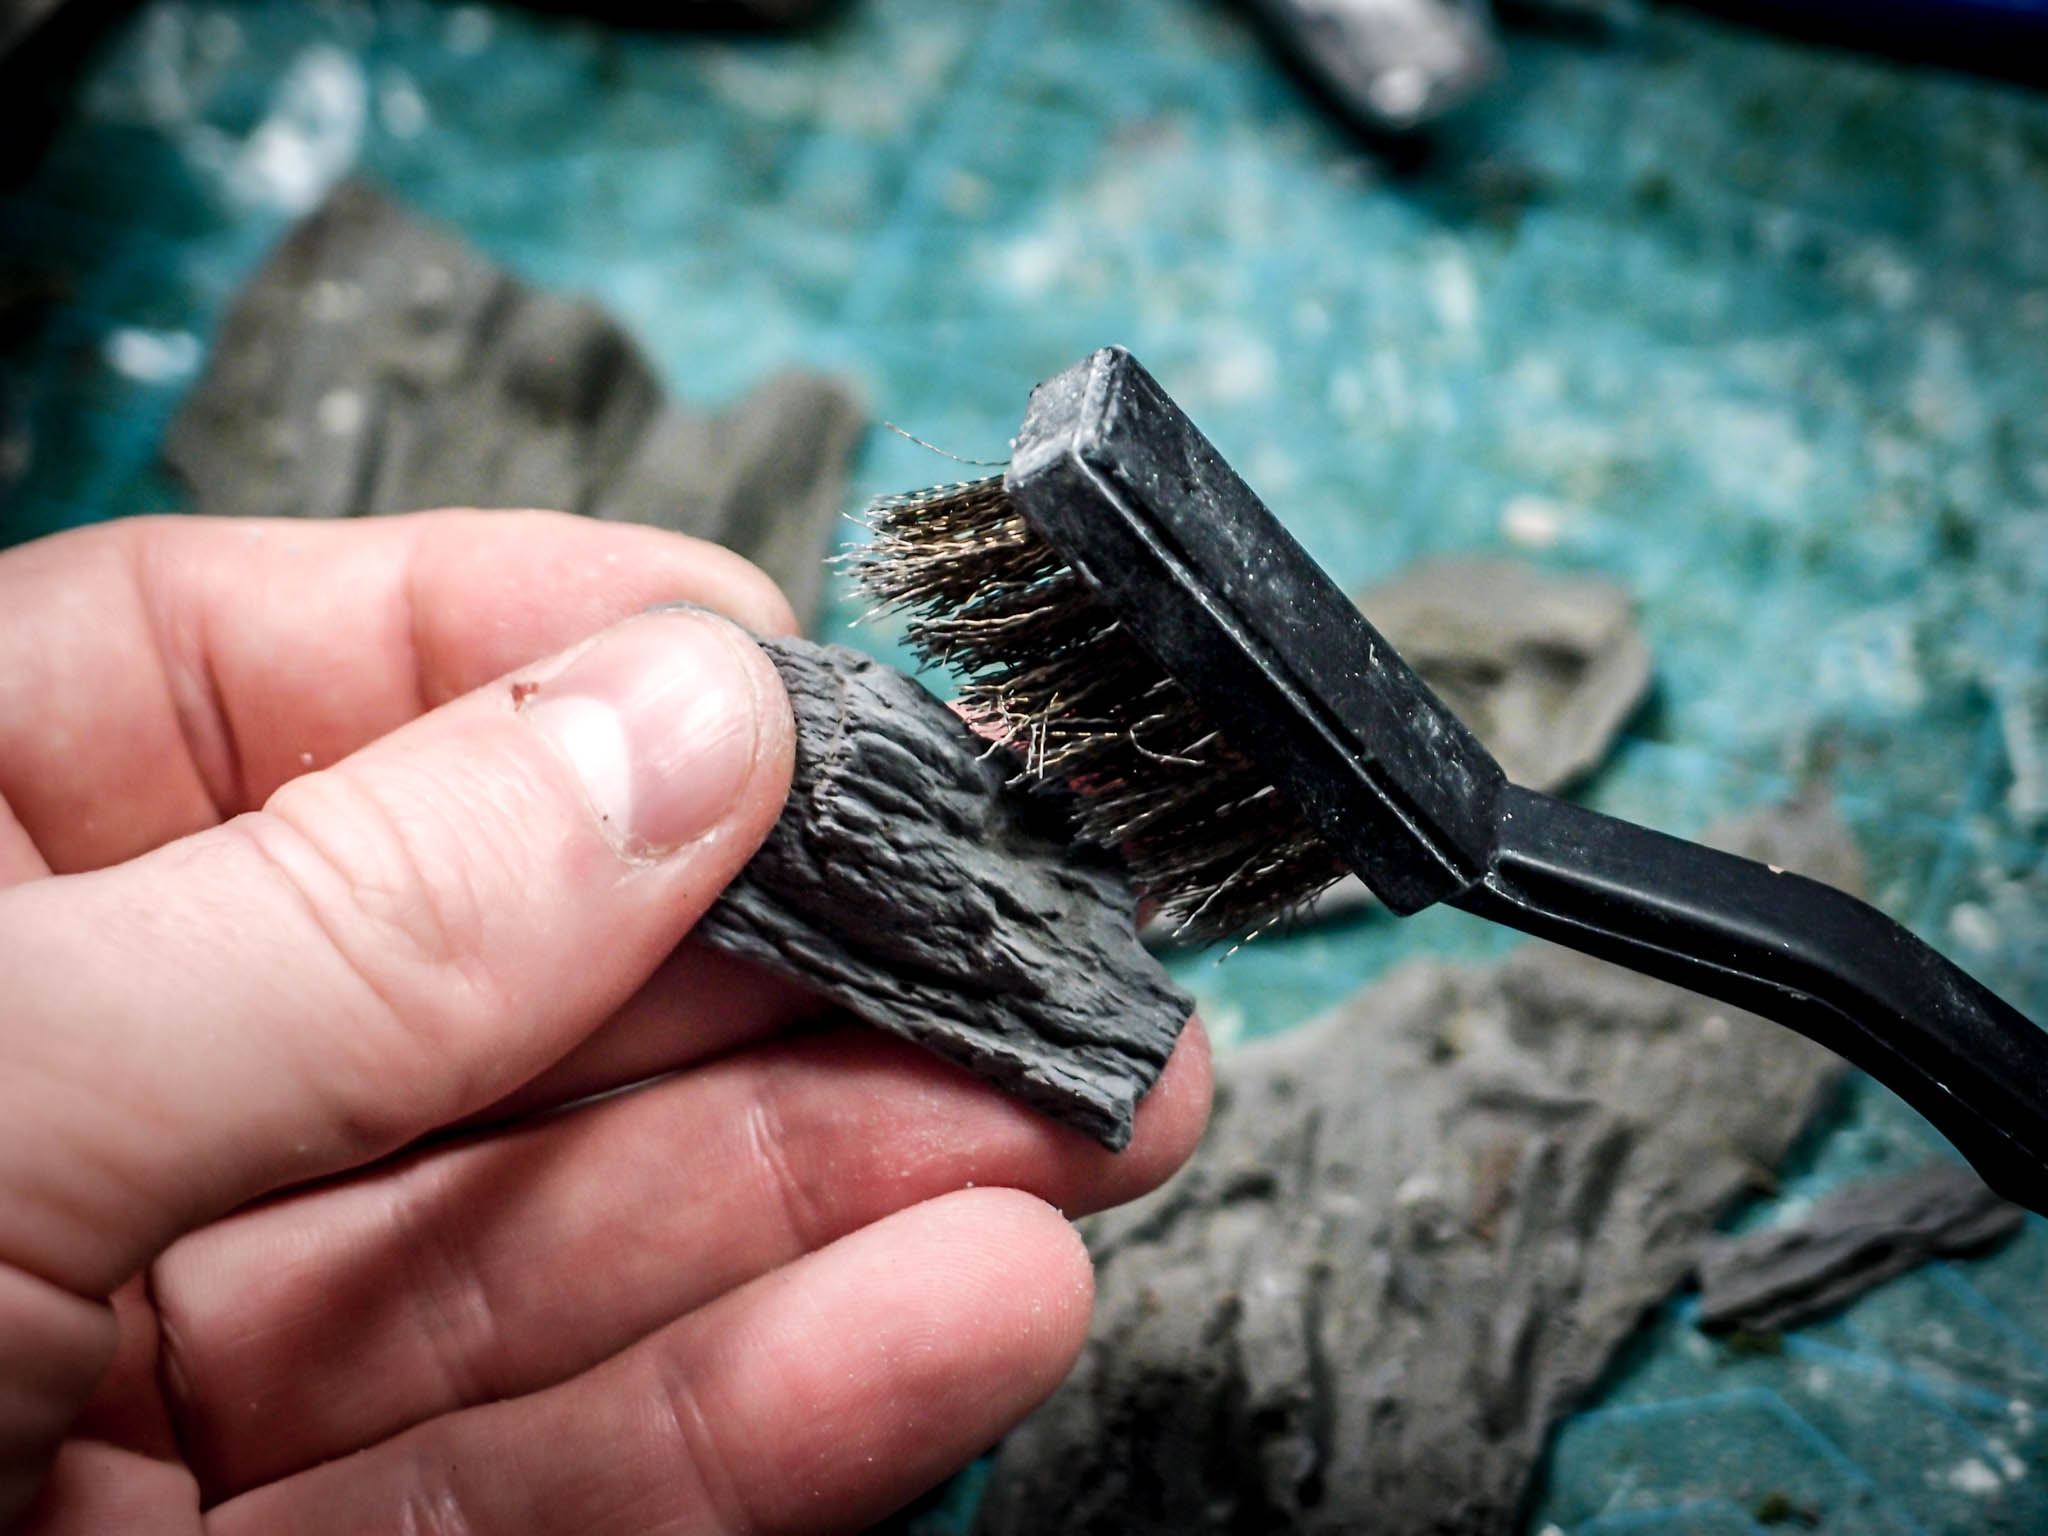
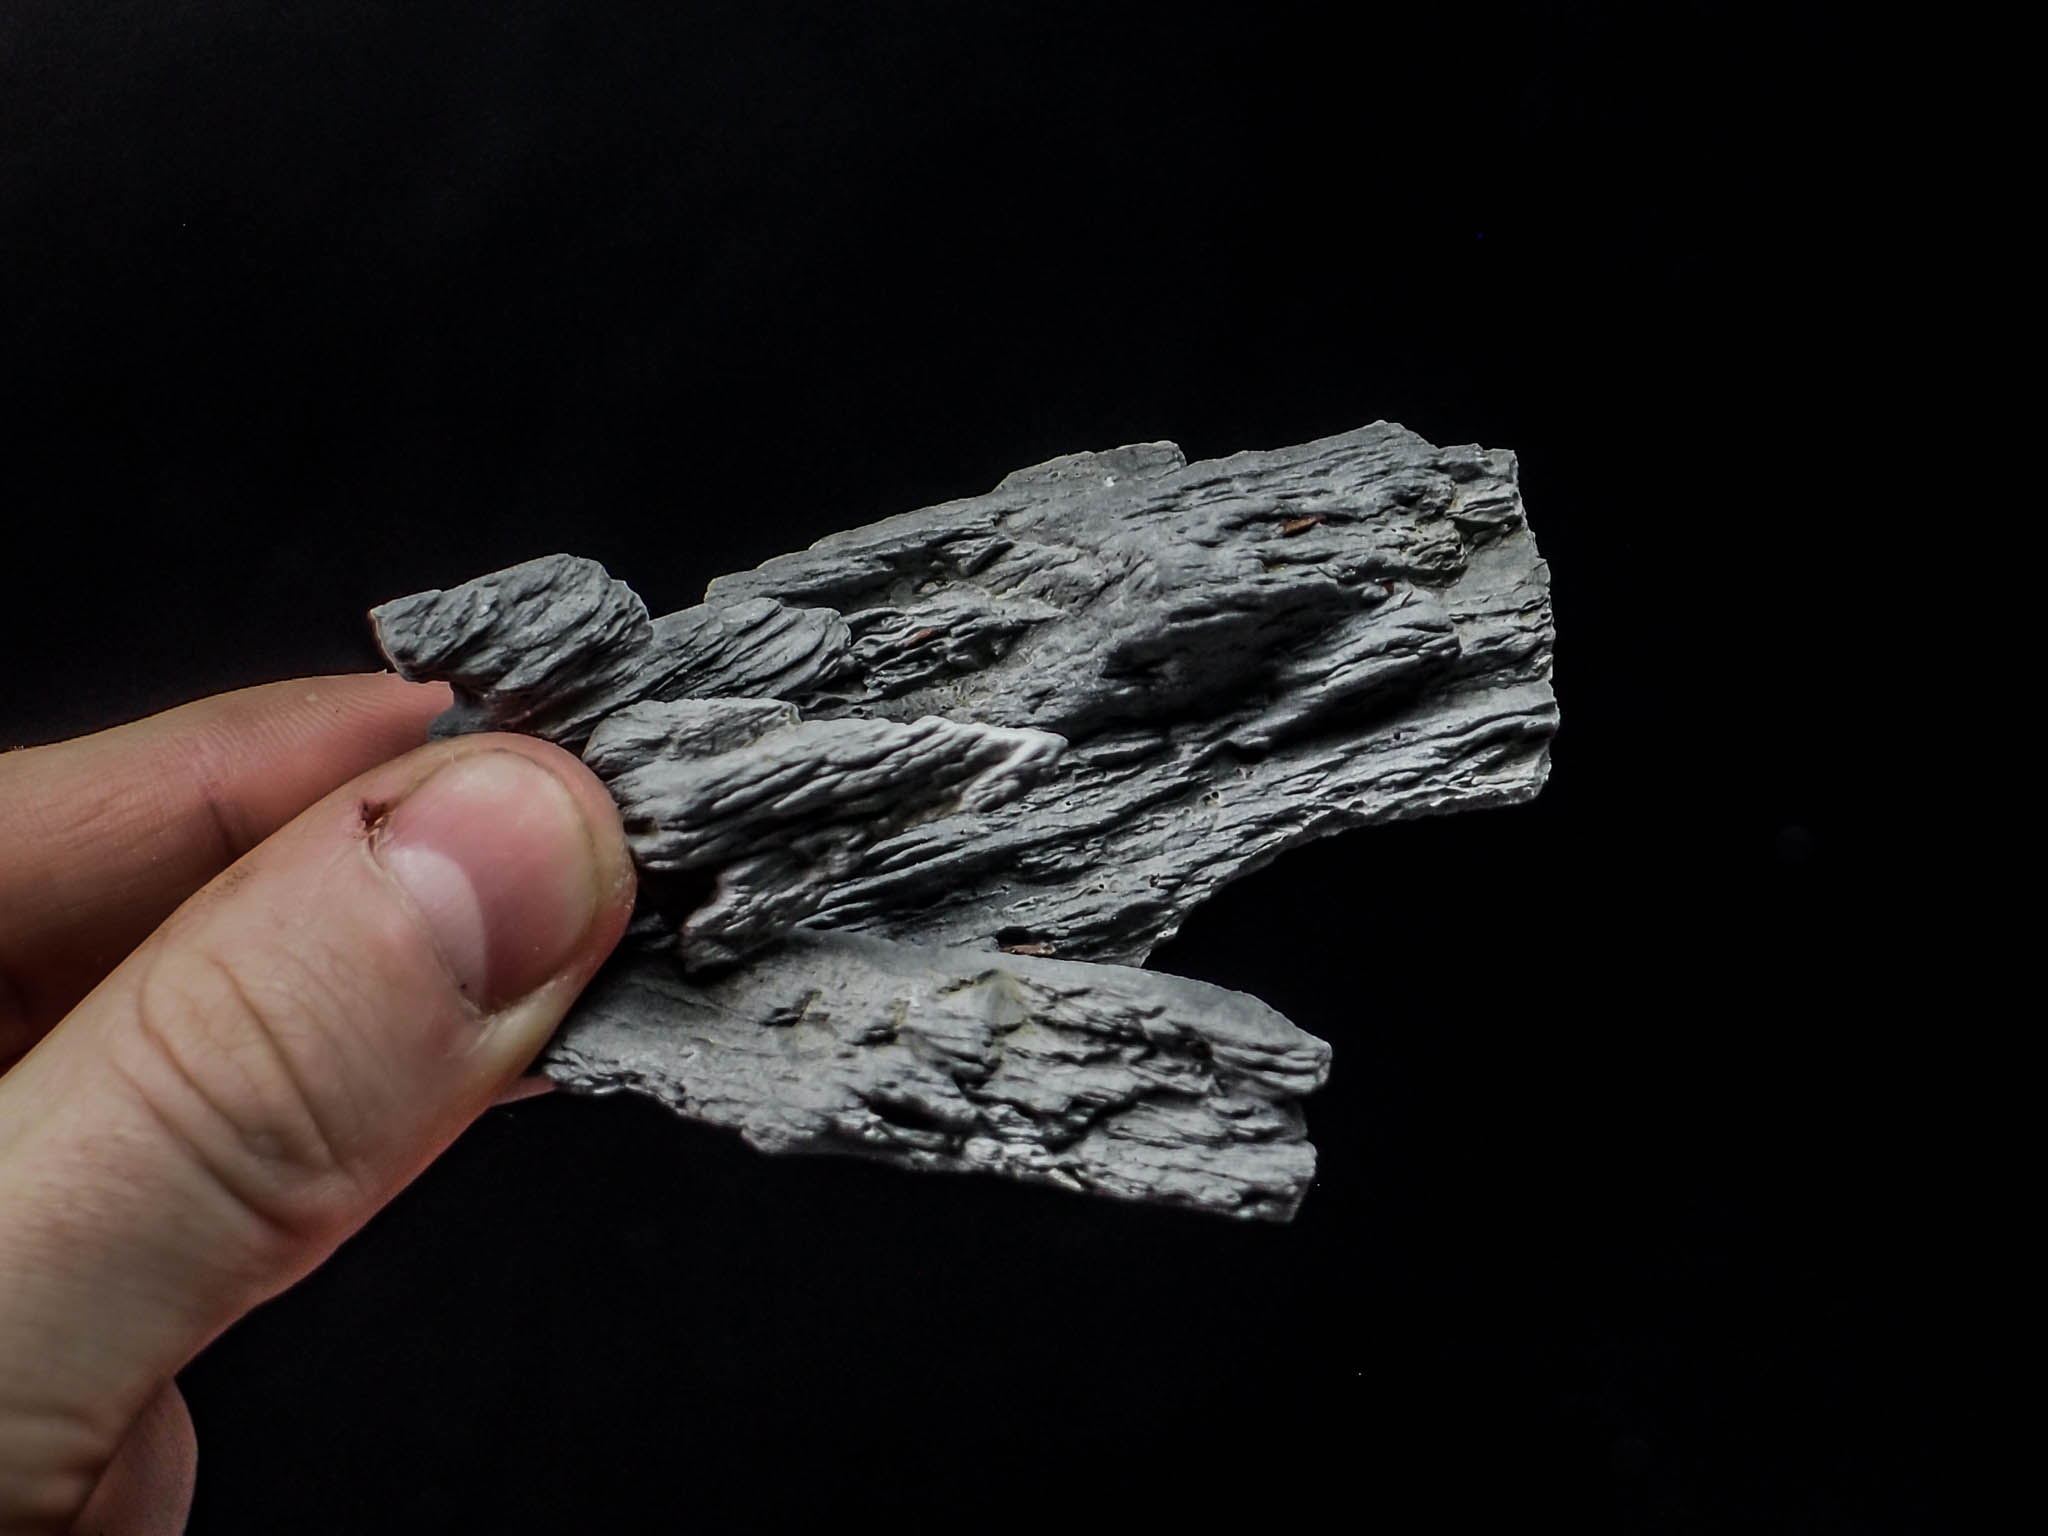
Now, since I mostly needed smaller parts for the sides of my cliffs, I then broke the panel into smaller pieces. With a metal brush I enhanced the details and the veins of the rock, adding some to the lines where the plaster was broken into the multiple parts. This way, each piece was fully texturized. A quick wash in hot water removed the remains of clay, and the pieces were good to go.
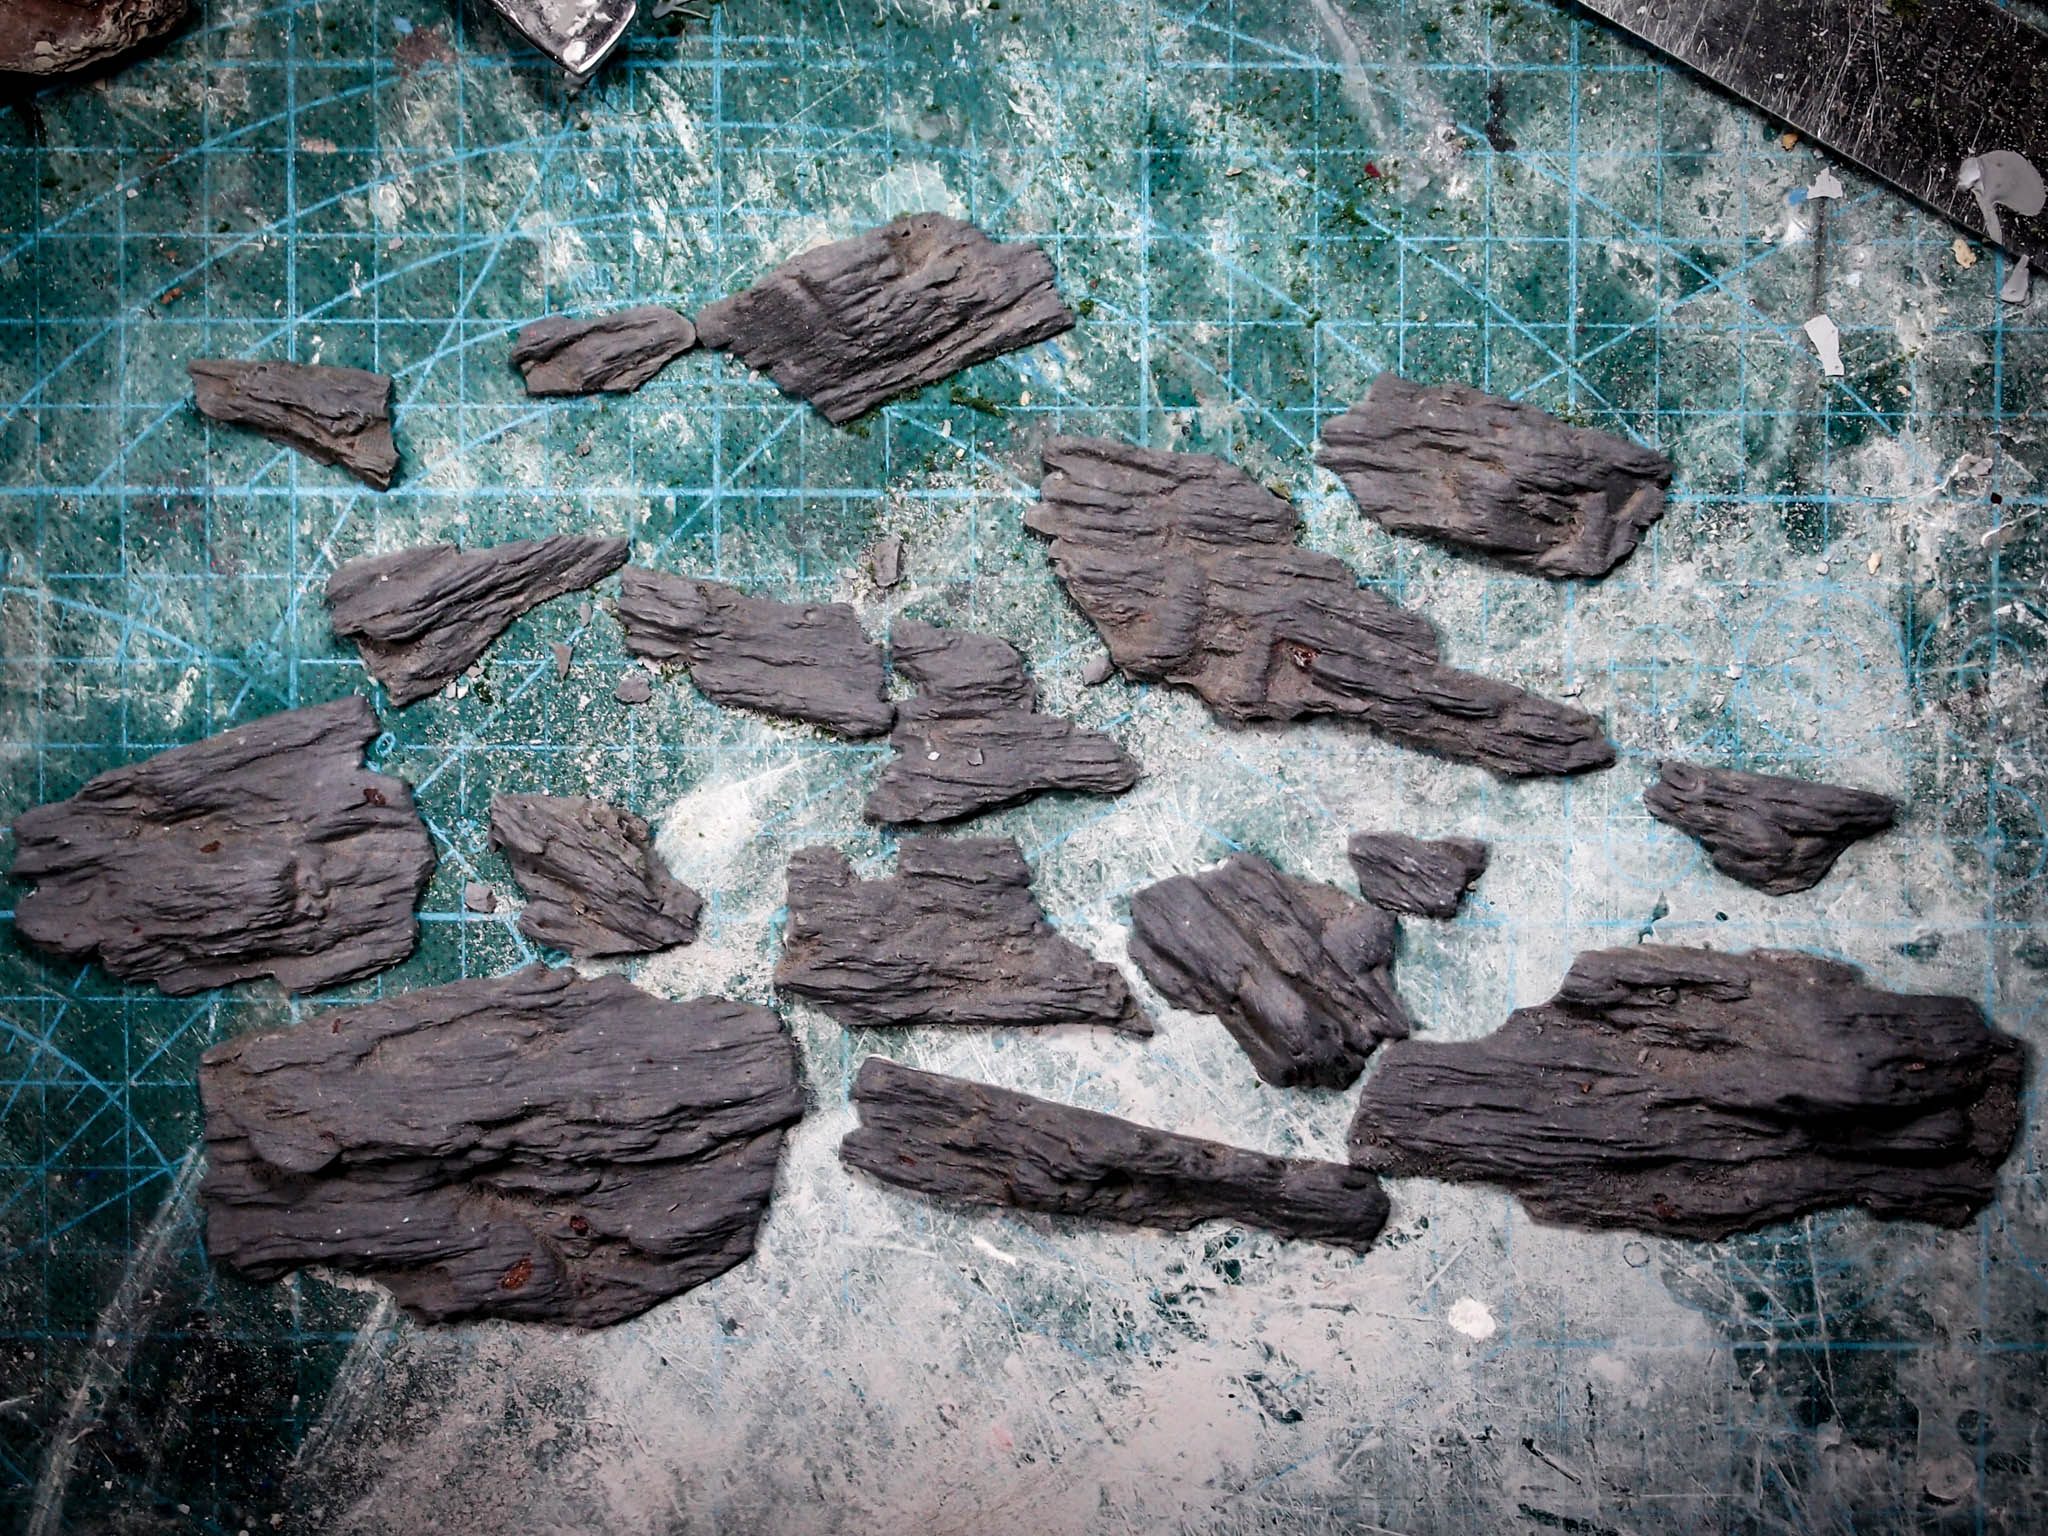
Here some close-ups:

Cheers,
The Lazy One
Really neat. Thanks.
Cheers!