Ruined Cobblestone Tiles
- Tutorial Type Dioramas, Gaming Scenery
Hi Everyone!
This time we’ll see how to use some of my Cobblestone Tiles, mainly used for roads but also suitable for flooring – like in this case.
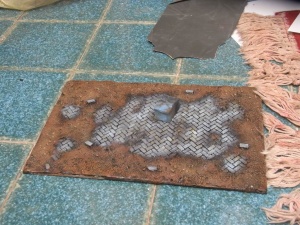
I cast some of them in plaster rather than resin, since for broken pieces has a more realistic look. Actually, it was the first cast of the mould, so i wanted to “clean” it with some plaster, and also to see if there are some imperfections. I used plaster of paris for this work, and i’m not really happy of the result: many bubbles and holes. As a personal note, avoid is when possible. I had some pieces that were ok, others went broken out of the mould, and I used them for the edges of the ruined floor.
Now, let’s start with the tutorial!
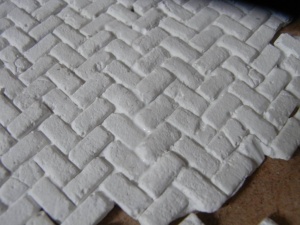
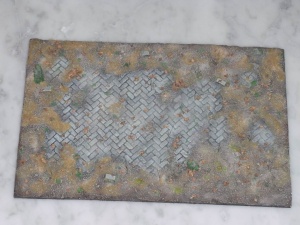
The pavementation was meant to cover only the central area, so all the undamaged pieces went there while the broken parts were used to create a rounder shape. Clearly, the resin casts work much better and better hold the details of the sculpt. To glue them on the MDF board i used PVA glue, which is also useful to fill the relatively small gaps between the panels.
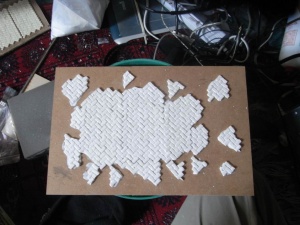
Then i used some foamboard to bring the remaining part at the same level of the stones – or even higher!
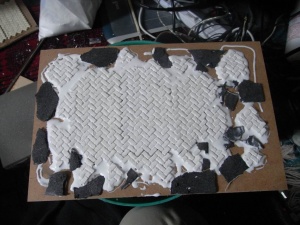
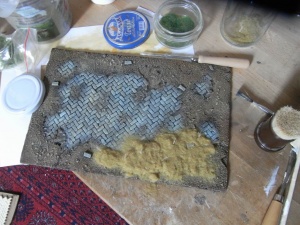
Here you see the PVA filler between the two pieces. After drying much of it will move back in the gap, but it will hide the joint.
Now, time to add some filler. I really don’t like working with filler, but this time I had to – and I didn’t make a great job. Anyway, you can still cut and sand everything that went wrong, after drying!
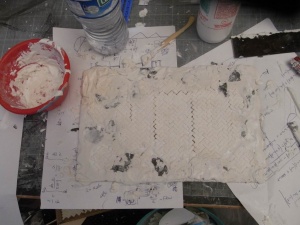
Once dried, I put the whole thing and dip it into the water, to avoid the hydrophiliac problem with the plaster. Then I put the glue for the ground texture.
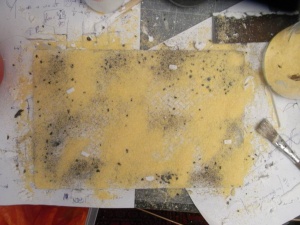
For the texture, I started with some small rocks, followed by sand (simple sand, I took it on the seaside) and then corn flour (ready Polenta!) At the end everything looked like… a two minutes work with Paint.
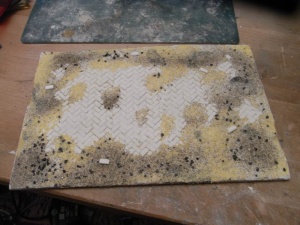
Once dried, it looked a bit less messy.
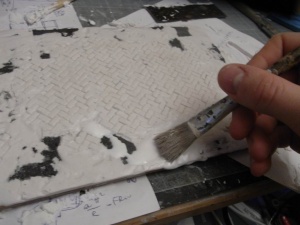
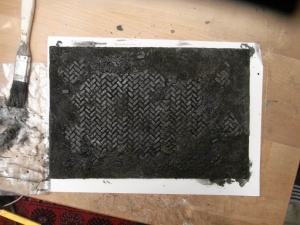
So i primered it with some layers of Carbon Black.
Let’s use the sponge now! Starting from dark brown to Ocra, maybe a tip of yellow inside. Then some much lighter drybrush, very delicate.
Then I applied some PVA glue using my fingers on small patches all around the ground area, followed by autumn coloured static grass.
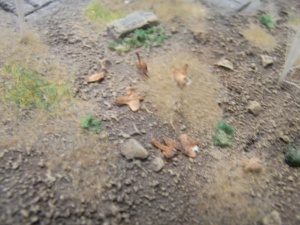
To complete the vegetation, some greener turfs and some tufts of grass i made using the bristles from an old brush, as well as some birch seed leaves.
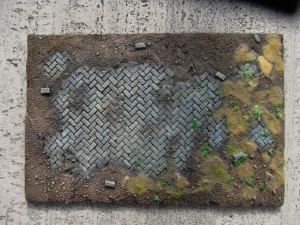
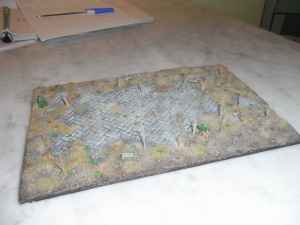
Here is the final result! I added some pigments on it to give a more dusty look, which is something new to me, and probably ruined more than what improved. Nonetheless, here it is!
Cheers,
The Lazy One