Step by step Berlin building base
- Tutorial Type Dioramas
This time we’ll see a Step-to-Step tutorial for the making of a display base for my 15mm Berlin Building which I painted a while ago. It was meant to be a square base all around the building, with a walking path made with cobblestone. The base is made with a styrene foam, and some sanding paper for the texture of the street.
now, let’s start!
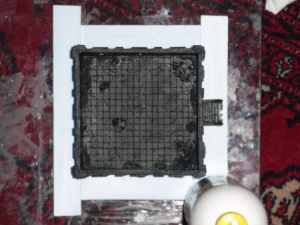
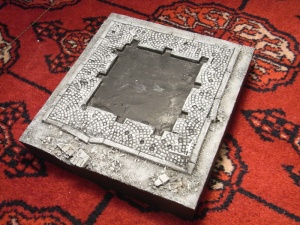
at the beginning i started cutting a square piece of 4cm thick styrene board. It will be used as base, and his borders will be painted black, giving a sort of frame around the model.
The upper surface is flat, but you can also cut or press it to give different shapes.

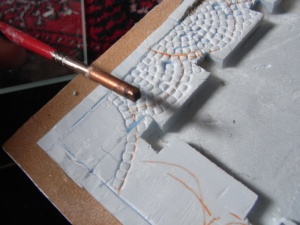
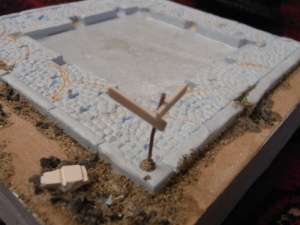
Then I took four strips of the same styrene foam, and i glued them together to make the cobblestone sidewalk.
after dry i cutted them to make the round shaped corner.
Using a special tool that I built following the inspiration from Emmanuel Nouaillier, I carved a “peacock tail” pattern with square stones all around the house. i did it fast, leaving the corner blank, to represent some bigger stones.
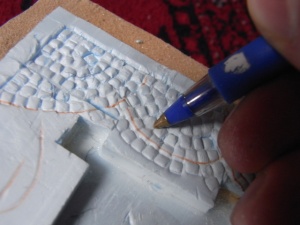
Then with a empty ball pen i insisted exasperating the rifts, until i was satisfied by the result.
There is no a real limit to it, you can decide to only “suggest” the shapes or to carve them until the end – actually it is called cutting.
All depends on the way you paint it. Since i’m a Quite bad painter i tried to make the lines quite deep, to make it easier as possible… 🙂
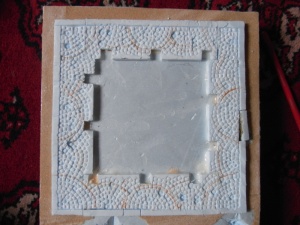
…and that’s the final result!
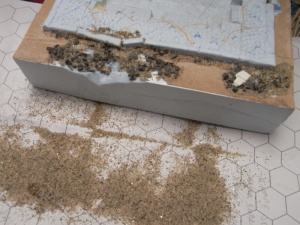
As you can see i’ve glued below the sidewalk a fine sanding paper. it is a really nice solution for city streets, since the sand+glue method is not enought flat and homogeneous.
Of course you’ll have to add some sand on it, or rubble all around… as I did:
And I also added a crater on a edge. I found it was a nice thing to show in section the crater, with rubble and stuff inside. no sanding paper around the hole, just sand. Irregularity is quite normal around an explosion, after all.
I added also a Sign for the road names. Nice to see but Really Bad to carry around: now i think it is lost in some packages or bag…
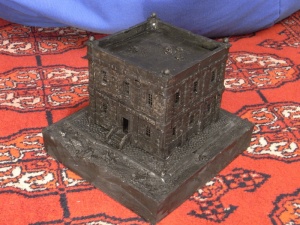
Primed all black (brush paint, since the styrene is stupid and doesn’t hold spray paint >.<), with the berlin building on it!
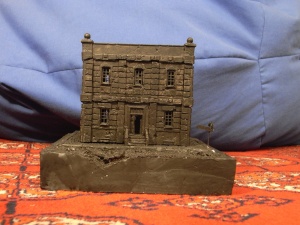
Then the painting: as I said i’m not a really good painter, so i used only some spongework and many layers of drybrush, from grey to white with a passage of brown (it is ground, afterall).
I added some yellow static grass, to give the impression of the time passed… that’s the final result!
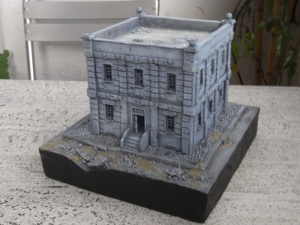
Conclusions: it was the first diorama i sculpted and painted, so i’m rather happy with the result. now i learned many things that could be used for the next work, and i hope that it will be useful also to you!
The Lazy One