The Sacred Tree
- Tutorial Type Gaming Scenery, Techniques
Hello Everyone!
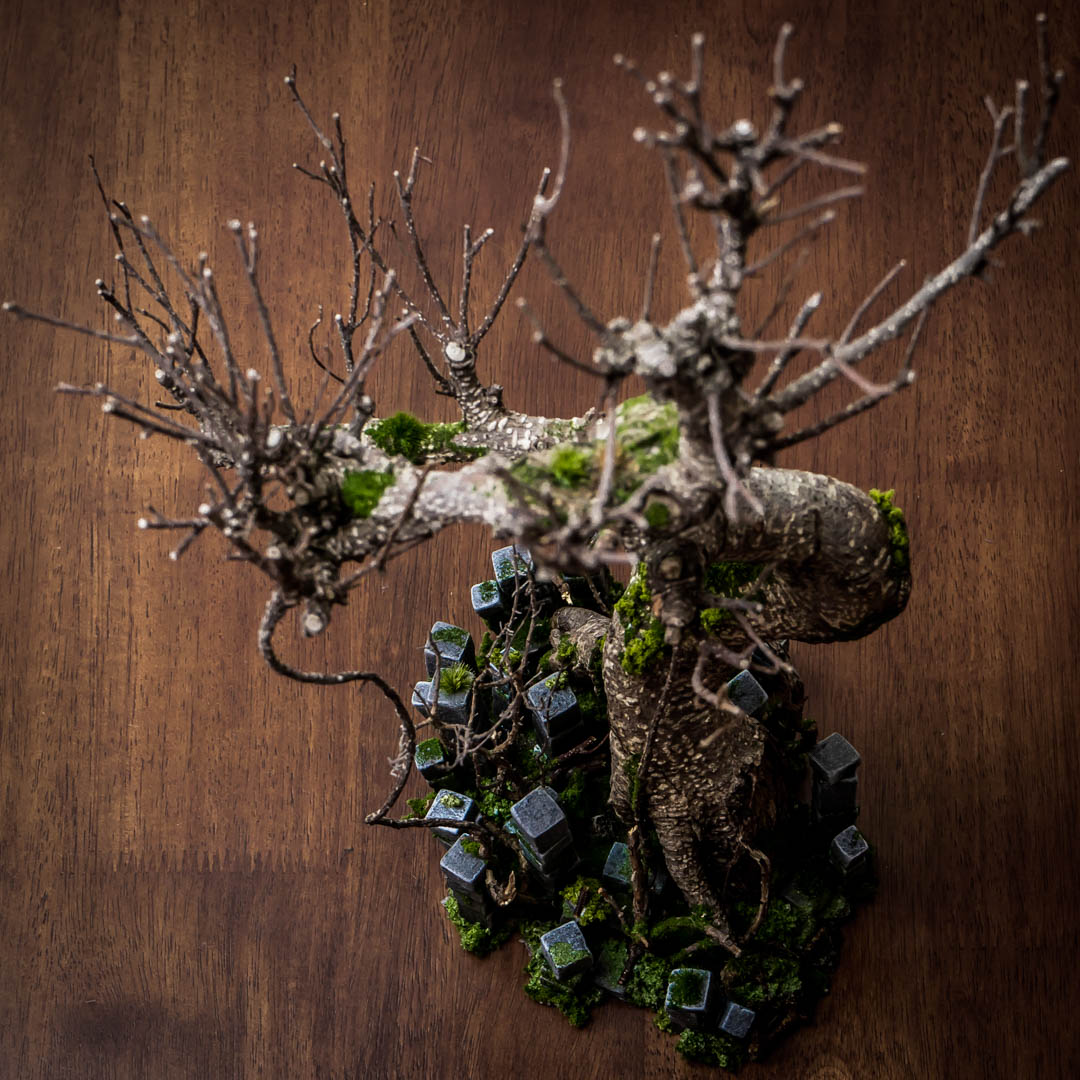
I’ve been gifted a dead bonsai from a friend (i know: the best!) a while ago, and since then I was looking for a proper concept to build a terrain piece around. Next week’s Round of Fire game was the perfect excuse, and a sacred tree to blend with my dead forest looked like the best option.
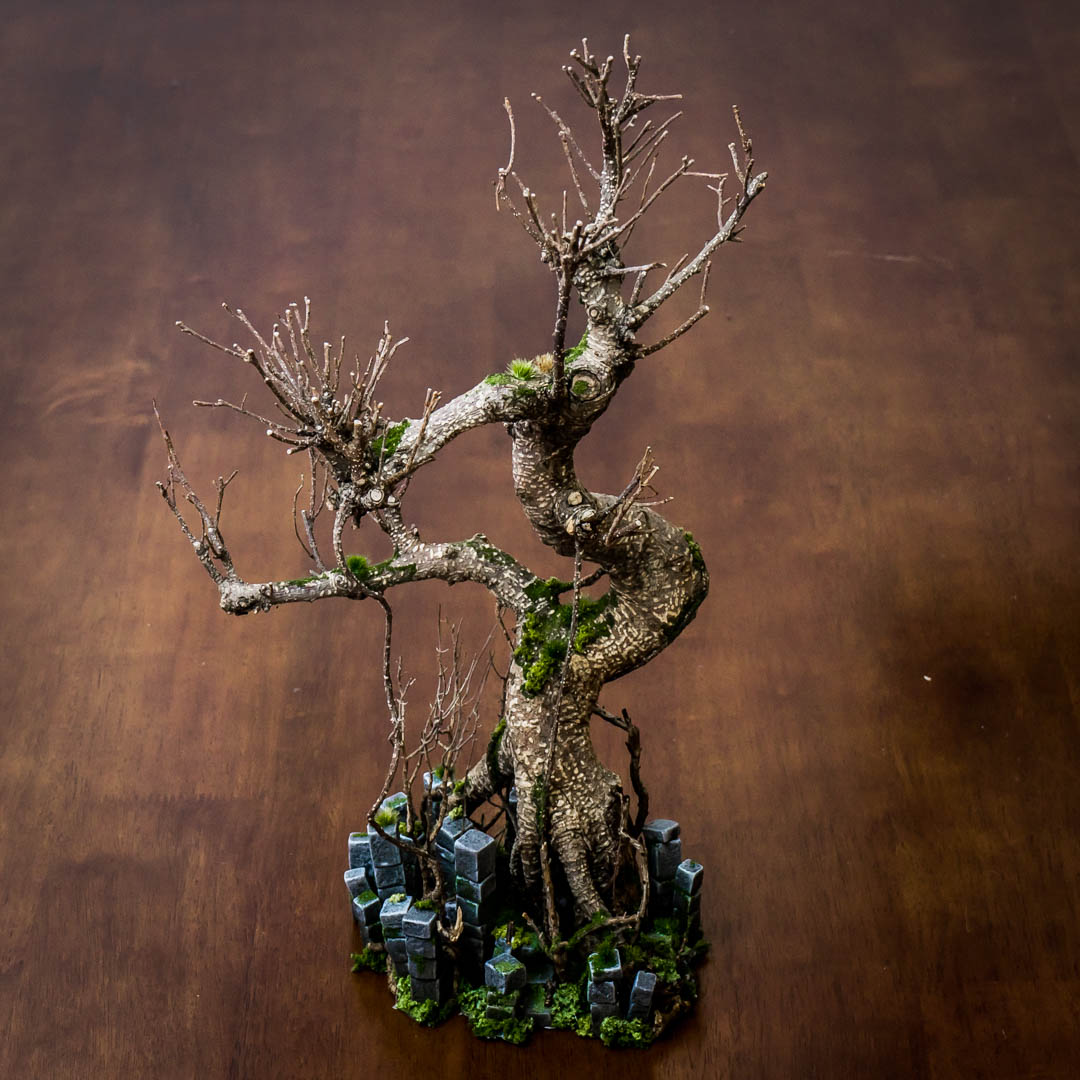
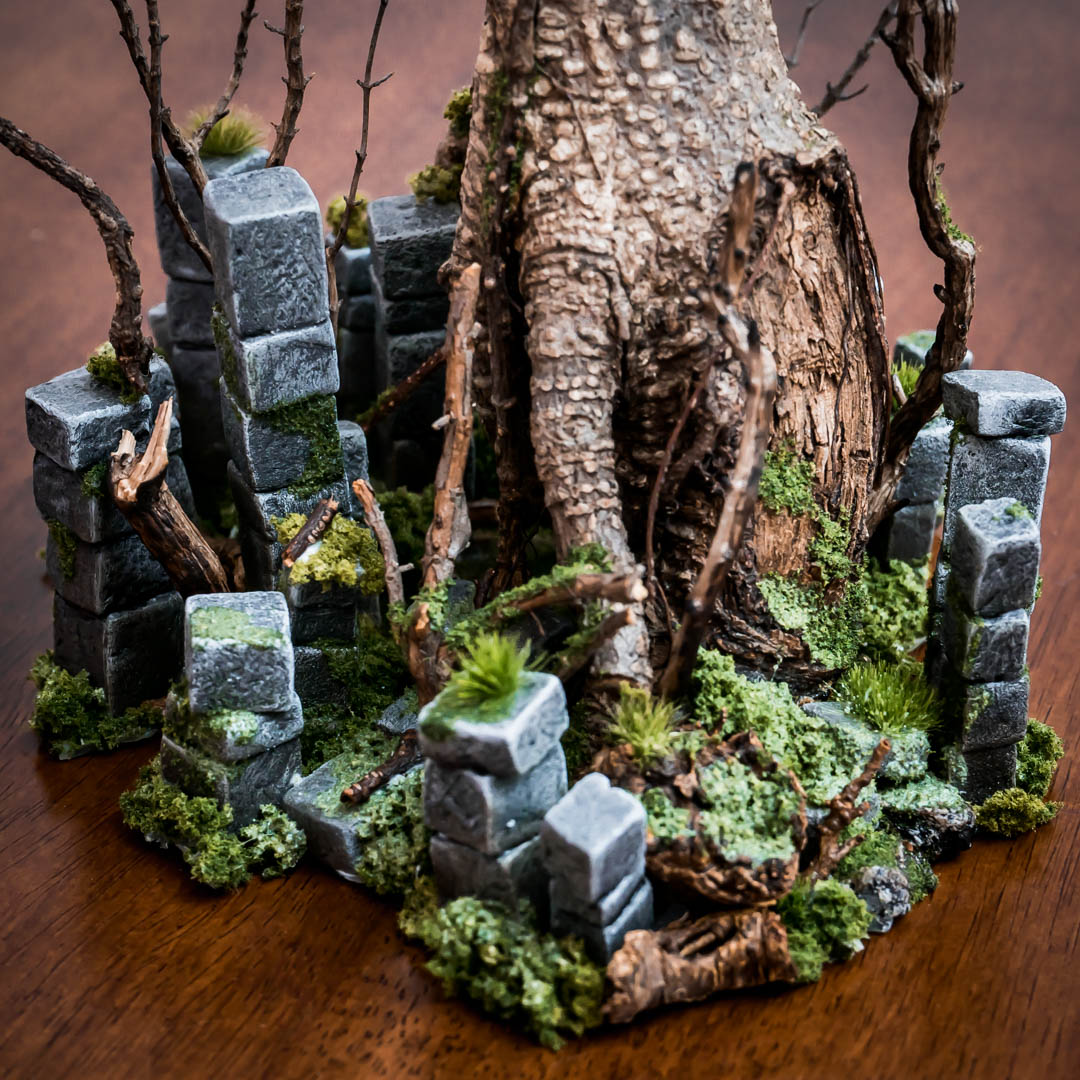
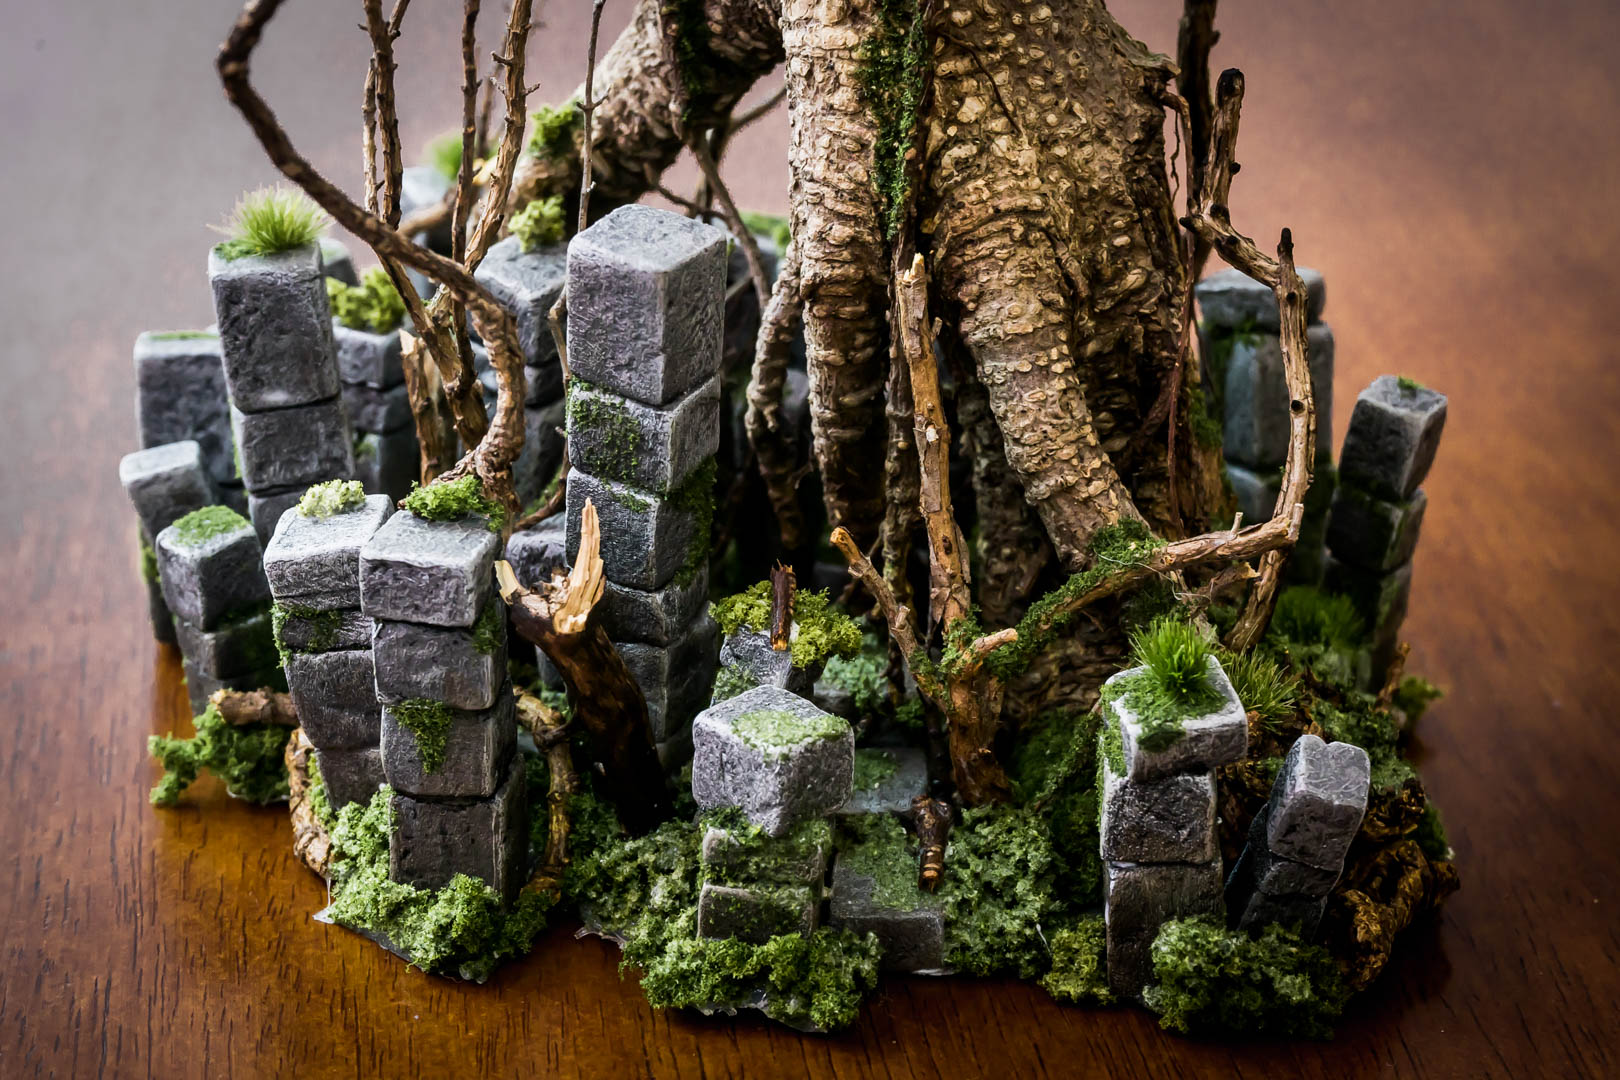
The idea was to surround the tree with sacred lanterns (japanese style), then I felt the lazyness growing and I settled for simpler stone columns, or totems. This allowed to widen the base of the tree for stability, and to hide the plastic base with a multitude of little columns. All in all, the concept was very good and might have deserved more time and more columns. Well, “finished, not perfect”.
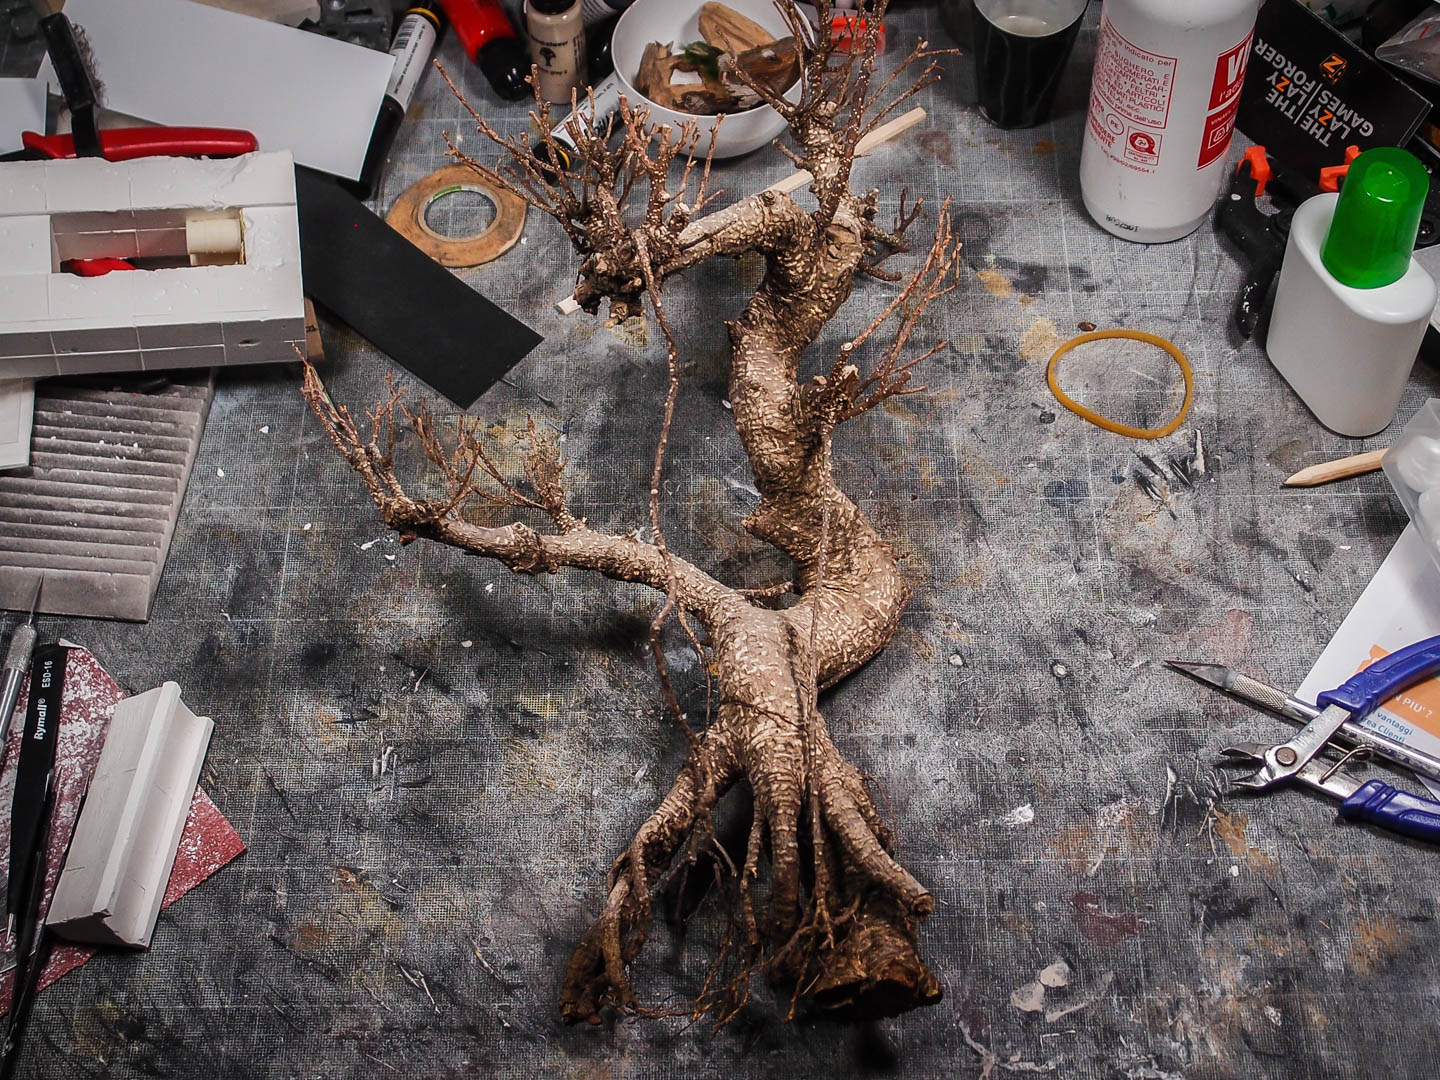
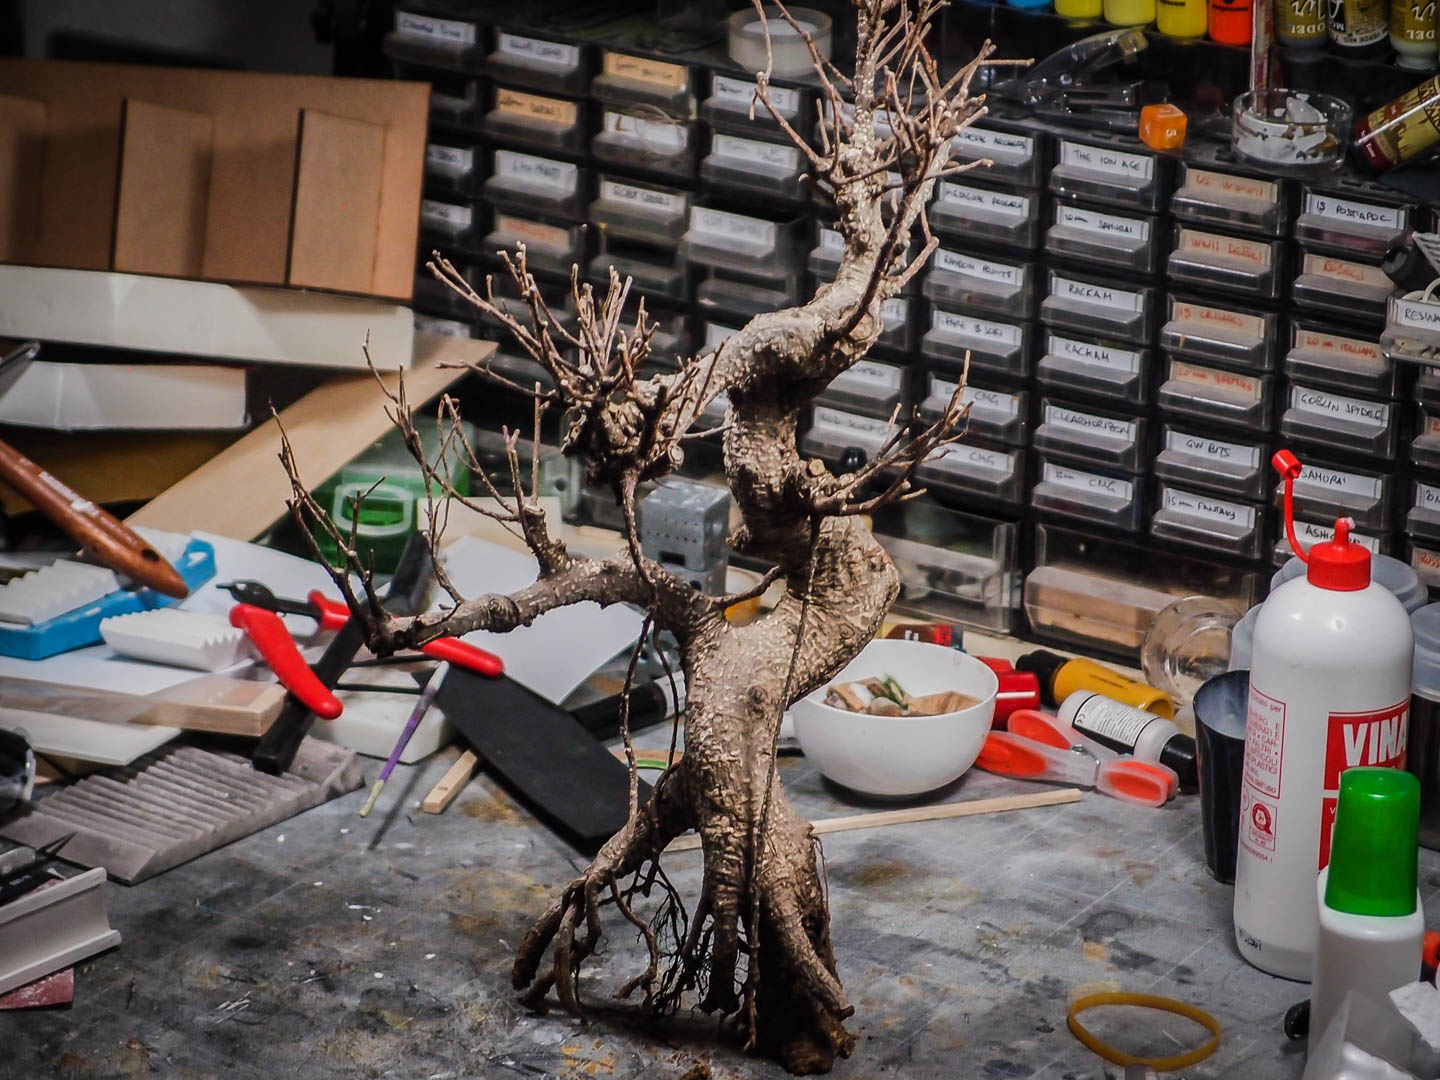
Let’s start with the raw material: dead bonsais are generally twisted and full of protruding roots and vines, so they need little to none prepping work. In my case, i had to saw away part of the bottom.
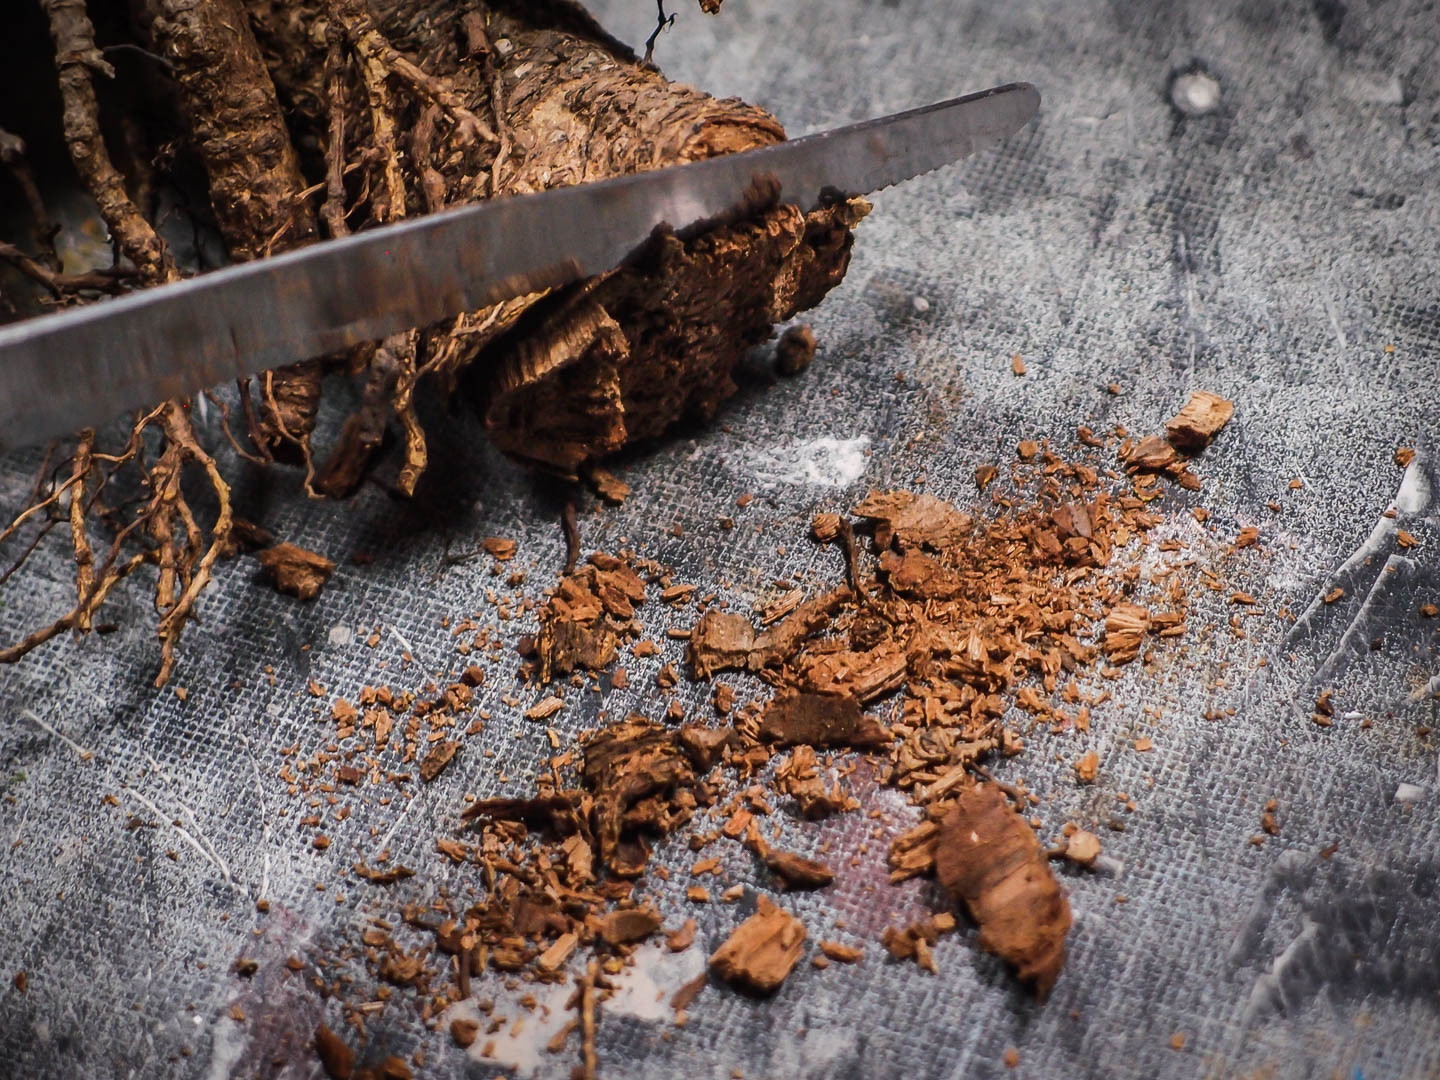
The dead plant was there for a while, and although it’s not rotten, the wood wasn’t solid as well. That did worry me a bit and prompted for additional precautions. With the base leveled out, the tree could now stand on its own. Of course that’s still a fragile balance, but it’s a good starting point to reduce the stress on the base.
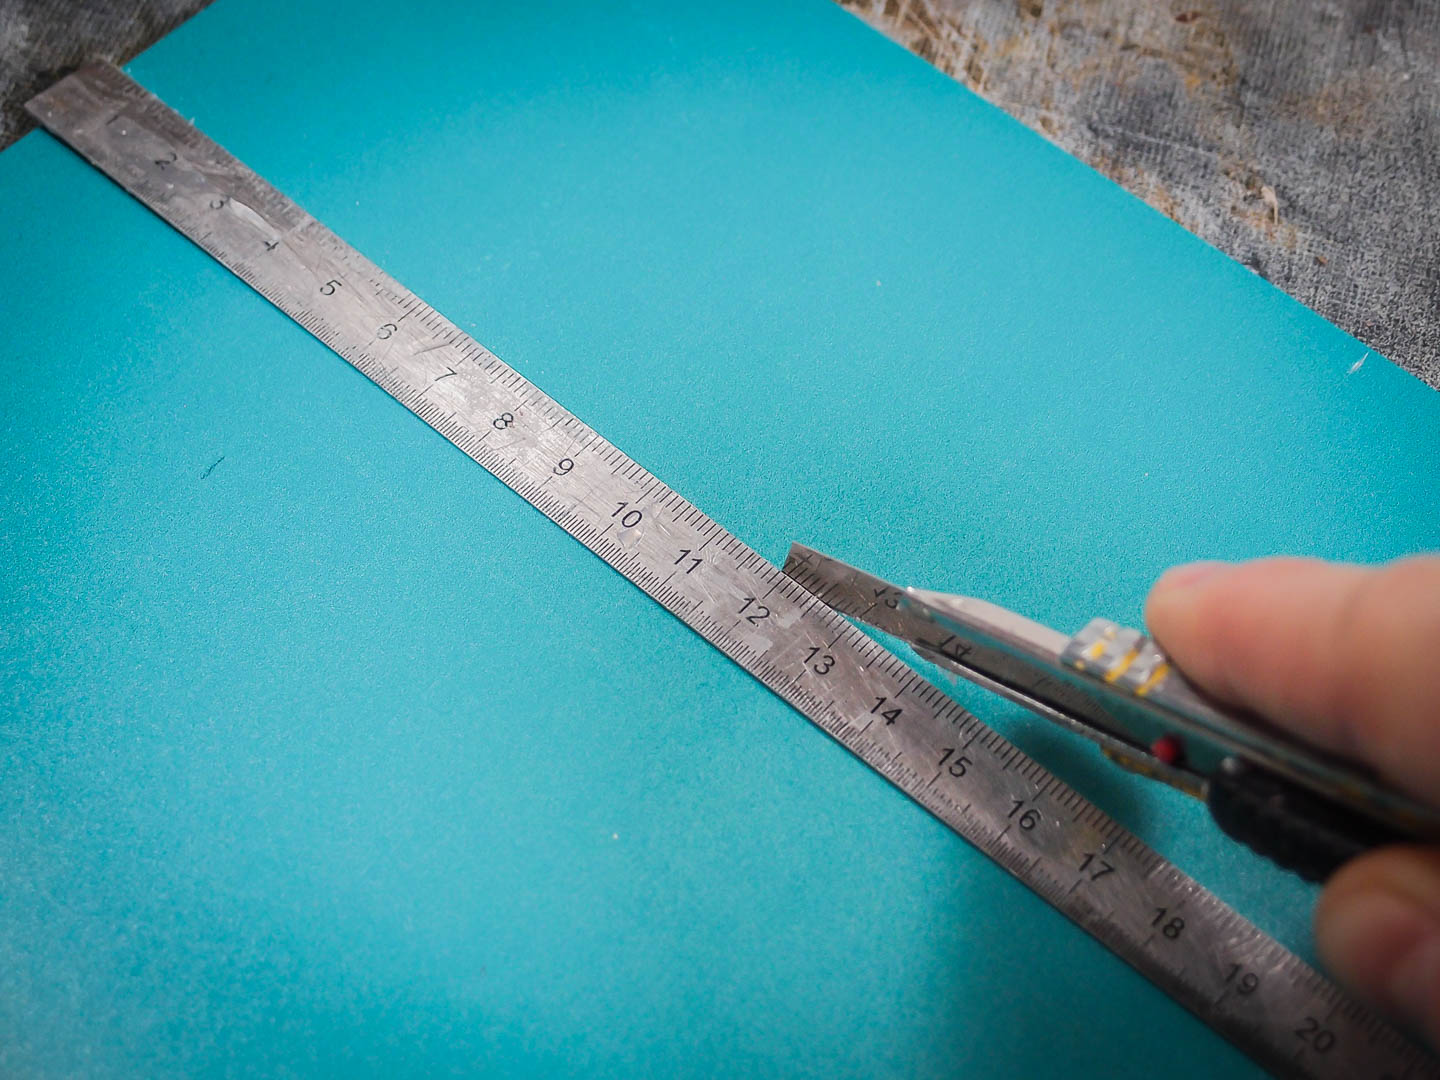
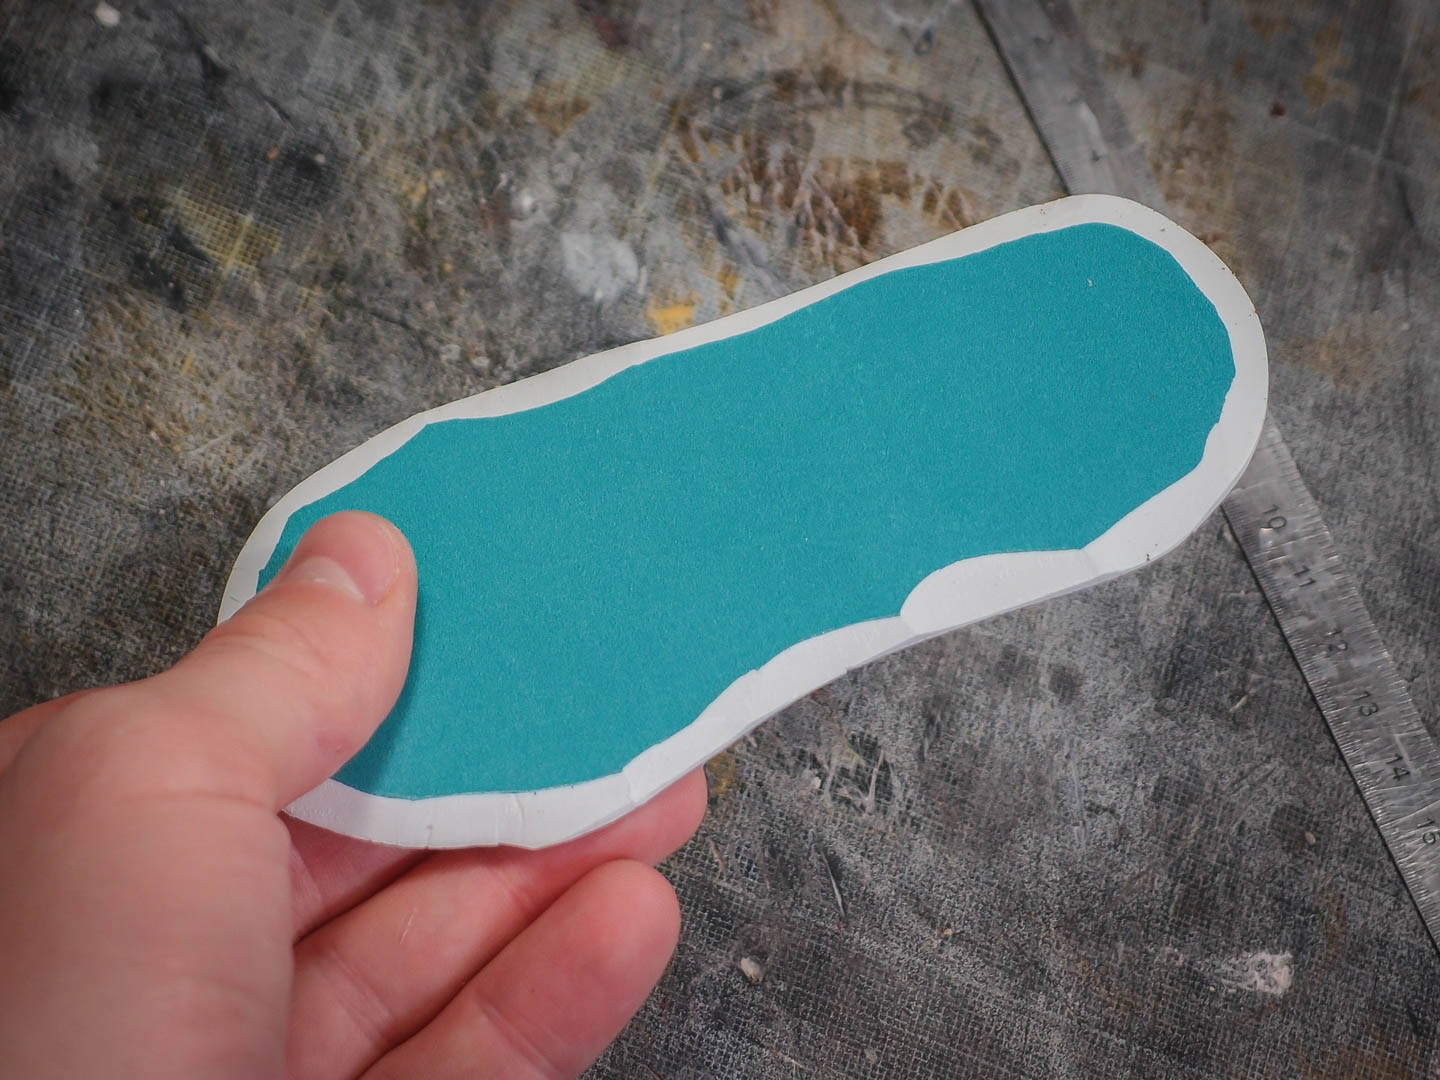
Speaking of the base: I chose to use 3mm thick Forex (extruded PVC). I had some scraps from test photo prints laying around, and it is an easy material to work with. Compared to MDF it doesn’t warp and it should be a little more durable.
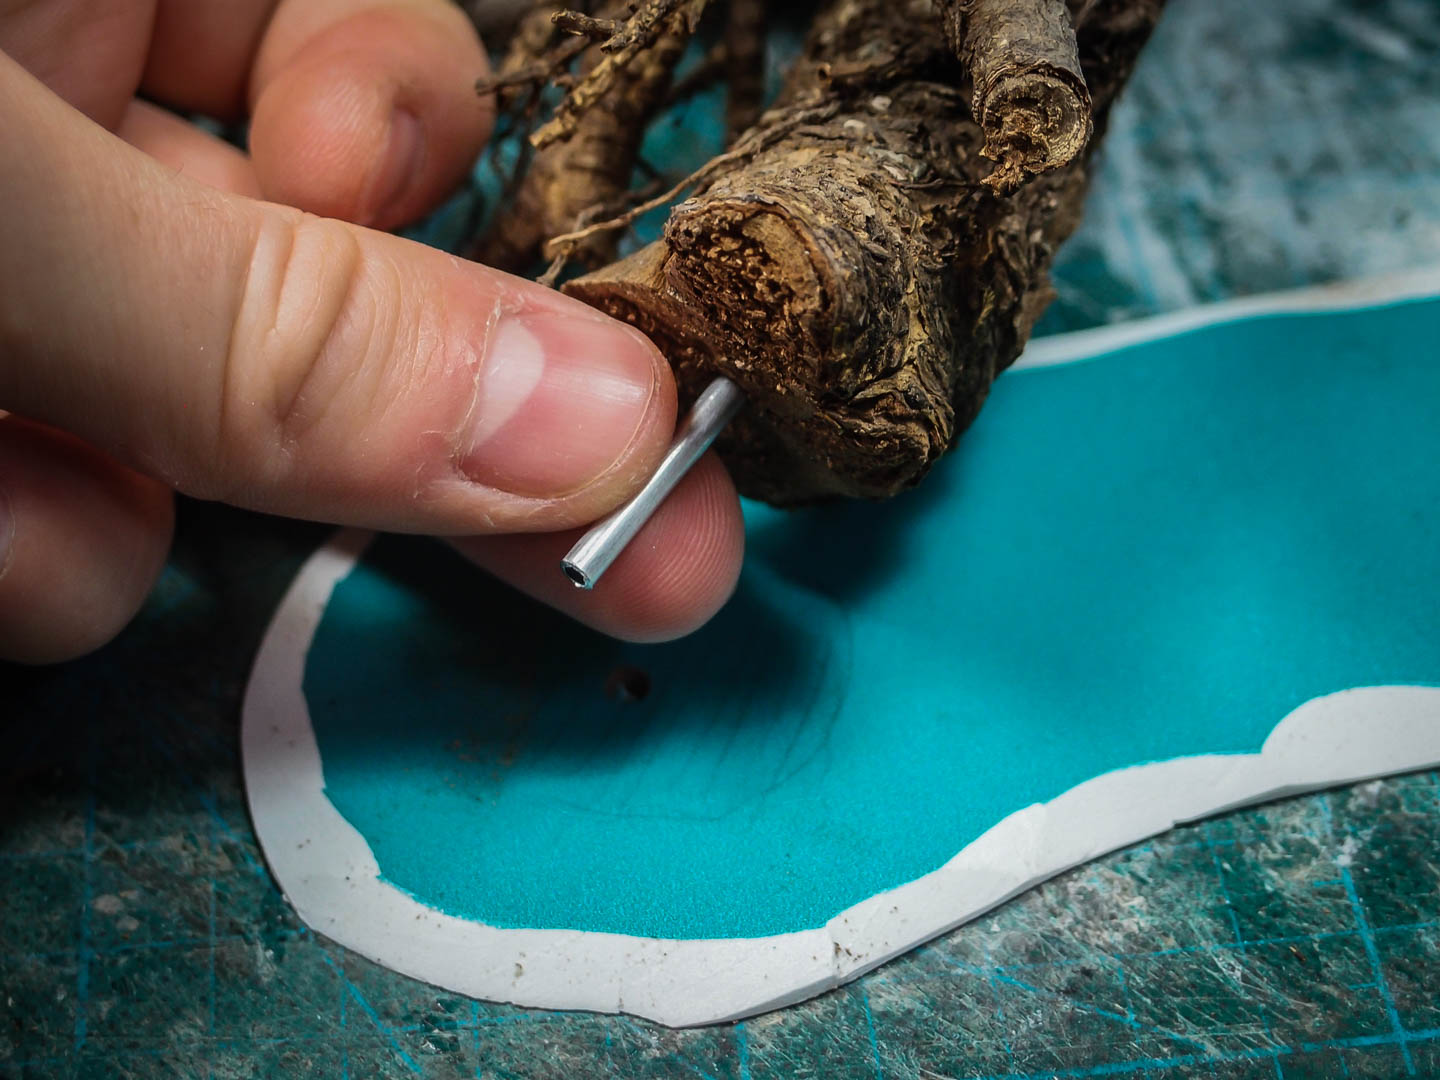
It’s now time for the precautions I mentioned above. A metal rod glued on the base (with a mix of PVA and Cyanacrilic) and going deep into the trunk’s bottom should increase the structural integrity a lot. As long as no gamer will fall hands front on the model, it should be fine.
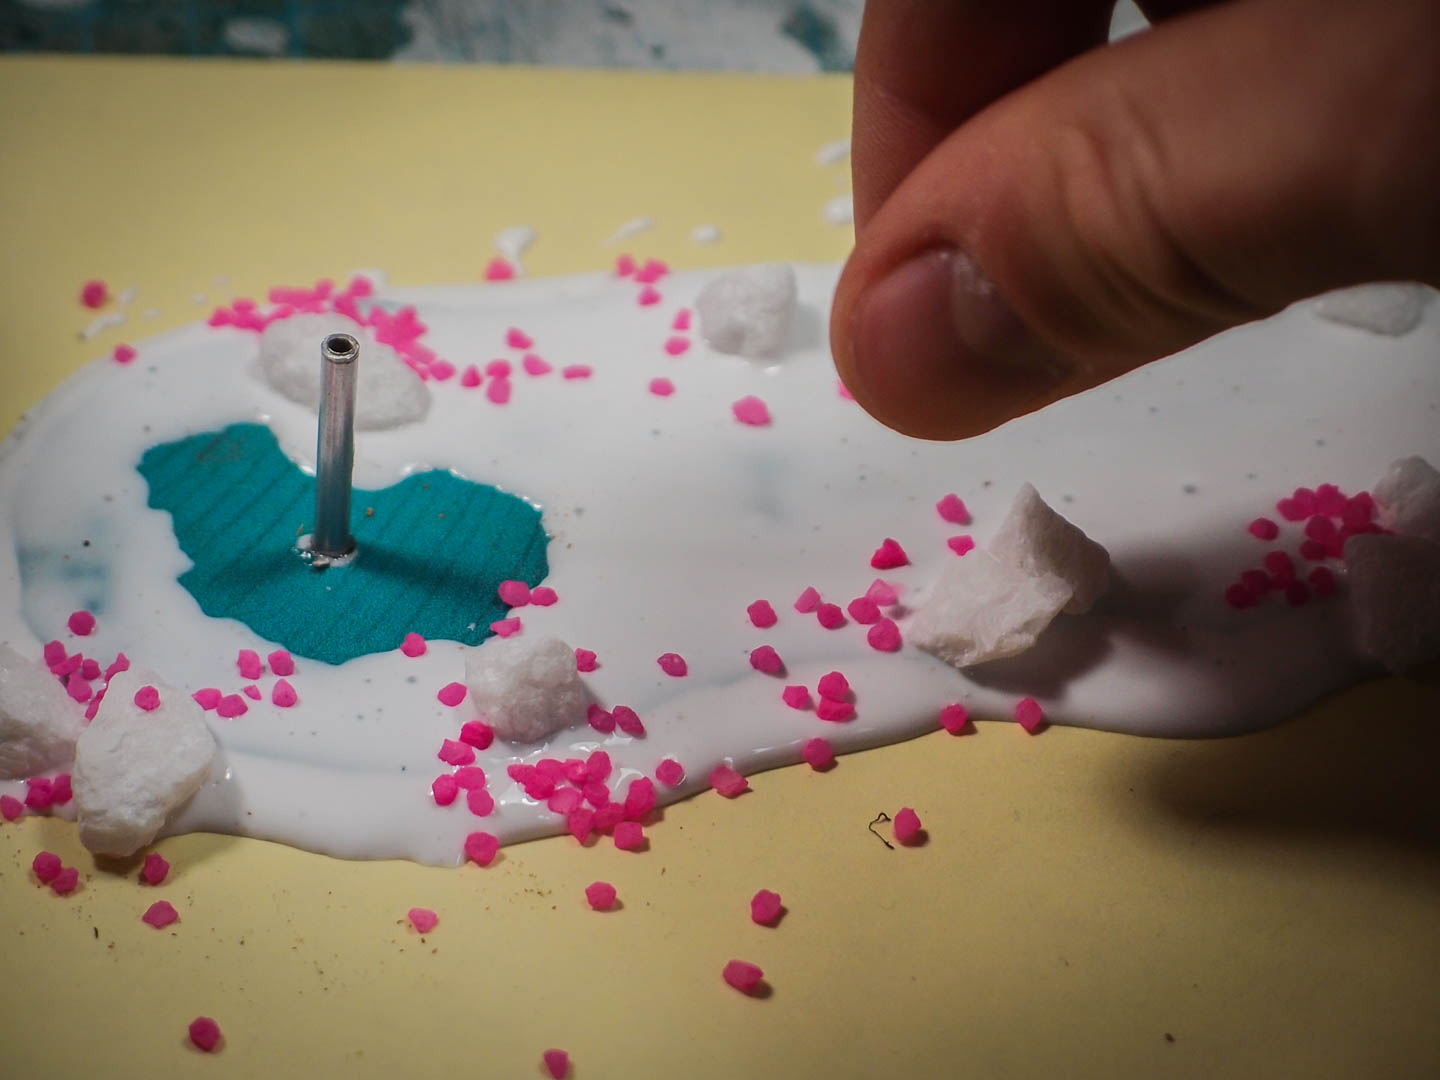
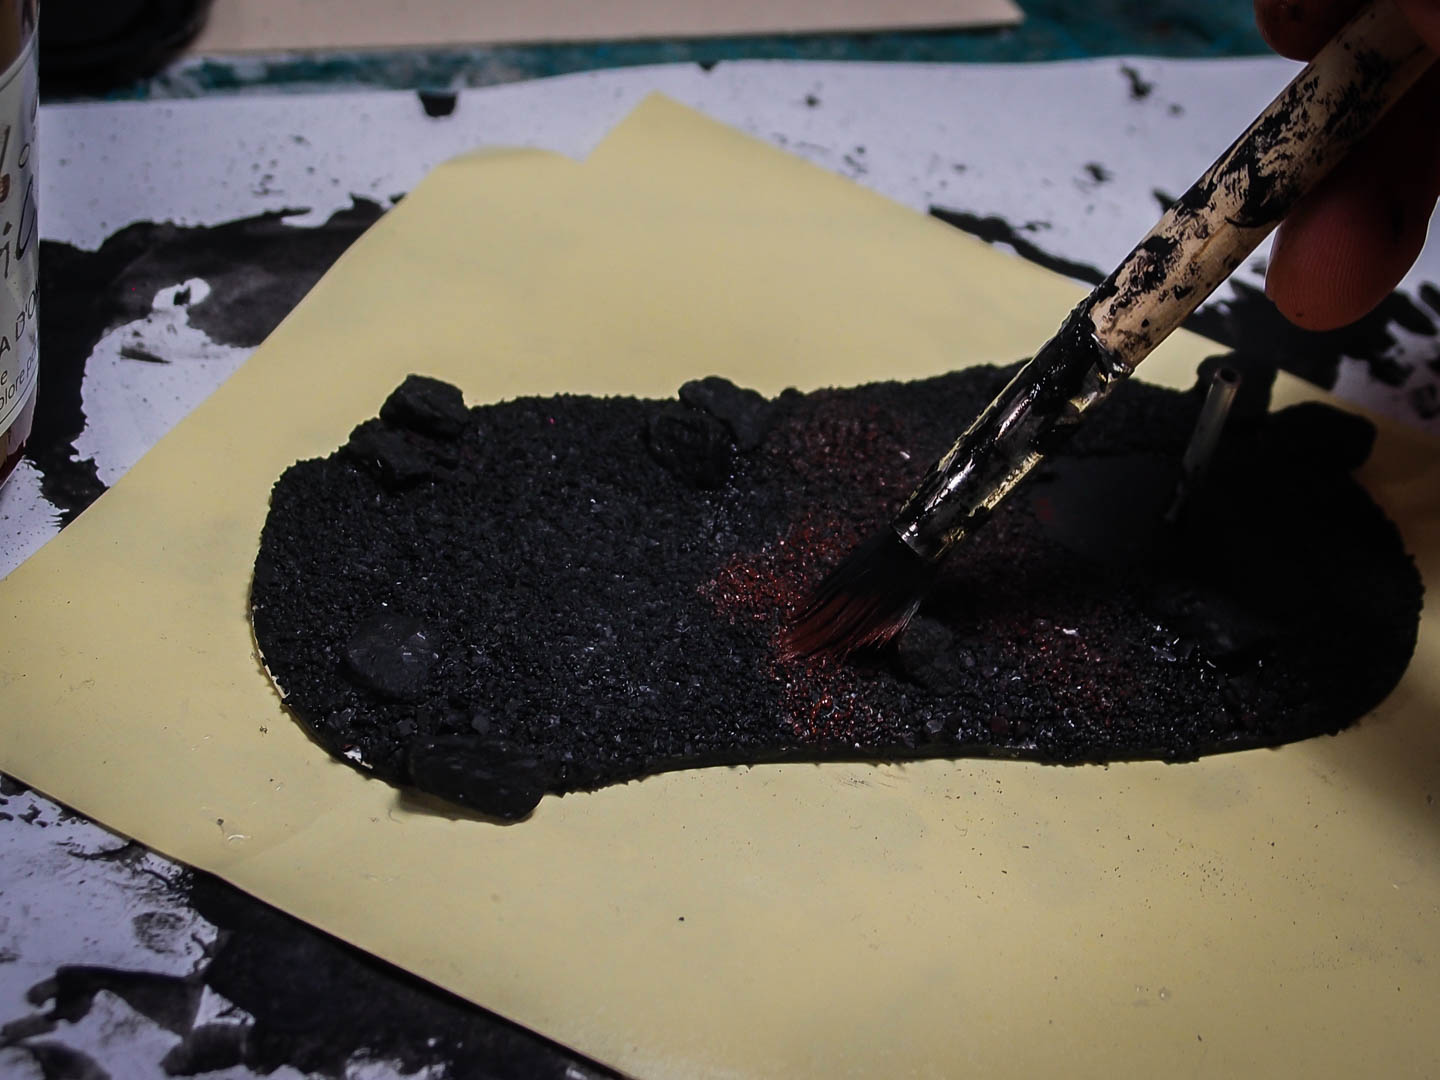
For the texture, I went for old-fashioned PVA glue. The grip is slightly less effective on plastic (even scoring some lines with a cutter on it), but in this case it will end up being almost entirely hidden.

Sprinkling some rocks and sand on it and letting it dry.
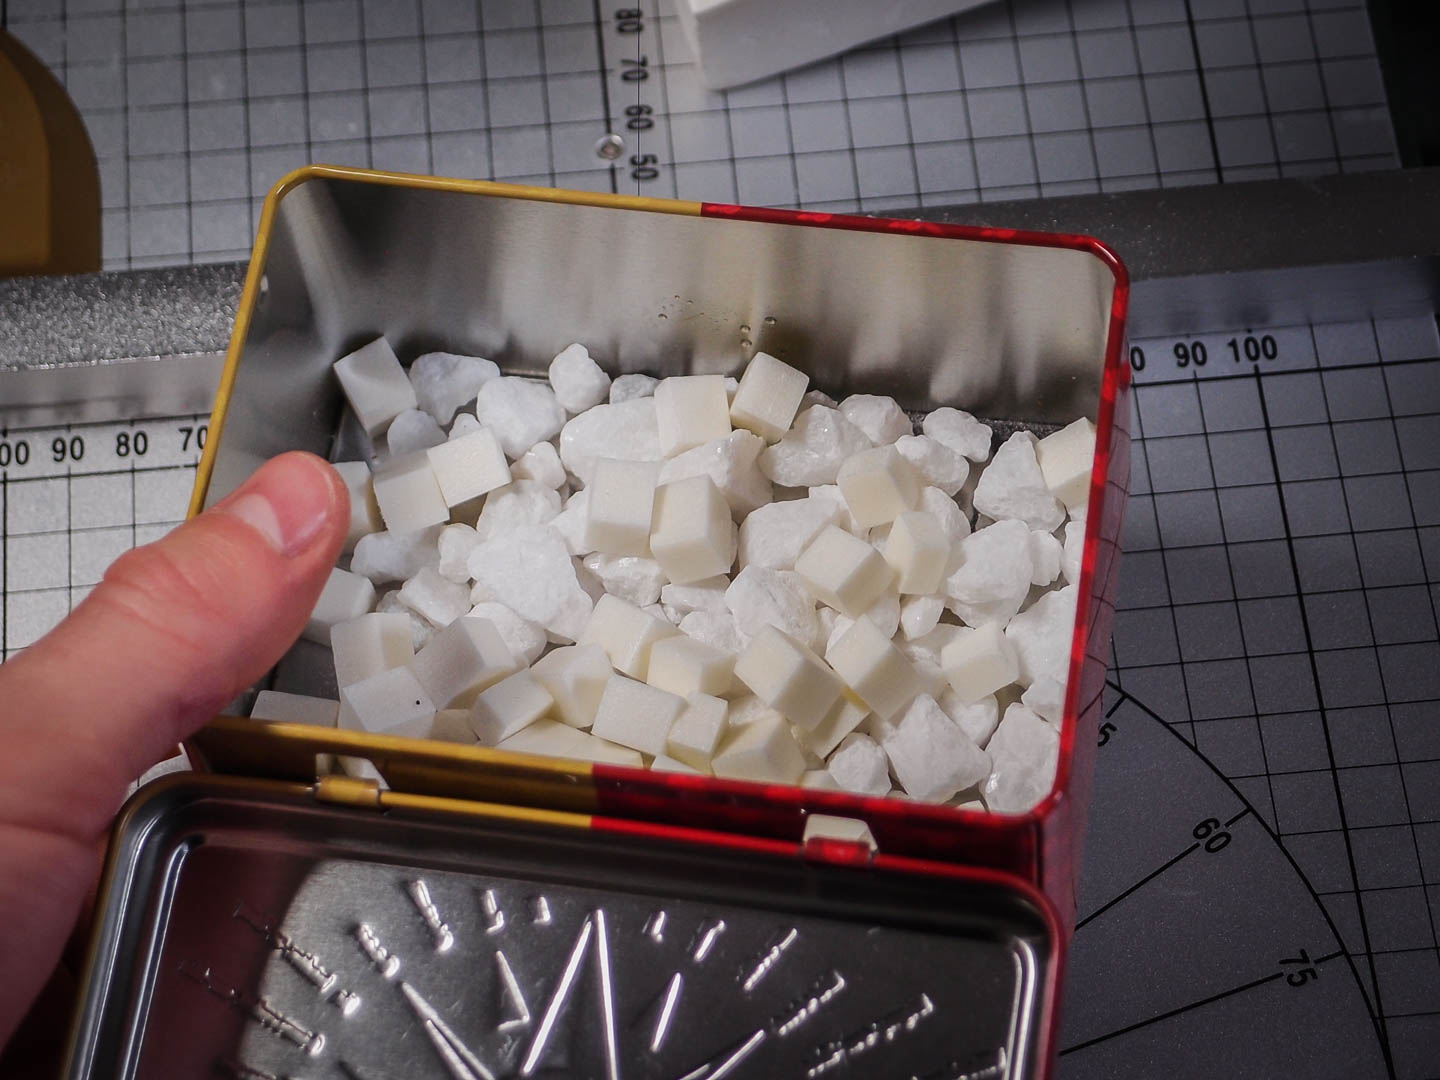
Meanwhile: for the totems, I cut high density styrene foam in suqared-section blocks of various lenght. Two different square sections gave a feeling of a little more variety,

For the weathering, a good solution is shaking the rocks vigorously in a box with small stones. The impacts will dent the surface uniformly. Pushing the mix of stones and foam with your hand adds a few major dents too.
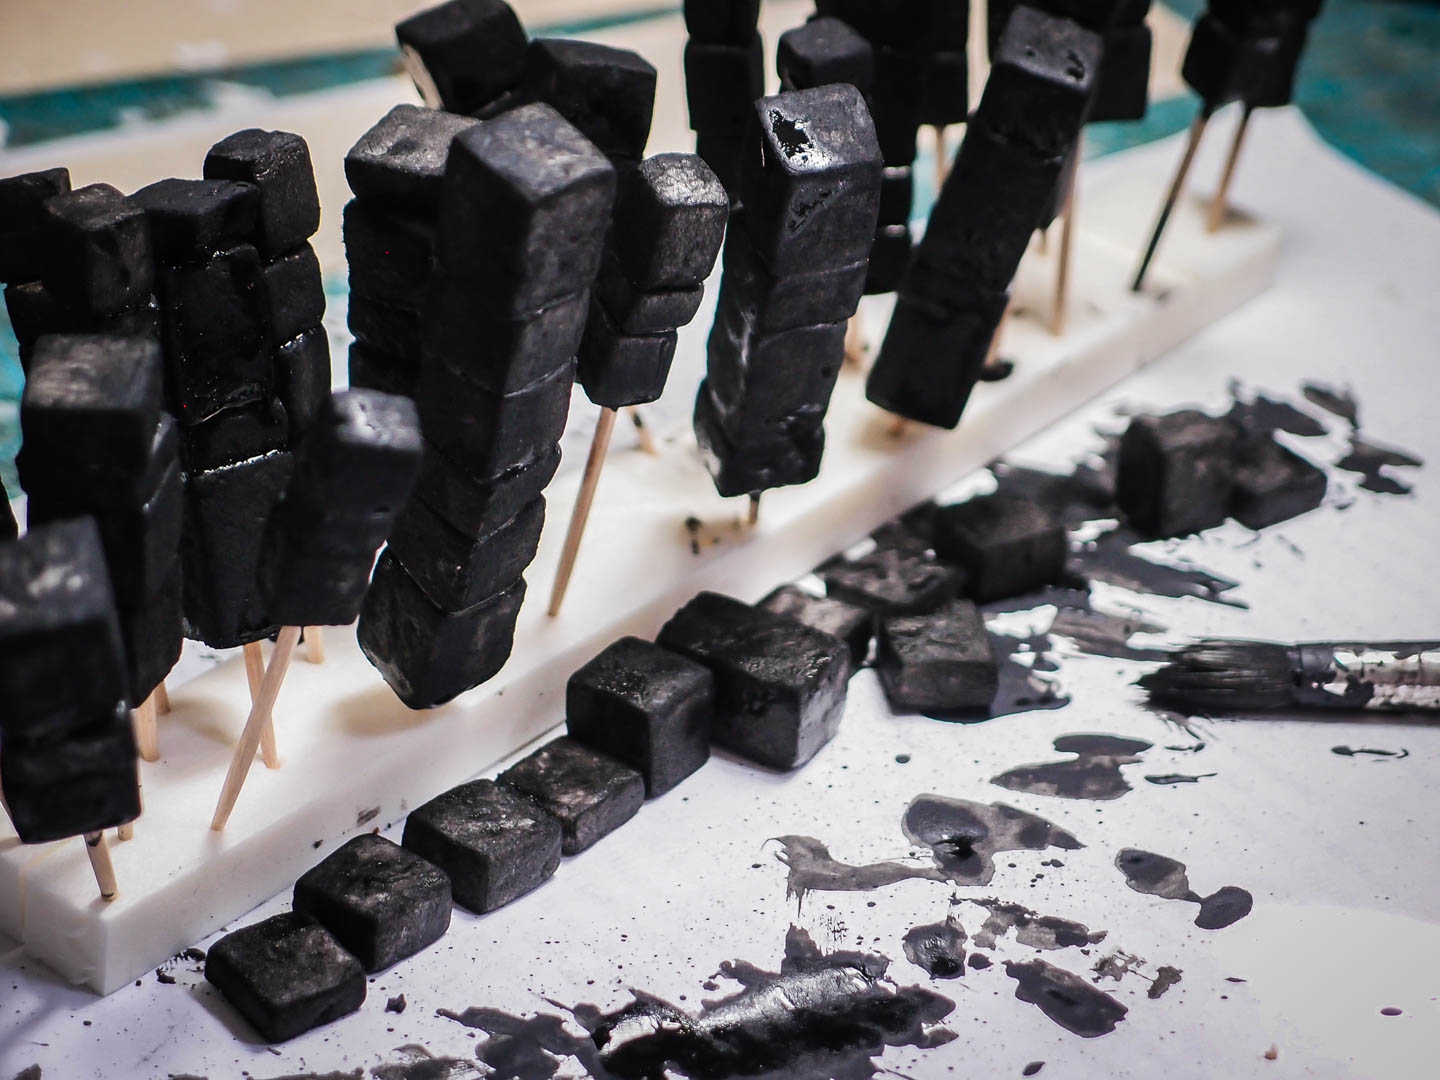
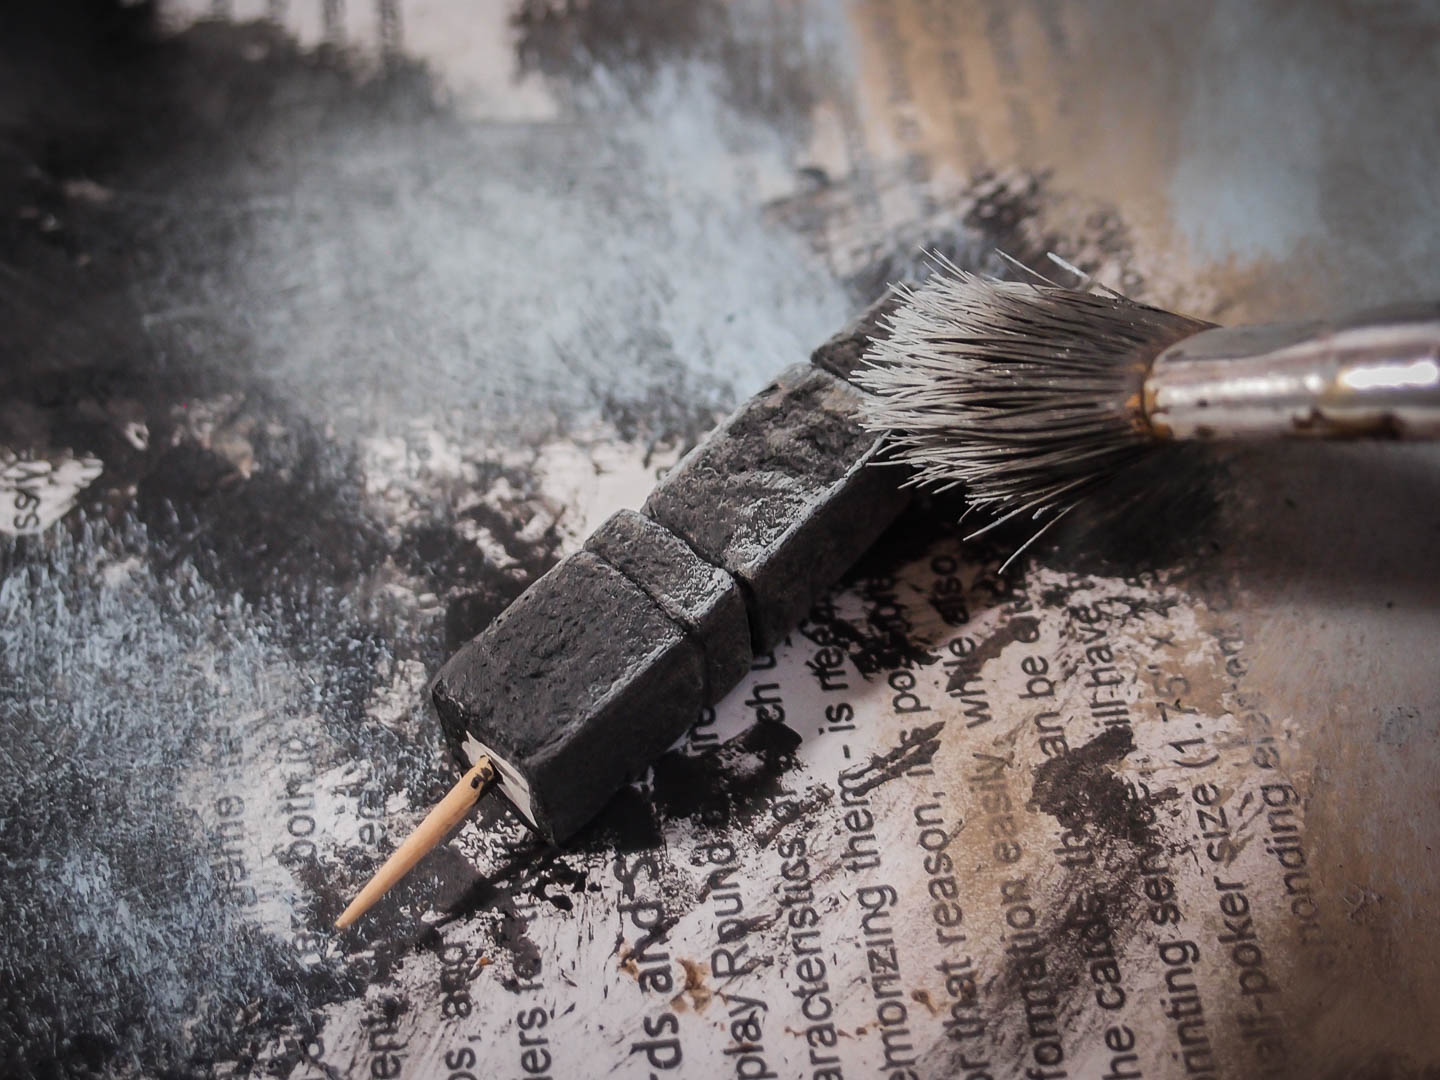
Skewers time! Toothpicks would help the totems to keep the shape while the glue dries, and increase the overall sturdiness of the model. Besides, if someone decides to wreck it, it might find the sharp wooden point hidden in the foam quite unpleasant. Just as a precaution, you know.

A first coat of black is applied, then everything’s left to dry.
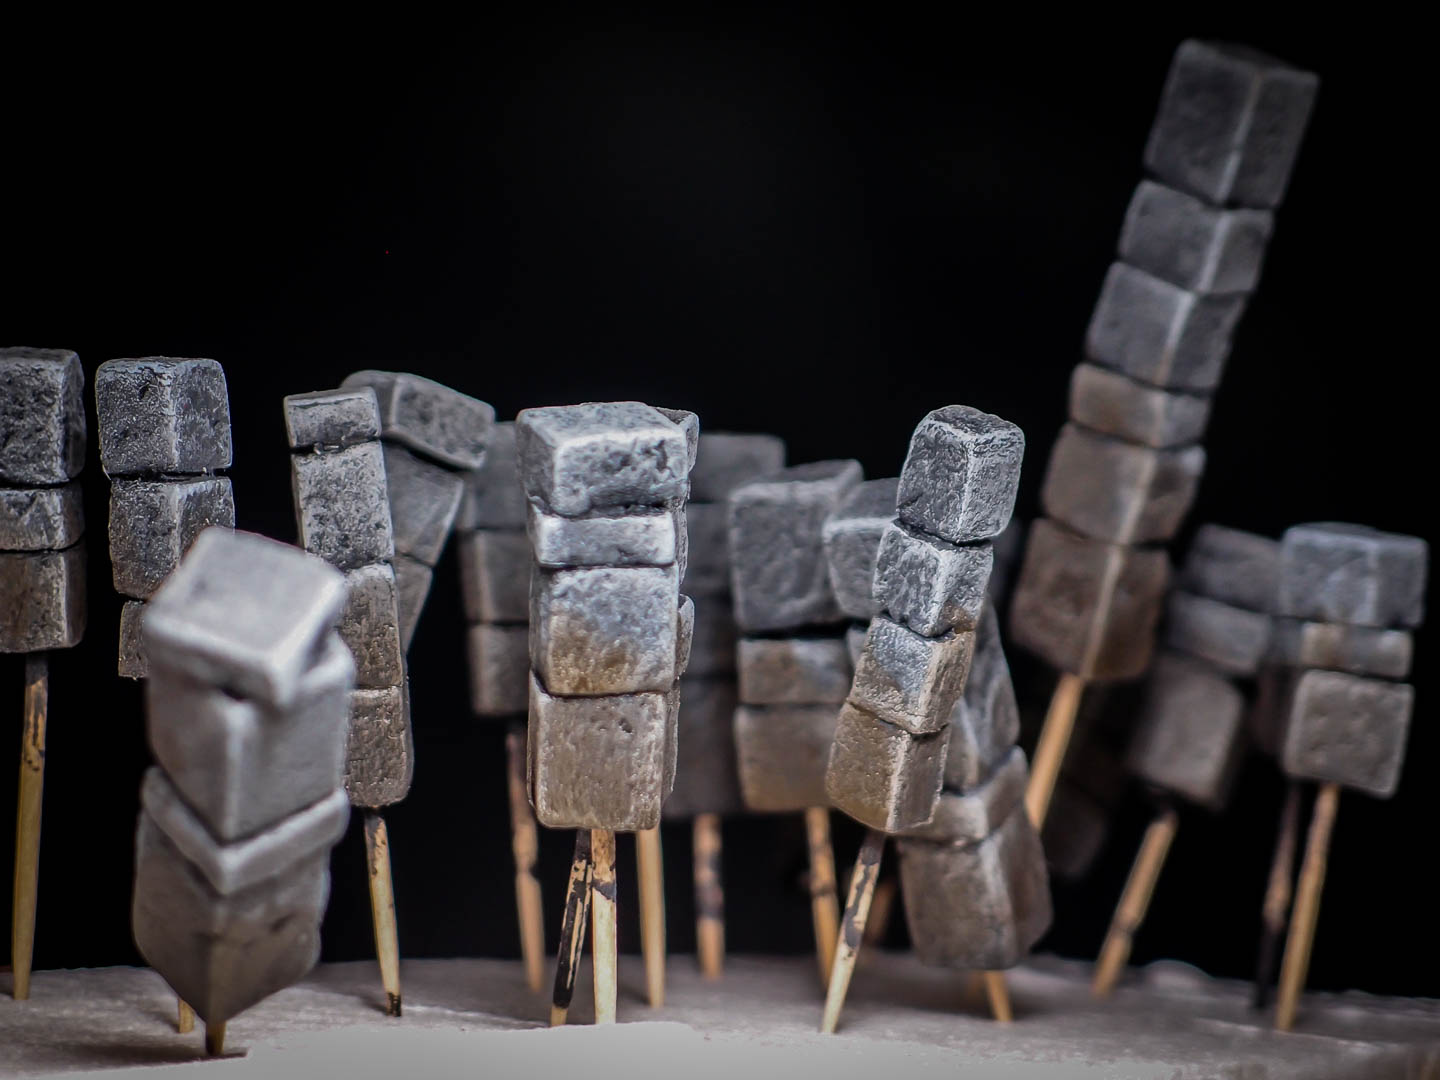
The painting process for the totems is pretty standard: using a warm grey, I dribrushed them with several layers, first mixed with black then with the pure light gray. A final touch with a lighter drybrushing of a light blue to enhance the corners gave them their final look.

Then, to add some color and make them more believable as a part of a forest, I mixed black, brown and green with a tip of floor polish as a flow enhancer. The resulting wash had a muddy look, without looking too much brown.

Once all were dried, they did have a fairly convincing look.
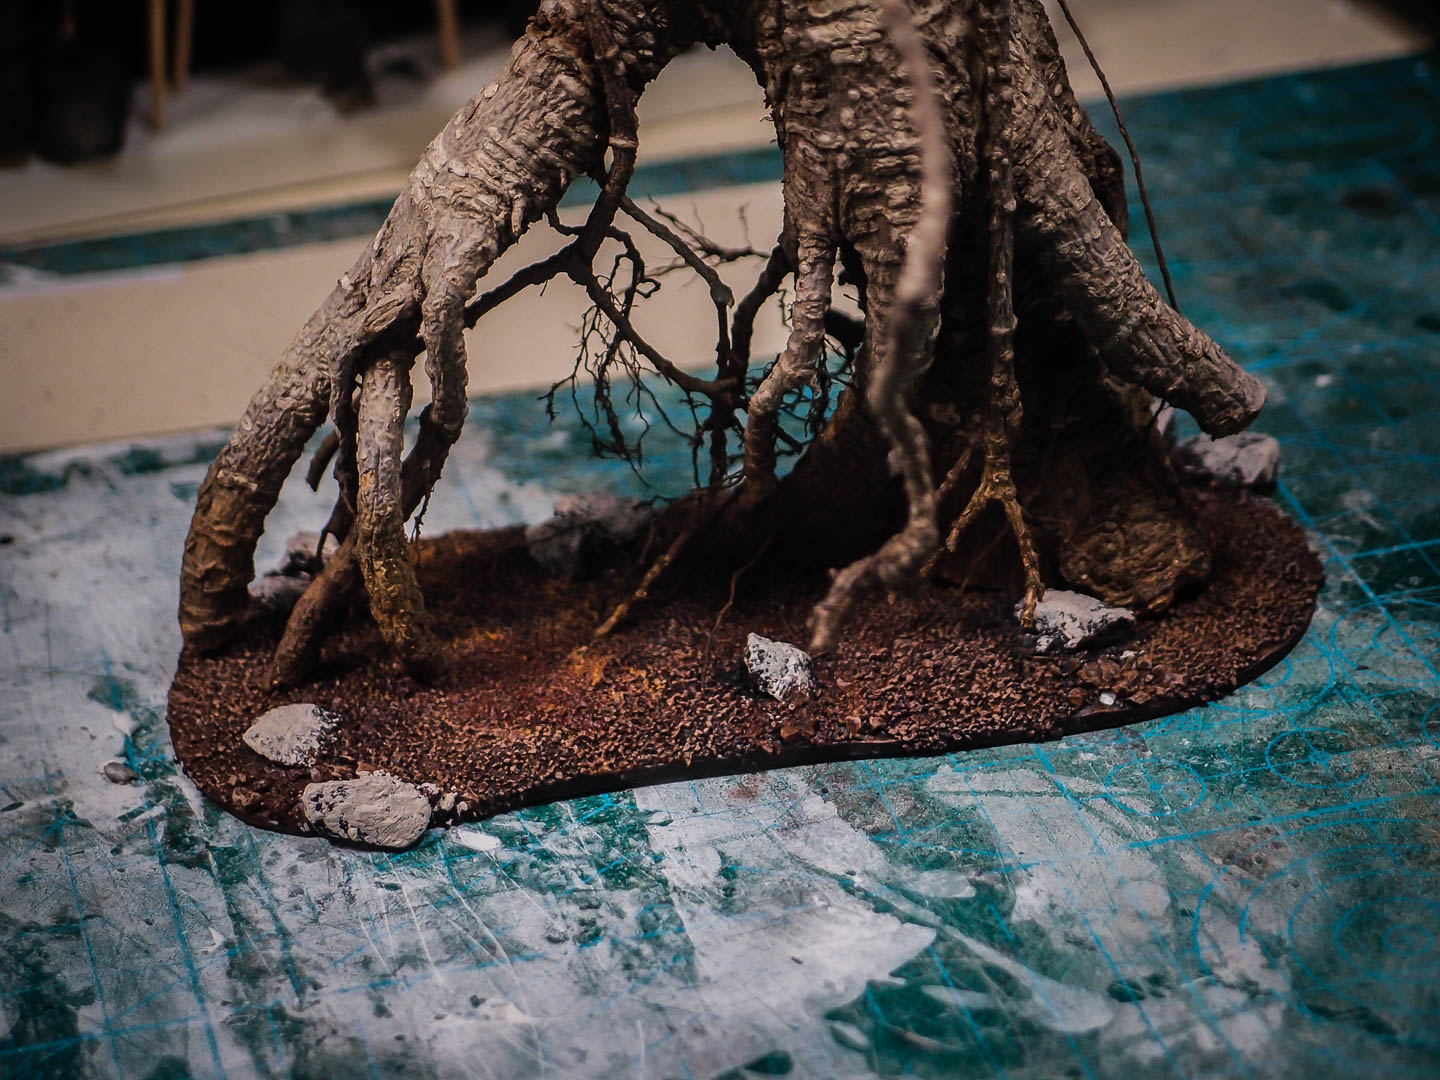
Back to the tree base: as pointed out before, the ground will end up being barely visible at the end, but it still need some paint on it. I tried to emulate the color of the bottom of the tree: brown, and a lot of yellow. The stones were painted grey, then covered in a thick layer of Army Painter’s strong tone wash.
Even without glue, the tree now was fitting well on top of the base. An abundant amount of PVA to fill any gap should fix it on there for good. Gluing the secondary roots in position too will improve the solidity too.
Before Assembling the whole base surroundings, I started by adding a few stones and details on the ground. The clump foliage works well as bushes, and can be applied directly over the hot glue. I generally am not a fan of hot glue, but for clump foliage it IS the way to go. Surprisingly, the totems seemed to react well to the glue as well, without melting away.
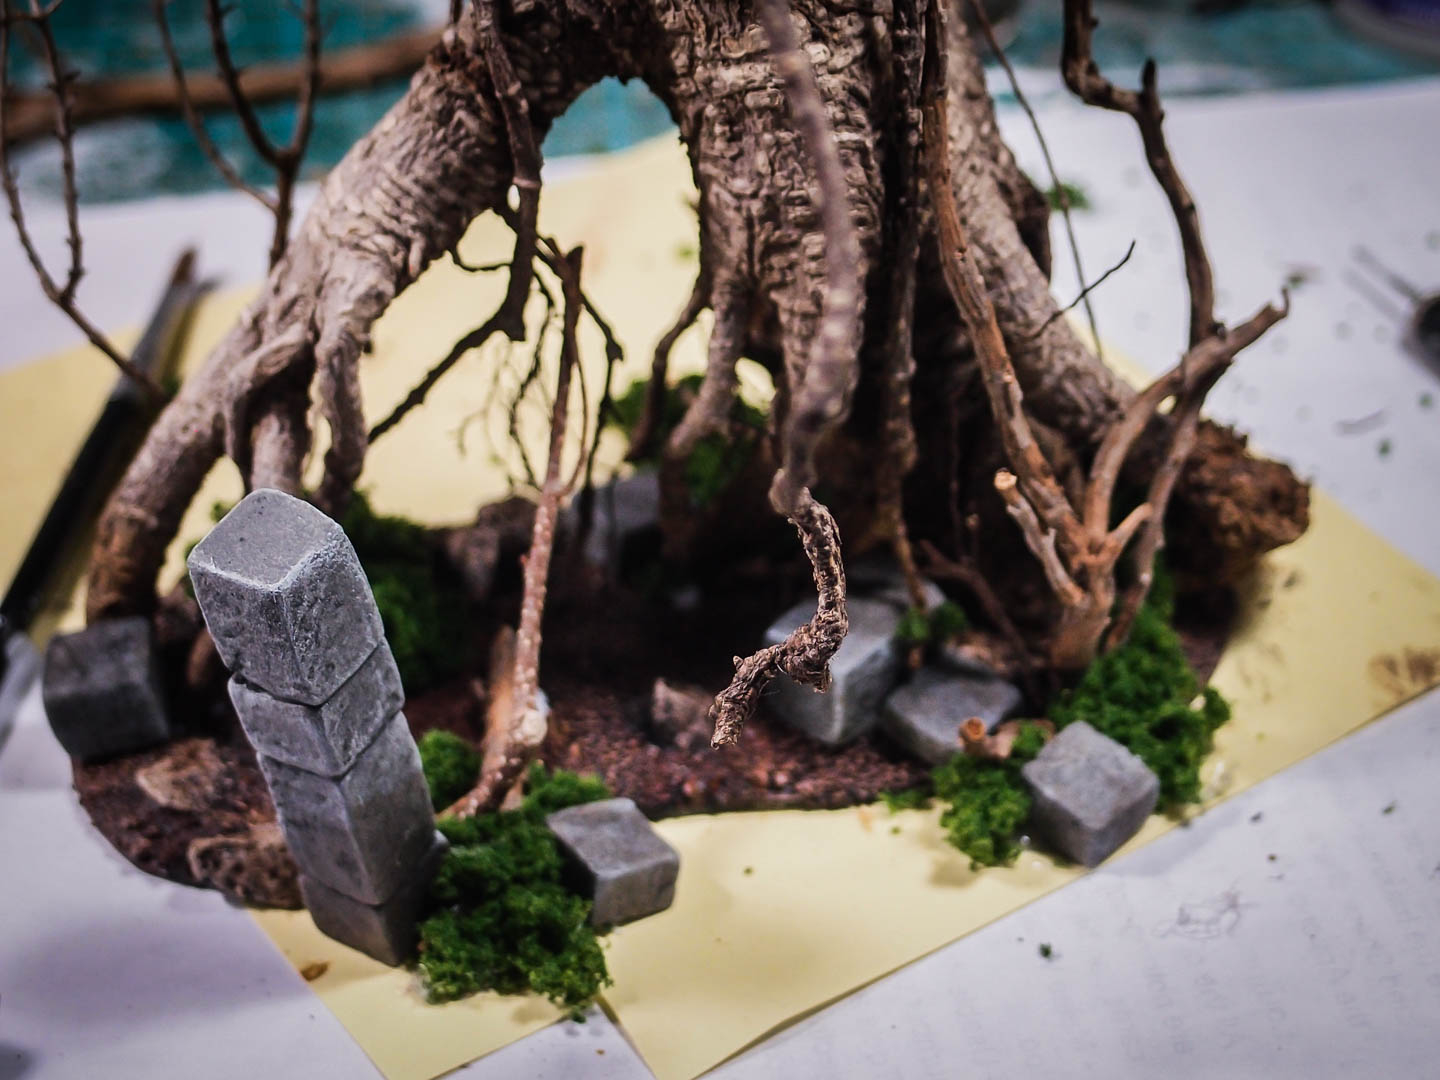
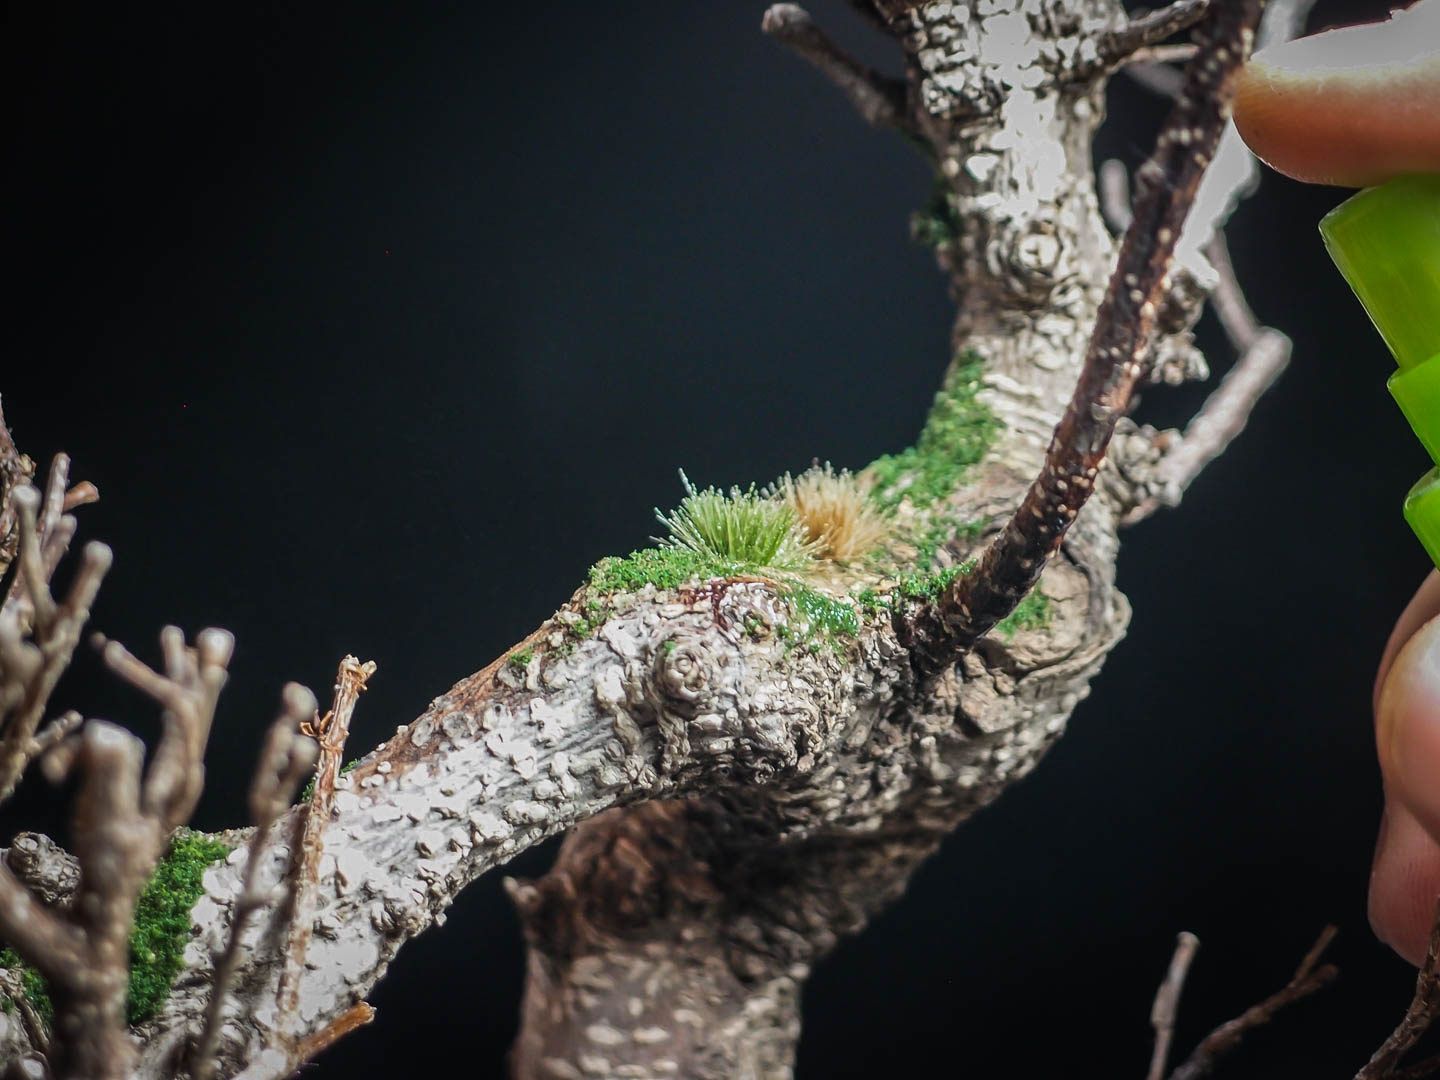
With diluted PVA glue, i applied fine turf on most of the ground areas. The same for the trunk, which had to be covered in moss on some areas. Most of the quickly-painted groun was now hidden.
I then continued to incrementally add dead branches, totems and bushes around the perimeter of the plastic base. The yellow sheet below is from the back of an adhesive: that wax-coated paper is incredibly good at not-sticking with anything, including superglue. Funnily enough, since hot glue melts the wax when touching it, it kinda sticks a bit. Still the best option to prevent your base to become one with your working area.
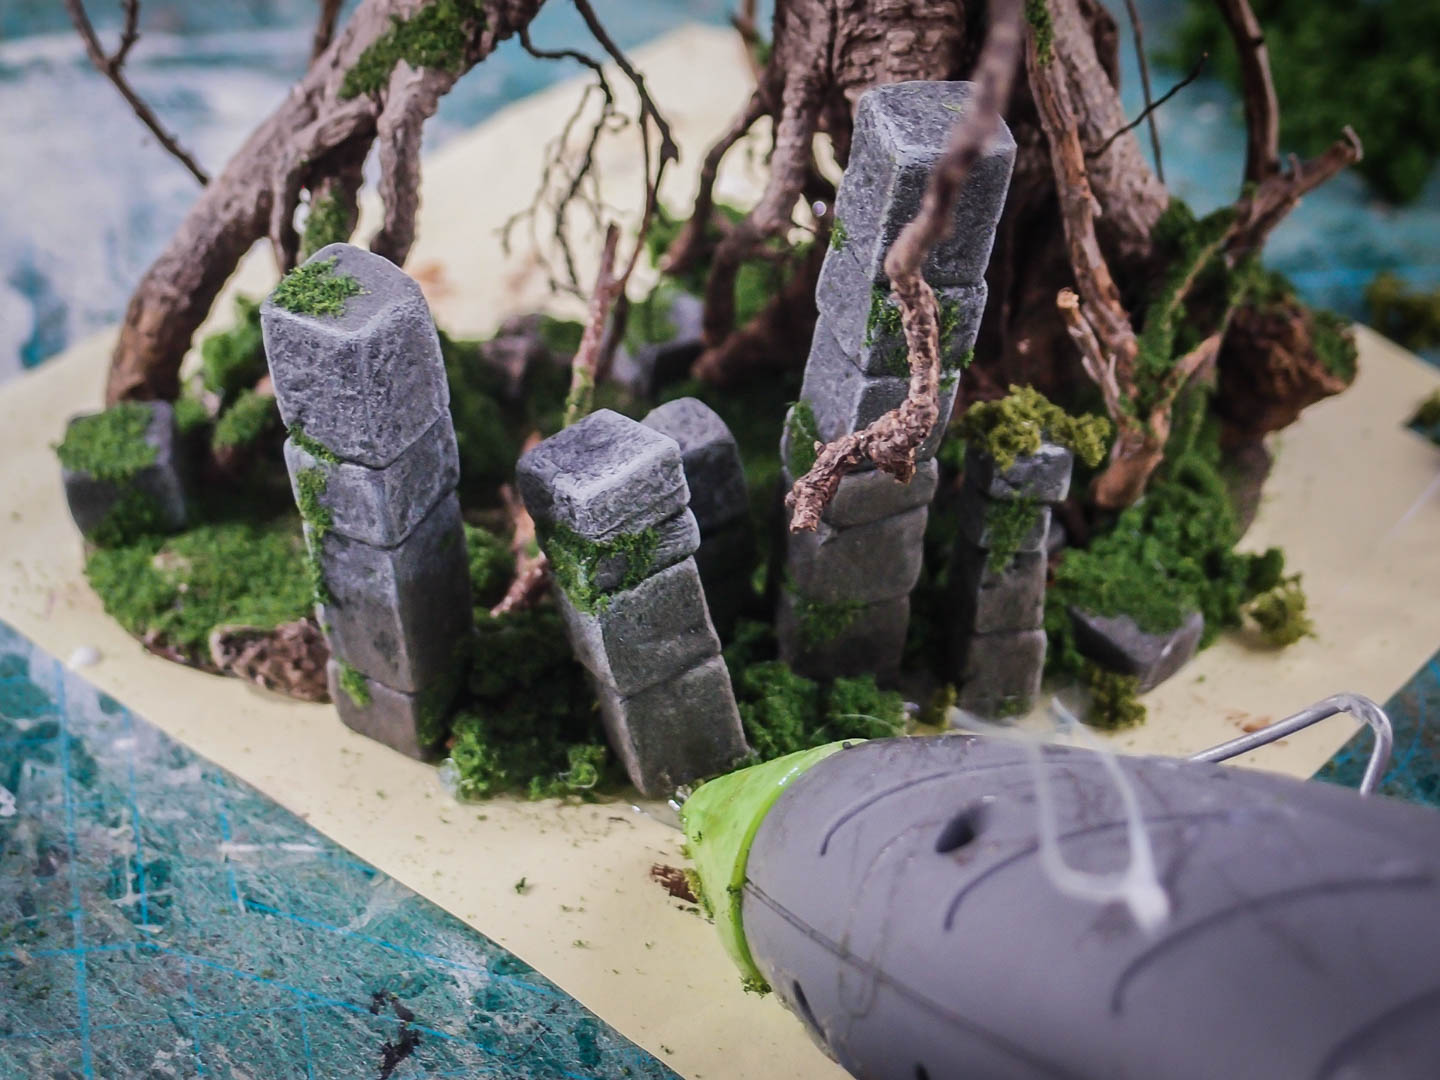
Eventually all the totems were in position. In the blobs of molten glue i pushed some more smaller dead trees and other scraps of roots and bushes.
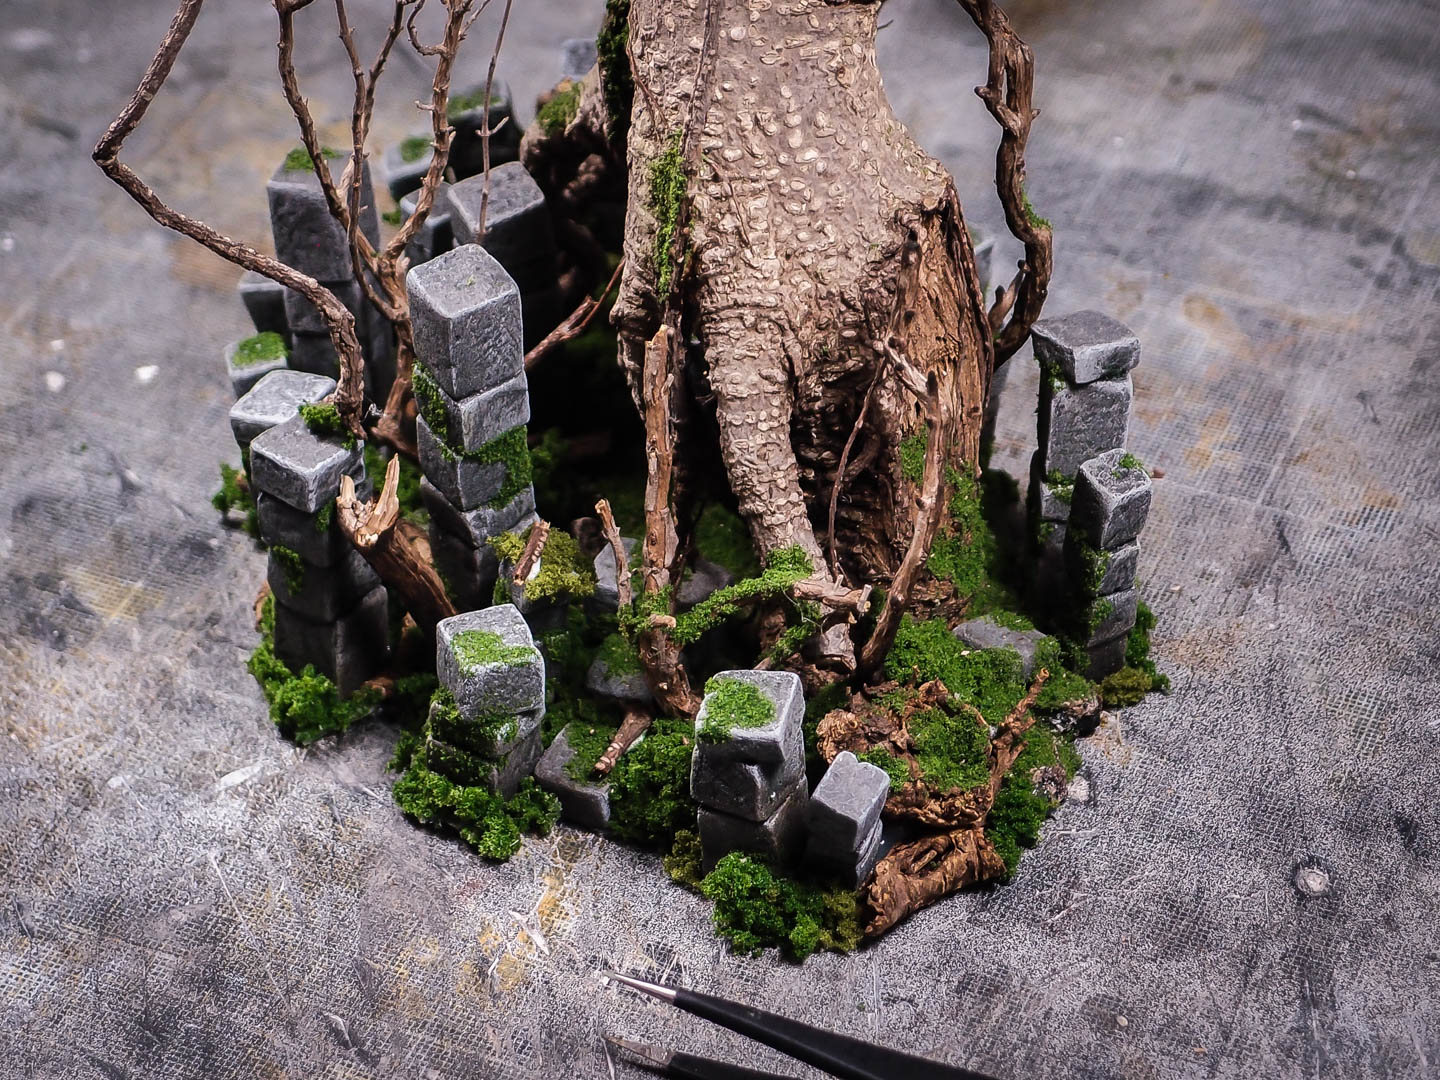
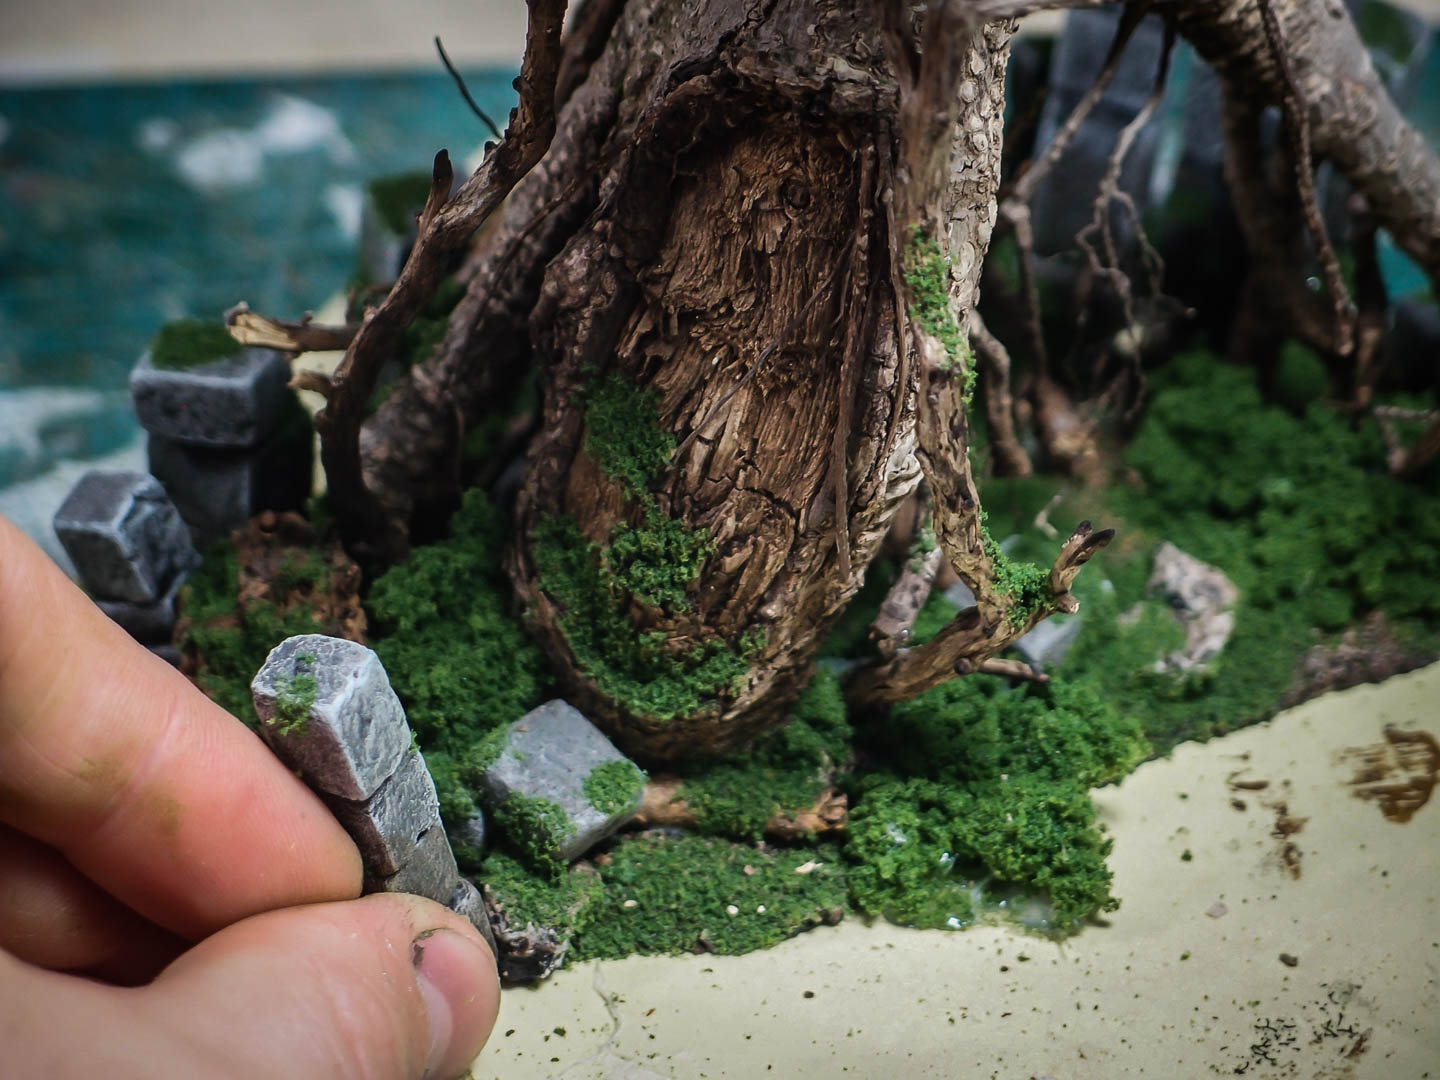
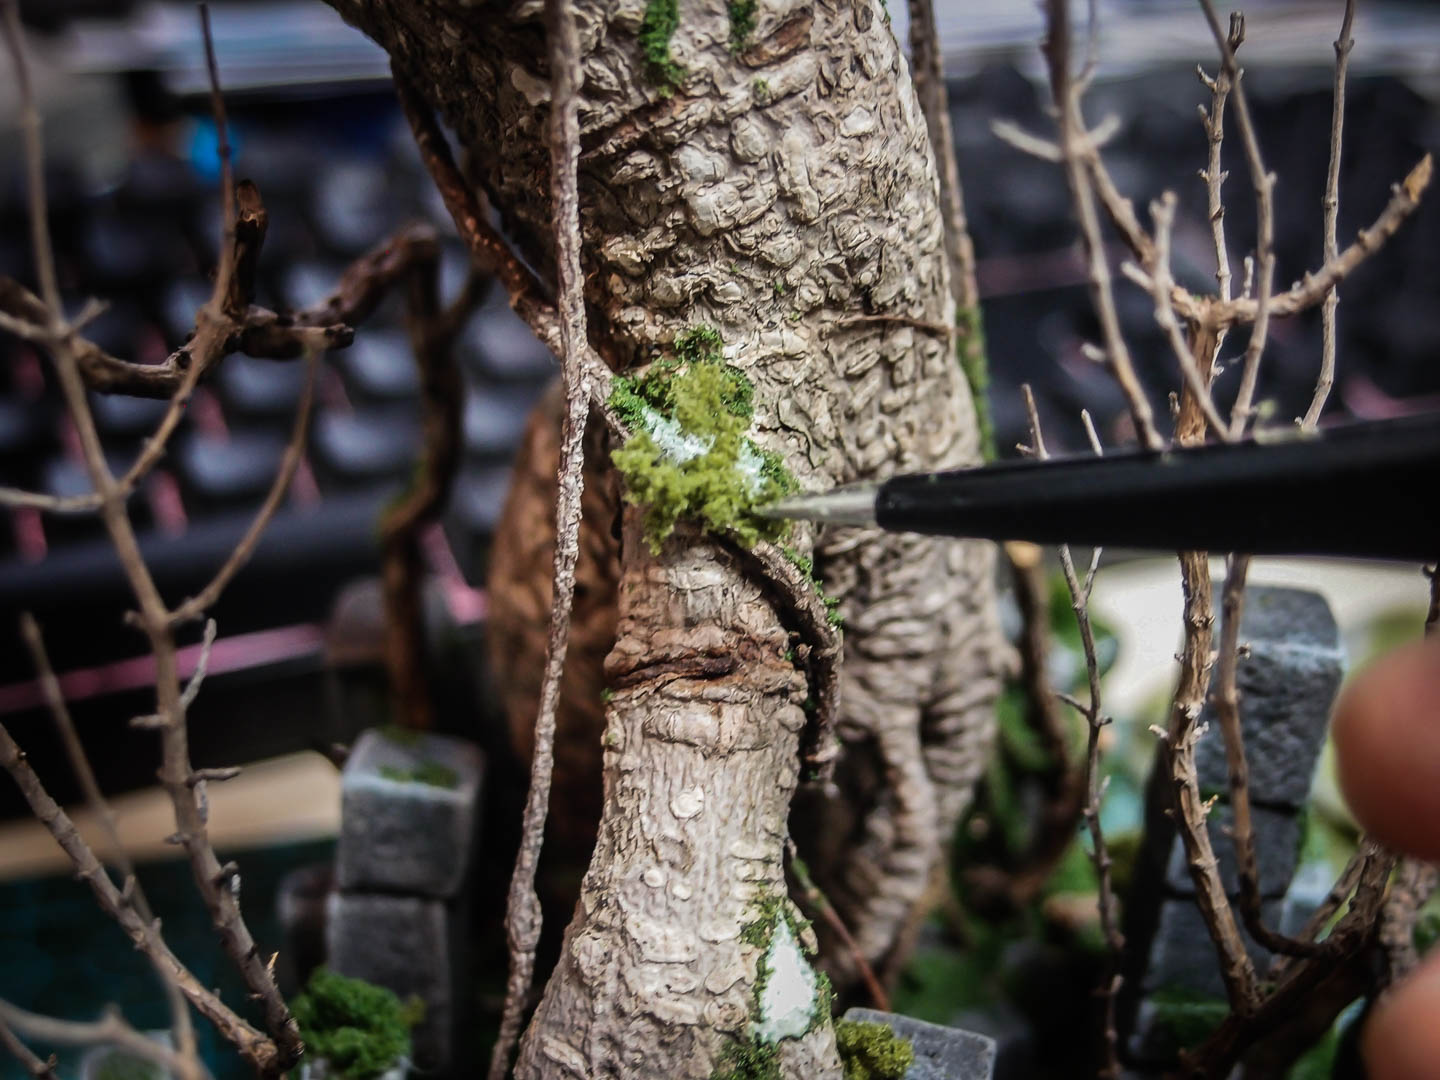
The vines on the tree were looking great, but needed some support. By adding moss in the areas where they touch the main trunk the glue fix them in position making them less dangerously fragile.
Eventually, some diluted pva glue was sprayed on everything. In particular, the foliage clumps used as brushes were barely touching the hot glue. Being soaked in pva glue made them slightly sturdier.
As you can see, the base now is about twice as large as the original one. The hot glue is elastic and helps with the balance.

And that’s it. The finished tree is ready for gaming!
Cheers,
The Lazy One