Where is Greg? Step by Step
- Tutorial Type Dioramas
Cheers Everyone!
Today’s step by step tutorial will cover something slightly different than usual for me: a large 54mm diorama, for Peter Muller from NextStep Painting.
I approached him for a joint collaboration to explore this new field, and he enthusiastly agreed, suggesting a two-levels scene, with a bit of contrast between the two. The scene is going to be with post-apocalyptic figures, with several characters in a search for a missing friend.
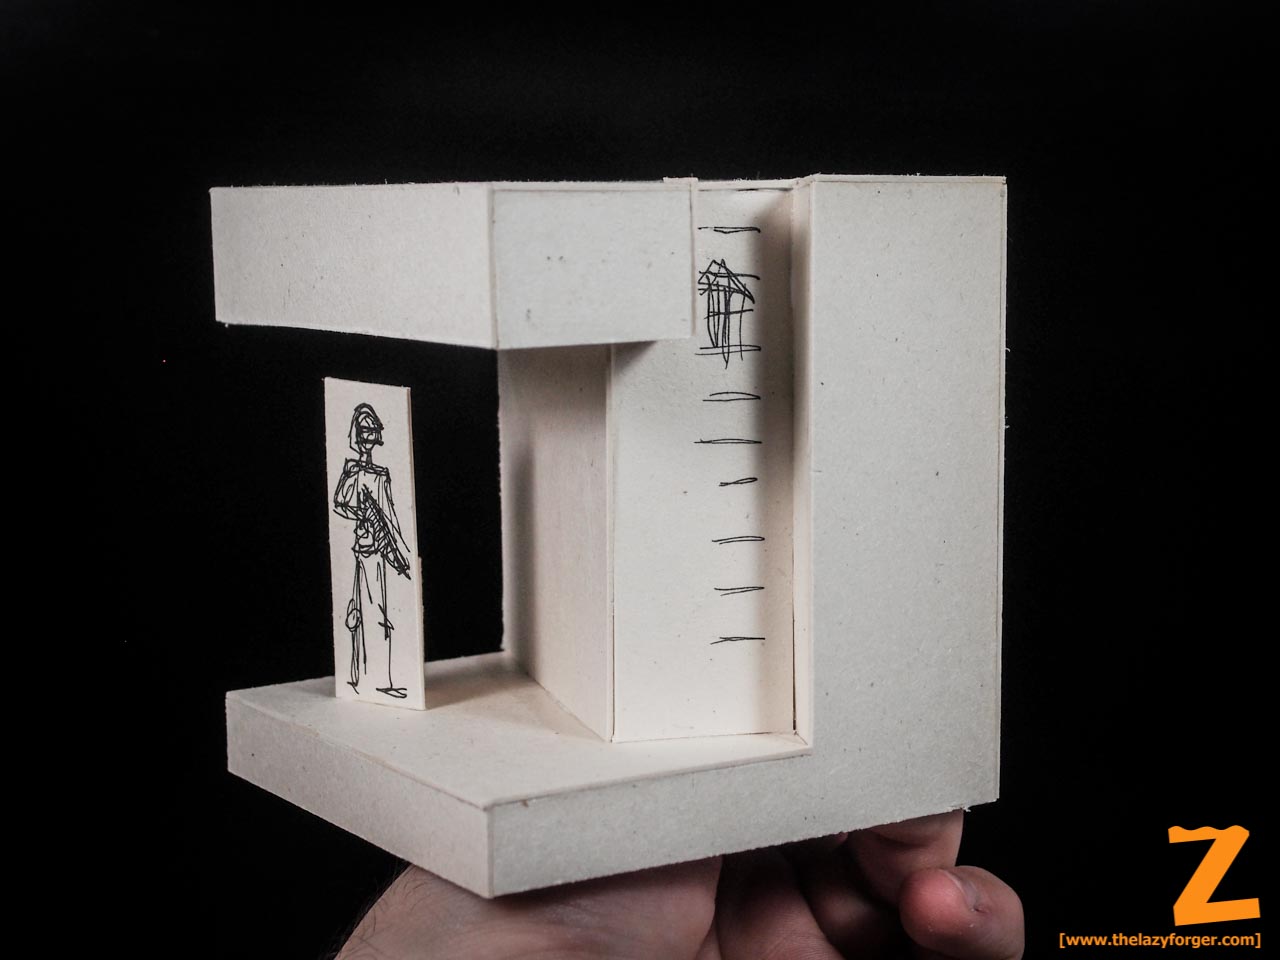
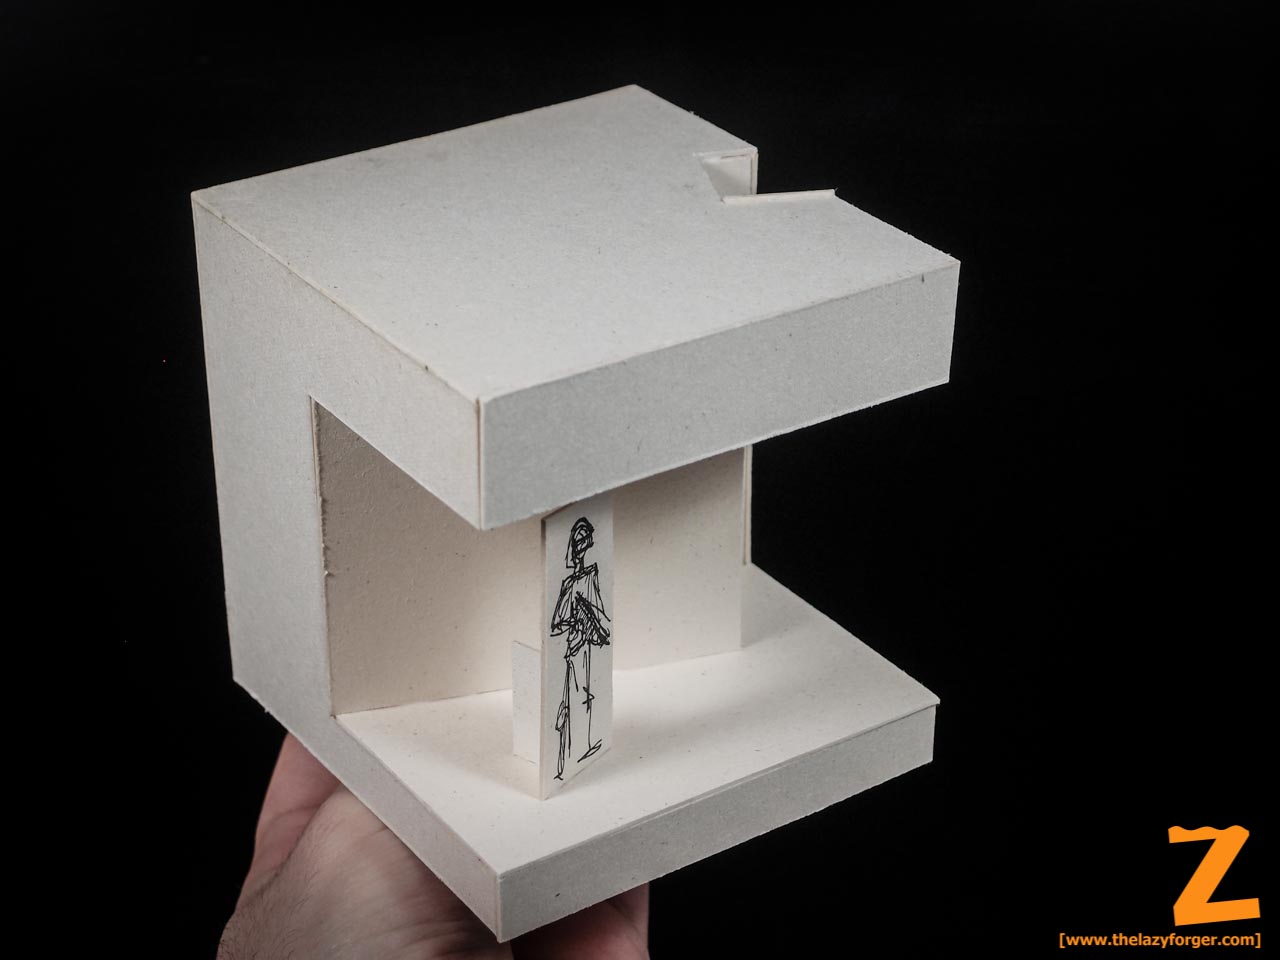
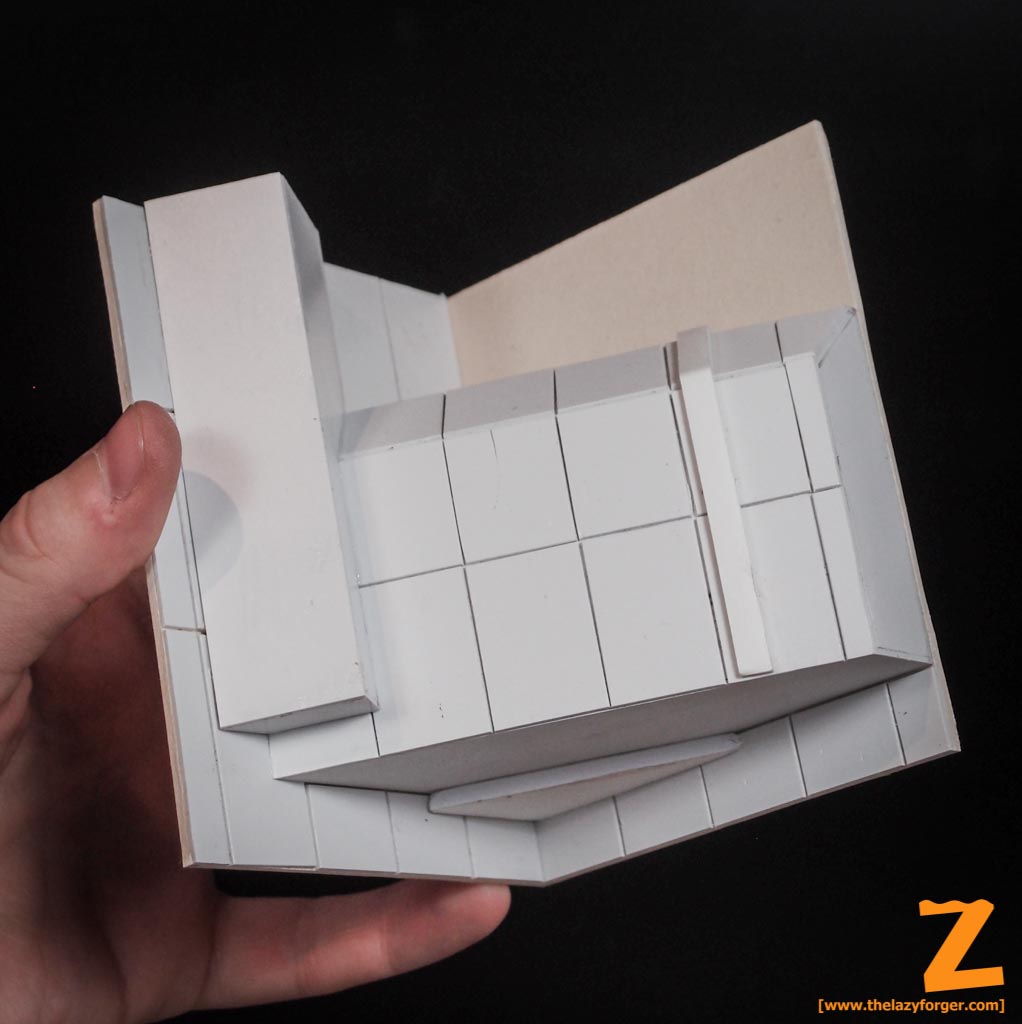
The first volume study was done in cardboard – even before preparing a 3D sketch – to grasp the feel of the model in this novel scale for me.
As a material, I decided to go for something I’ve been experimenting since a while, which is form-cast concrete. The different scale required larger panels for the form, but I sticked with the same extruded pvc for them. In terms of construction flow, I first started to build the concrete bulk, planning to add layers of rubble and ground above.
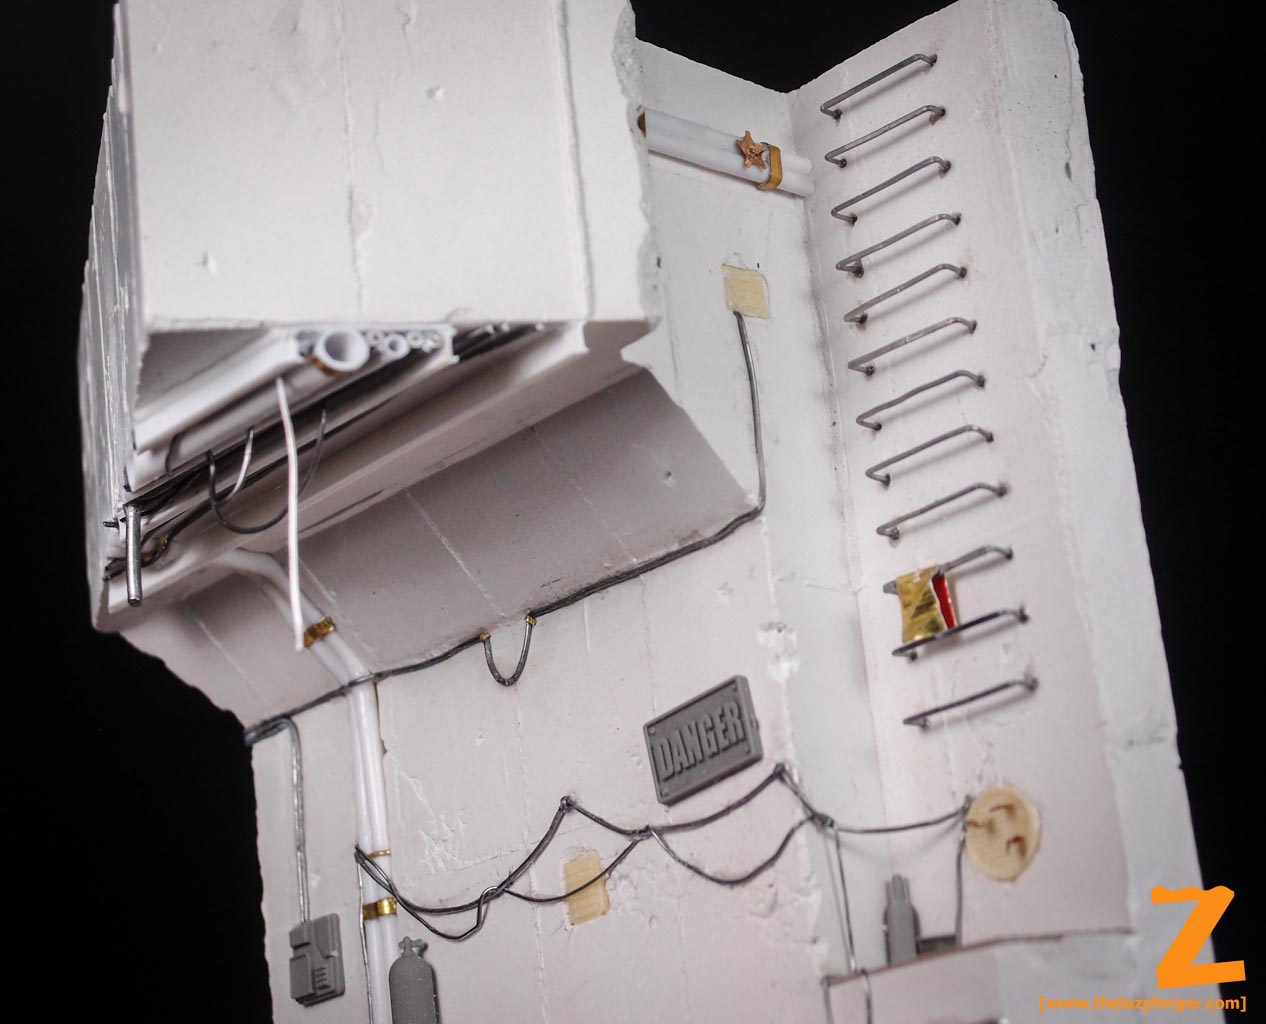
With this in mind, the shape had to follow straight lines, but I still was after a complex geometry. First of all I gave the lower tunnel a beveled roof edge, and a section-cut hatch and ladder tunnel on a side was required to connect the two environments. Moreover, I wanted to use uneven angles to give a bit of dynamism and more importantly to differentiate the two scenes: there is no reason why an underground tunnel should follow the general directions of the buildings above, and as a result the hatch was going to intersect the upper structures with a non-right angle.
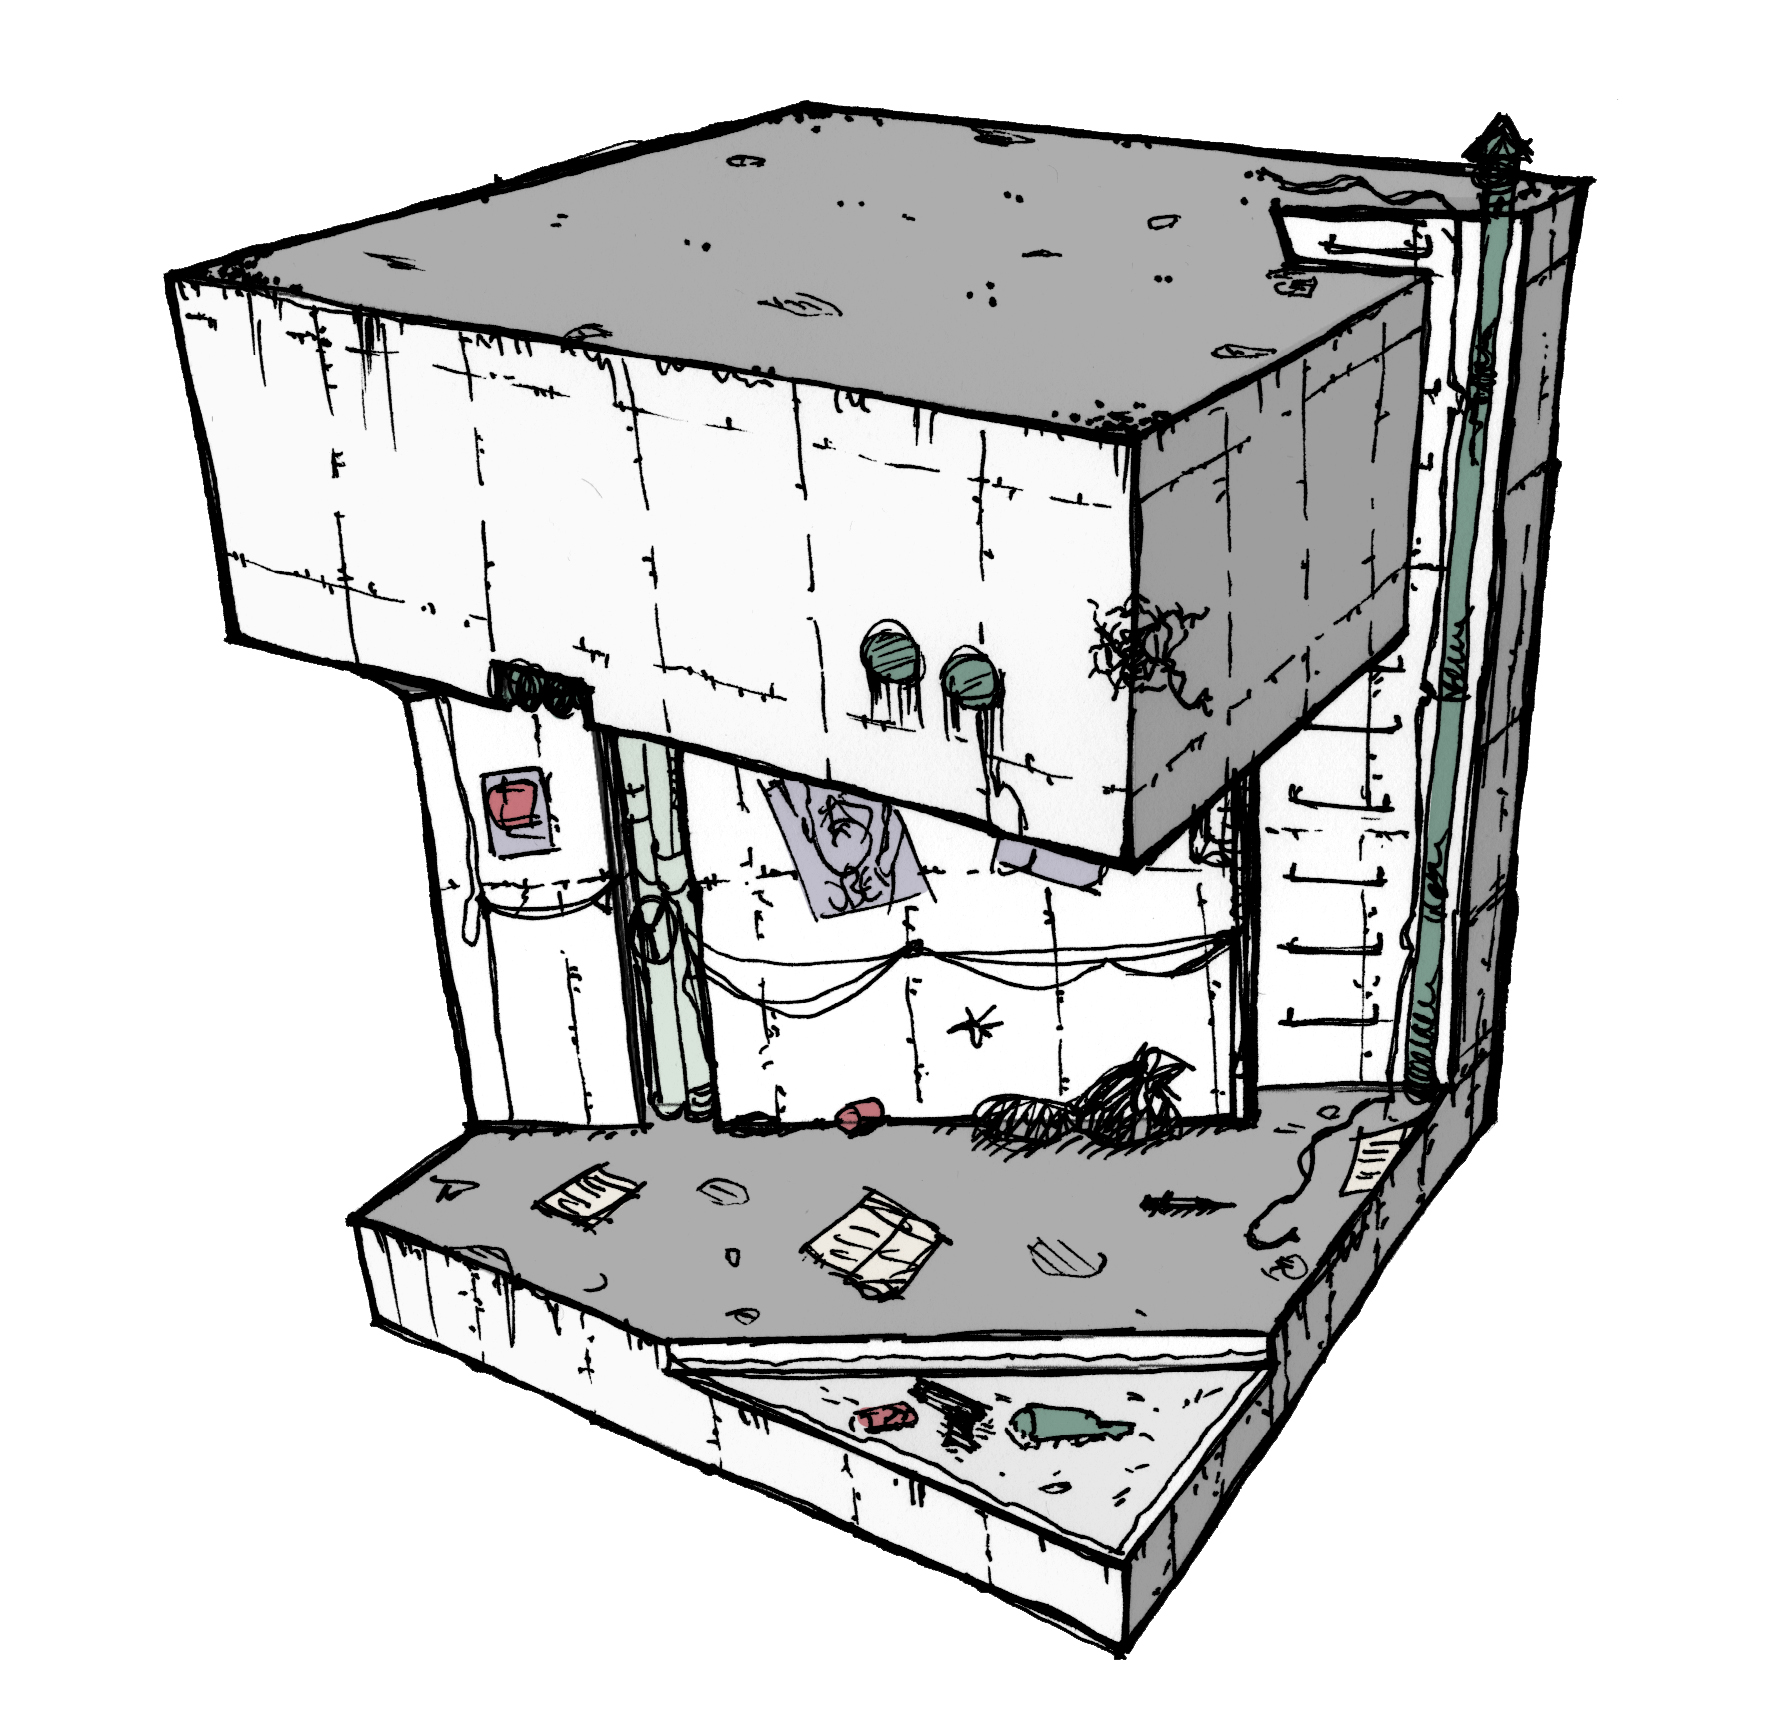
The 3D sketch was rather straightforward, and over it I hand-drew a quick illustration.

This drawing was meant both as a personal exercise, but also as a mean to test and balance the density of elements and the atmosphere of the scene.
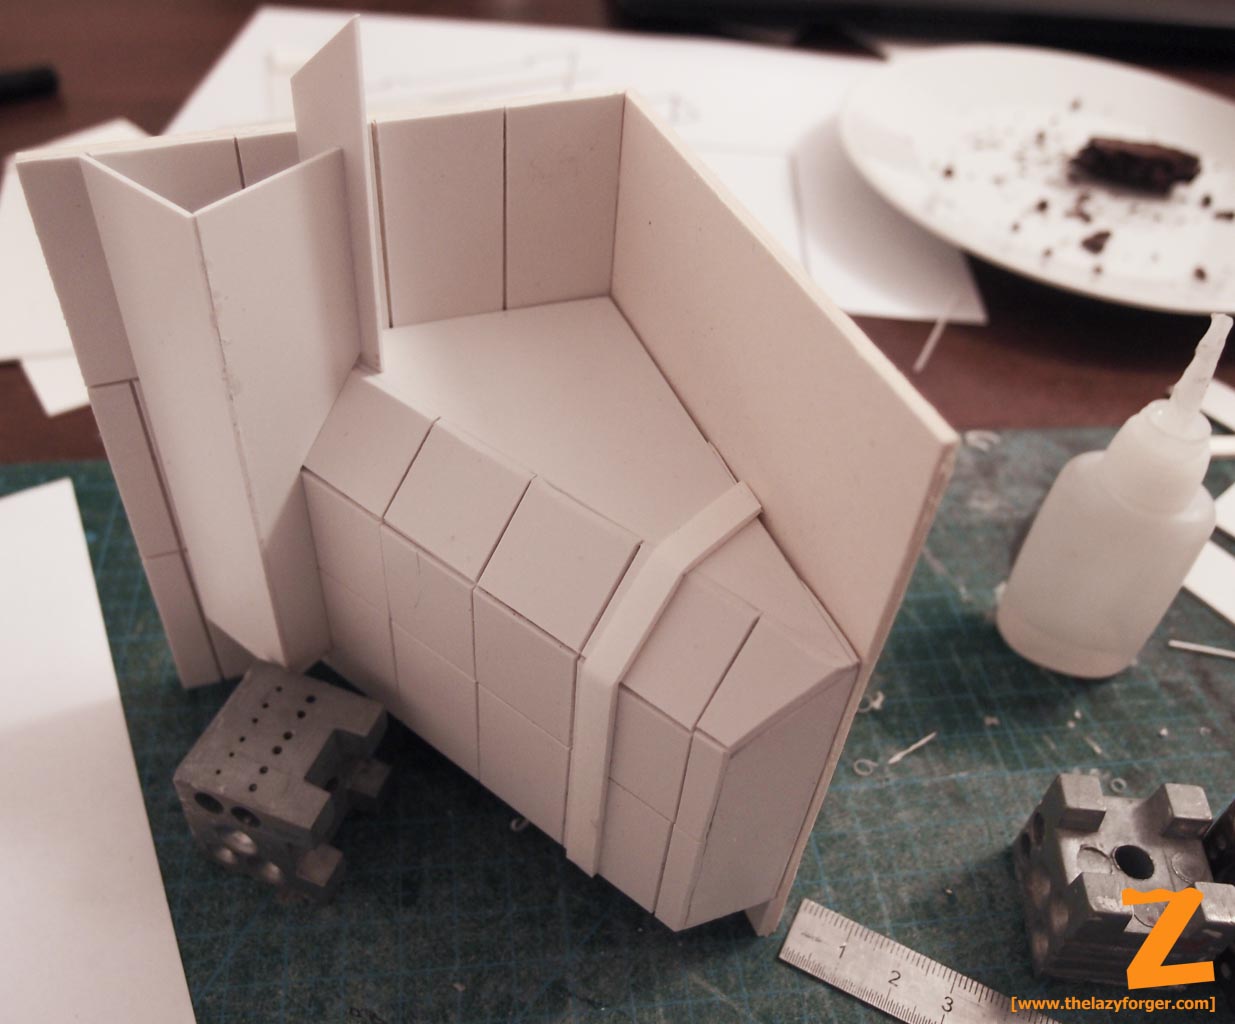
With a bit of reverse-thinking, I started building the form. The outside walls were rather straightfolder – it’s a cube, afterall – but the inside pieces needed to be built as the negative of the desired geometry. All the parts that were expected to be left with raw concrete got covered with the form panels, while the pavements were left flat. The tiled embossed styrene sheets were going to cover it anyways.
The parts were then glued together with simple PVA glue, and made watertight with an additional layer of glue before pouring a bit more than a kilogram of hard plaster in it. The type of plaster used for this kind of applications is vital, and depending on the desired surface texture, level of weathering and damage, bubbles (which are a real thing in formed concrete too!) and weight, the choice might vary.
In retrospect, I might have used a more slow-curing plaster for this application, since some sacks of air were left among the several layers of poured plaster.

Once cured, I carefully removed the outer faces: the inside of the form was mainly made of plastic, and in order to let it dry it needed some exposition with air. On the other hand, wet plaster tends to be far more brittle, which was something nobody needs at this stage.


The resulting piece held a strong resemblance with the model drawn before, which is a good thing. From there, I started with carving cracks and dents, in order to weather the model enough.
Moreover, as I never liked the “black flat” effect on the outside walls of dioramas, I wanted to go for something clearly unrealistic and texture them as if they were exposed to the outside, too. This is clearly nothing more than an abstraction, but the resulting effect seemed to better blend with the rest of the painted areas, without breaking the composition entirely.

As said above, the floors were covered with embossed styrene, and a fine blend of sands. The solution was somehow cheap compared to the rest of the materials, but i added a bit of character to it by cutting out a tile every here and there. From my big bag of scatter elements, I took a few pieces generic enough to look good in 54mm, plus some quickly sculpted sheets of paper and smaller scatter rubble. 
On the wall, soldering wires and other resin elements gave enough details to fill every spot.
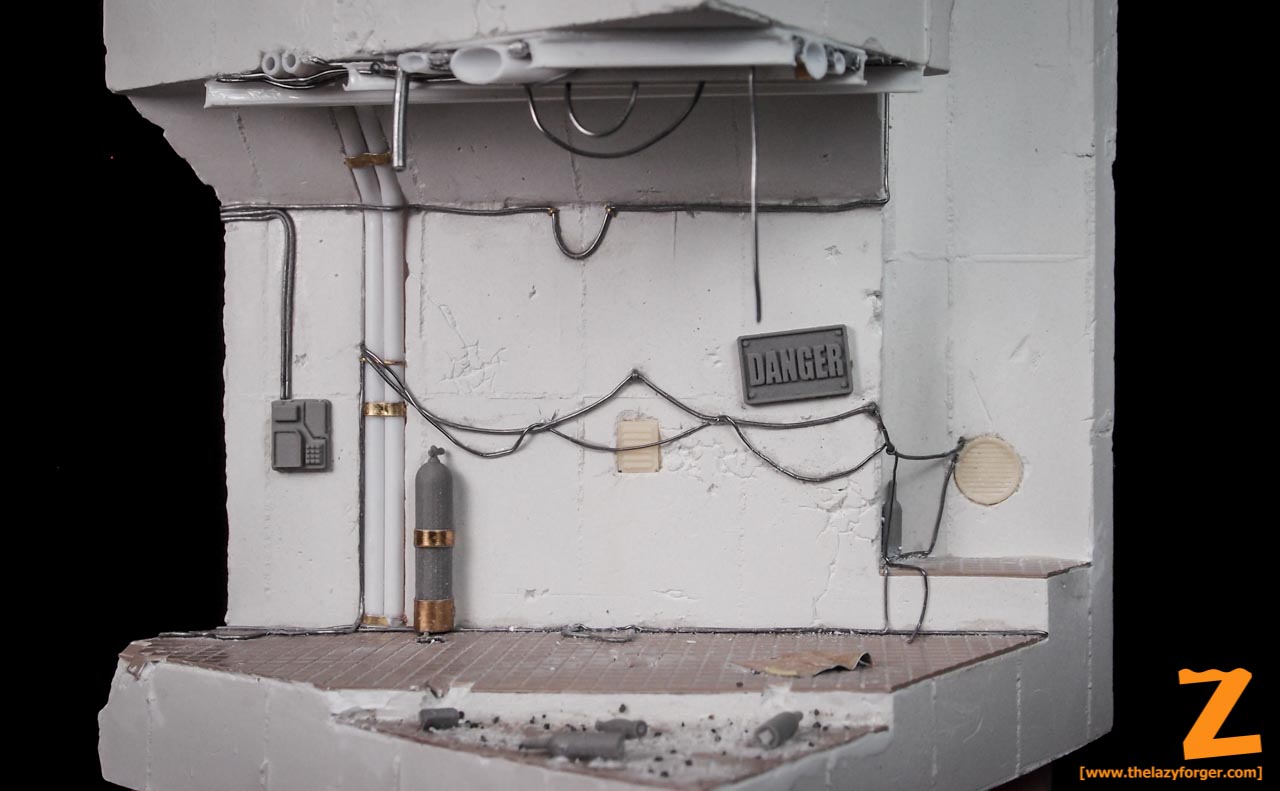
On the roof, a large number of tubes running along the corridor. There again, I left the ends of the tubes open, and I can’t wait to see what Peter will do with them!
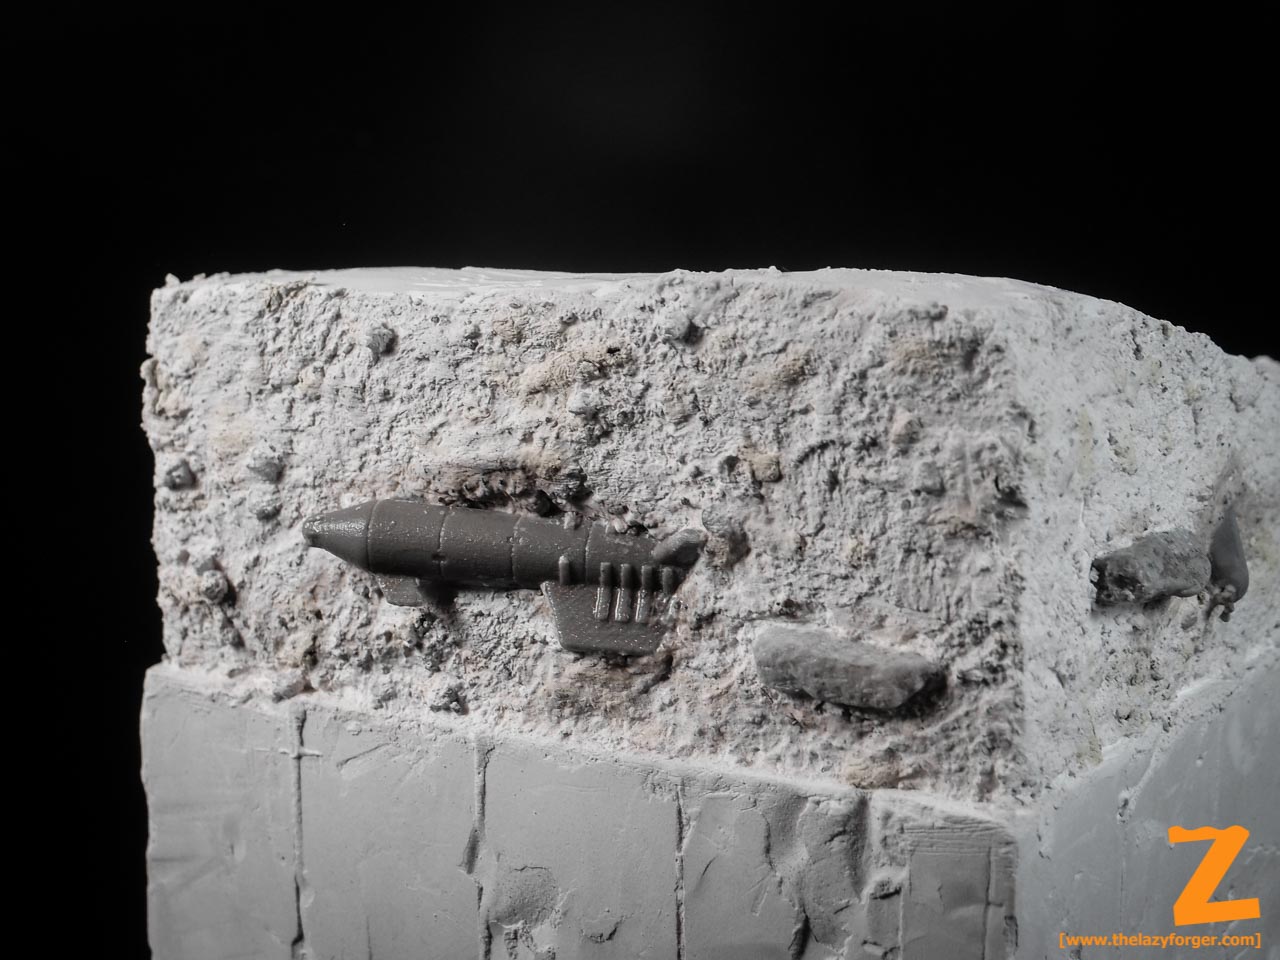
The upper level of the diorama took me a long time to complete, as I had in mind something but with no idea on how to accomplish it. As for the concrete external faces, I wanted to keep with the unrealistic yet expressive detailed external faces, but a cut portion of ground isn’t really something remarkable. Initially, I wanted to achieve a “stratified” effect, with prevalent horizontal lines in the ground texture. When I miserably failed in doing so in my experiment, I moved to something slightly more cartoonish, but more convincing: rocks and buried artifacts popping from the four sides of the cut ground section.
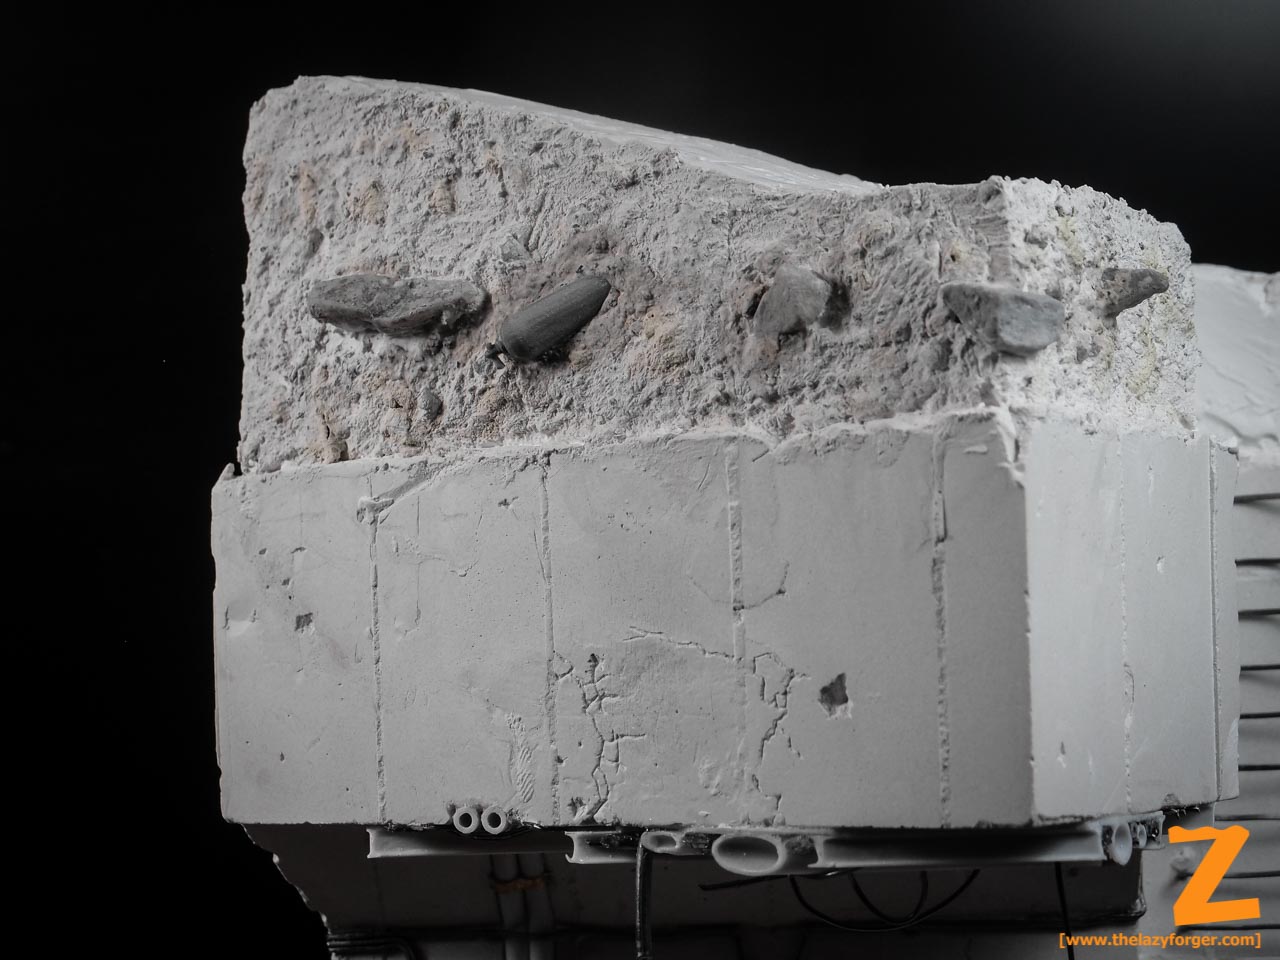
Again, here I used elements from my rubble pile, such as miscasts that can afford to be exposed only by half.
The upper level was kept as simple as possible, to not overcrowd the scene with more concrete structures. I took an old mold of a concrete column, and adding a wire mesh inside before pouring the plaster I obtained a crashable column.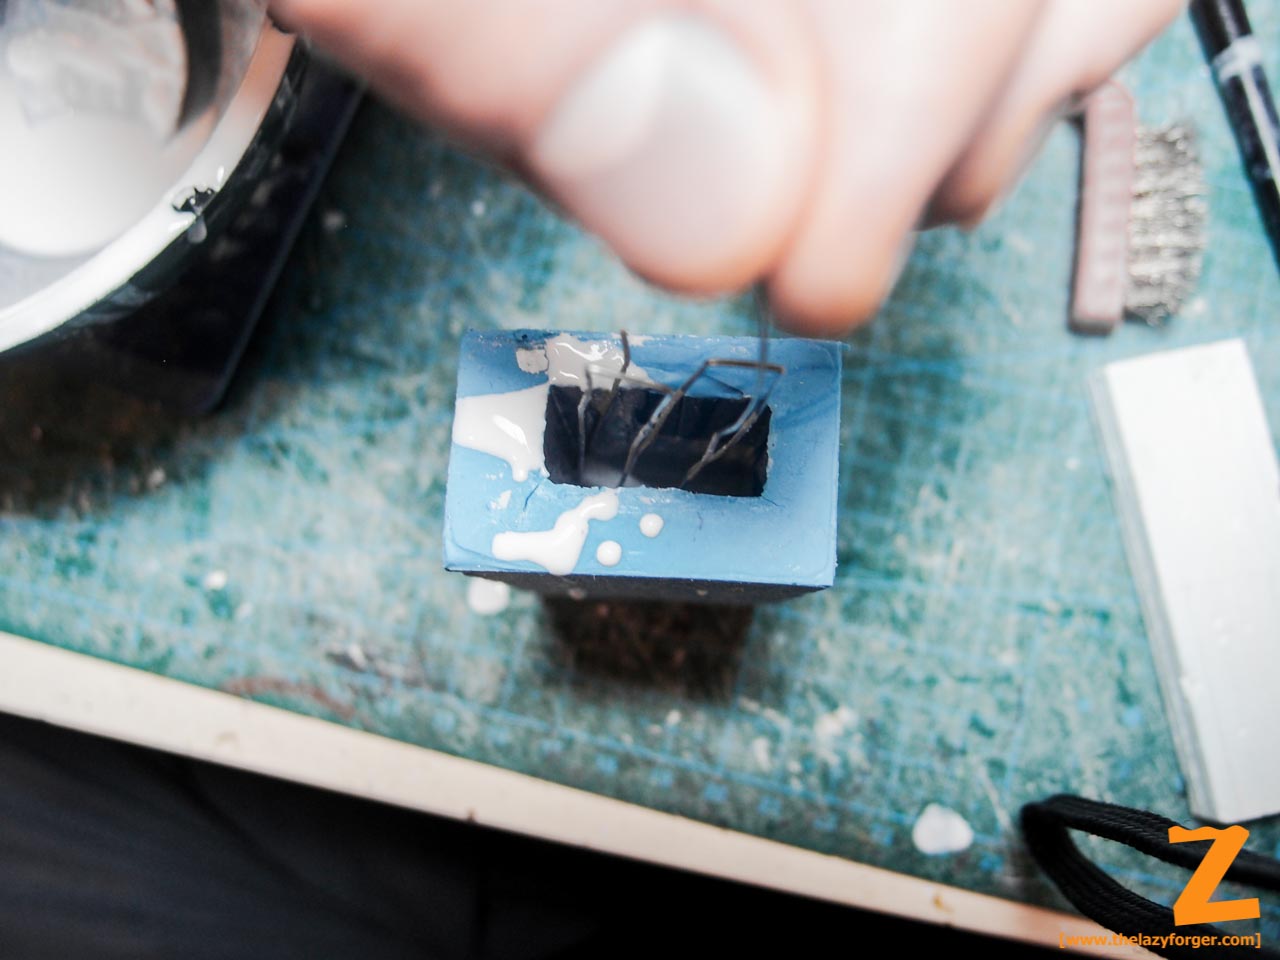

Once properly damaged, a few drops of glue helped to restore its solidity.
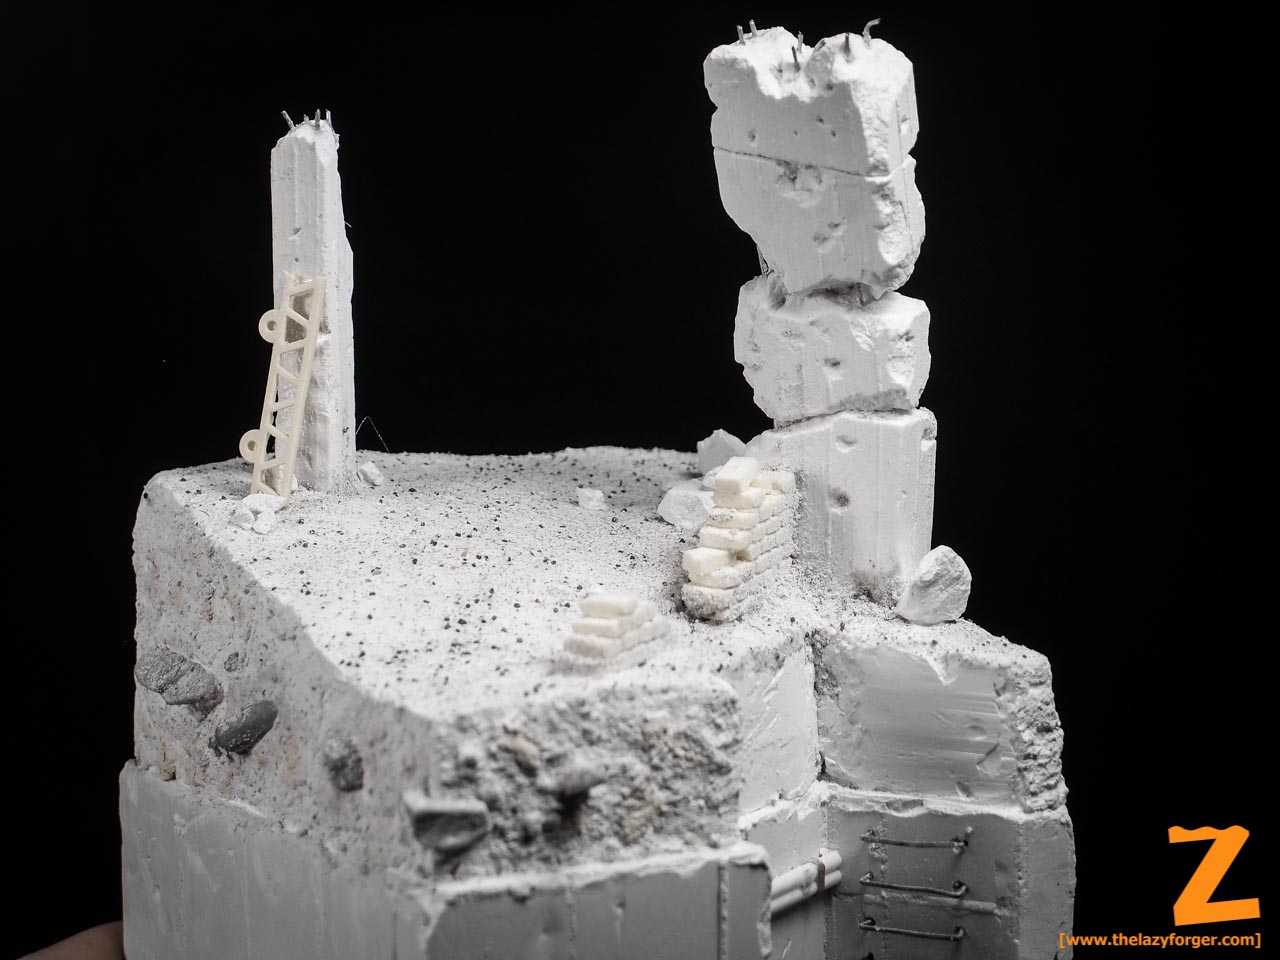
With a few elements added here and there, including an Eulithe brick wall, the diorama can be considered done!

Now it’s all in the hands of Peter Muller, and hopefully we’ll see the first results soon!
Cheers,
Jack
Great work and lovely breakdown.
Thank you Adam! 🙂